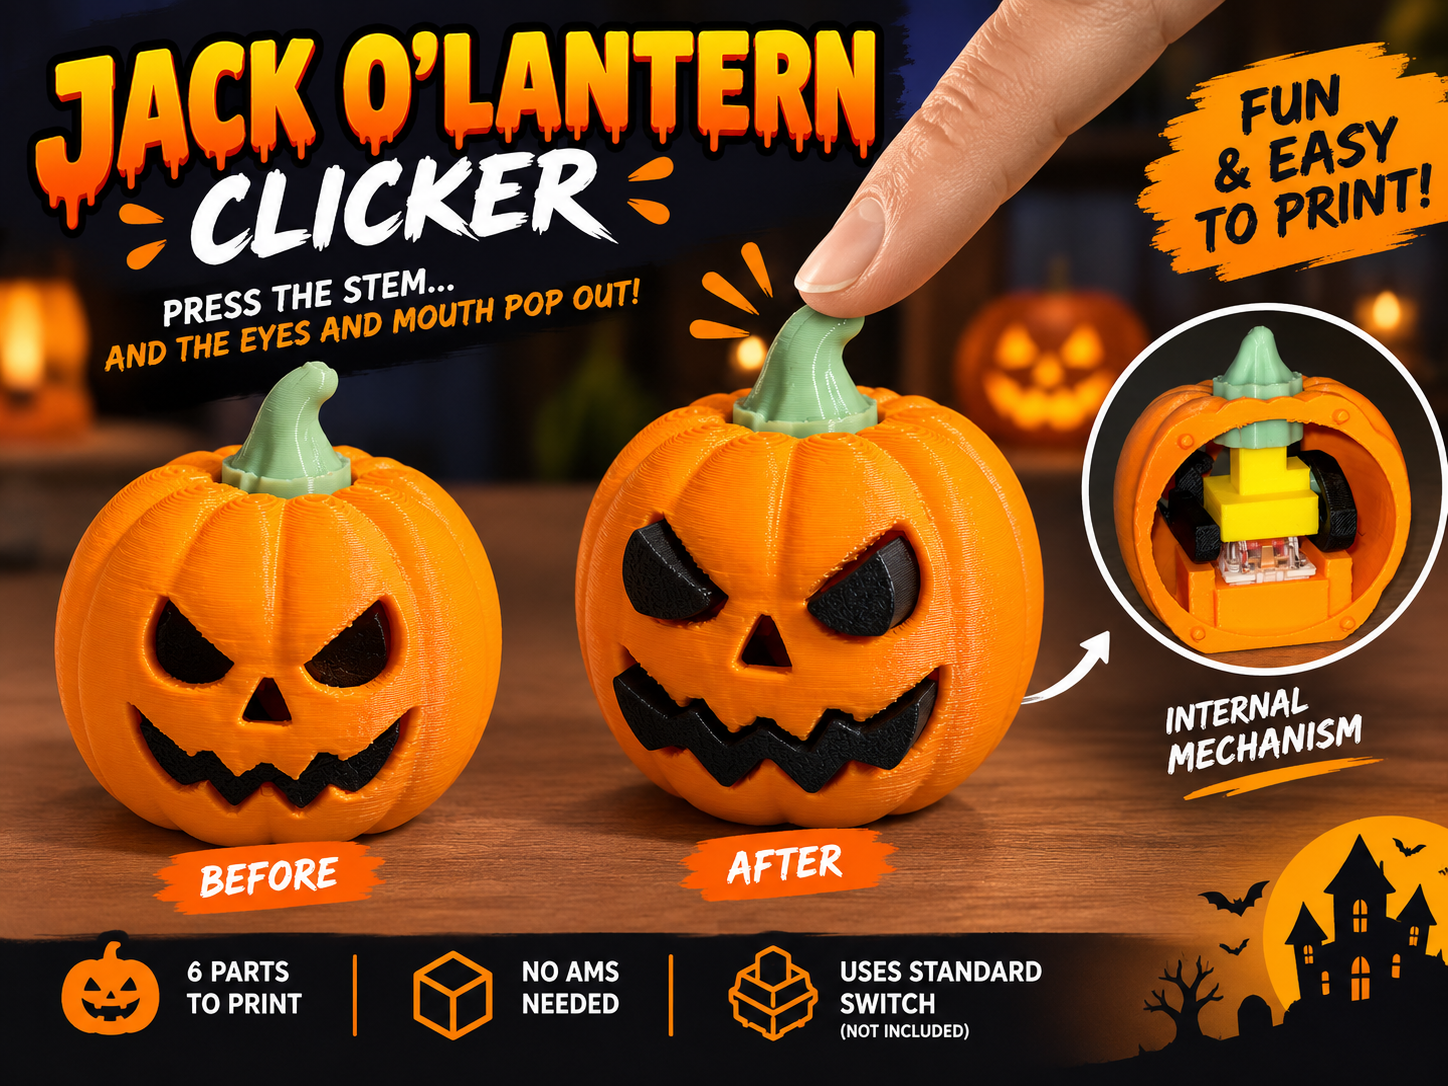
🎃 Jack O’Lantern Clicker – Halloween Pumpkin Clicker This Jack O’Lantern Clicker is a fun mechanical 3D-printable toy: press the pumpkin stem/button and Jack’s eyes and mouth pop out from the face! Release the button and the mechanism returns to its original position, ready for another satisfying click, You won't be able to stop. The project was designed as a compact and easy mechanical system that combines a keyboard switch with a custom 3D-printed mechanism. Please follow the assembly instruction provided below in this description 👻 How it works The pumpkin stem acts as the push button . When you press it down, the vertical shaft moves the cylindrical cam, which drives the internal eye-and-mouth mechanism. The result is a fun and surprising movement: PRESS THE STEM → EYES & MOUTH POP OUT! 🎃💀 ⚙️ What is included in the 3d project The project includes all the 3D-printed parts required to create the mechanical movement , with the only exception being the keyboard switch, which must be purchased separately. The pumpkin is split vertically into two sections specifically to make assembly of the internal mechanism possible: Front Pumpkin: approximately 3/4 of the pumpkin and contains the complete mechanical system. Rear Pumpkin: approximately 1/4 of the pumpkin and acts as the rear cover. The complete project consists of 6 separately printable parts : Front Pumpkin Rear Pumpkin Stem Button Vertical Shaft with Switch Mount Eye & Mouth Movement Assembly Cylindrical Cam A standard keyboard mechanical switch is also required and must be purchased separately. 🖨️ Two Printing Versions Included The project is provided in two different versions , so you can choose the printing method that best suits your setup. 🔸 Version WITHOUT AMS This version does not require an AMS . The components are separated across three different plates according to their colors: Orange, Black and Green, allowing you to print each color separately and assemble the finished pumpkin afterward. This is ideal if you have a single-nozzle printer without an AMS. There is also a NO AMS A1-mini dedicated project 🔸 Version WITH AMS – Print by Object The AMS version is configured for Object-by-Object printing (to minimaze waste) . All the components are placed on the same plate , but they are printed sequentially rather than changing filament color at every layer. This approach helps minimize filament waste and avoids unnecessary color changes on every layer, making the multicolor print much more efficient. 🔧 Assembly Instructions (very easy and detailed) 1. Prepare the printed parts Remove all the printed parts from their printing supports and make sure the moving surfaces and holes are free of any residual material. 2. Install the Eye & Mouth Movement Assembly Insert the Eye & Mouth Movement Assembly into the Front Pumpkin . Position it correctly so that the eye and mouth elements are aligned with their corresponding openings in the front of the pumpkin. 3. Assemble the cylindrical cam and switch shaft Insert the Cylindrical Cam into the corresponding hole in the Vertical Shaft with Switch Mount . Then install the keyboard switch into the lower part of the shaft assembly. At this stage, insert the complete shaft + cam + switch assembly into the Front Pumpkin , but do not yet lock the switch into its lower mounting position as is shown here → 4. Engage the cam with the movement mechanism With the shaft assembly inside the pumpkin, insert the Cylindrical Cam into the elliptical opening of the Eye & Mouth Movement Assembly as is shown here → This connection is what converts the vertical movement of the stem into the movement that pushes the eyes and mouth outward 5. Secure the switch Press the lower part of the keyboard switch into its dedicated mounting slot in the bottom of the Front Pumpkin as is shown here → Make sure the switch is properly seated and that the mechanism can move freely. 6. Install the stem button Insert the Stem Button into the upper part of the Vertical Shaft . The stem now becomes the external button that you press to operate the mechanism. 7. Close the pumpkin Finally, complete the assembly by snapping the Rear Pumpkin onto the Front Pumpkin . As you will see, is very easy to assembly it. The rear section acts as the cover and encloses the complete mechanical system inside the pumpkin. Before fully closing the pumpkin, I recommend testing the mechanism several times to make sure that the eyes and mouth move freely and return correctly when the stem is released. 🎃 Why You'll Love It ✔️ Press the stem → eyes and mouth pop out! ✔️ Only the keyboard switch needs to be purchased separately ✔️ 6 printable parts designed for easy assembly ✔️ Removable rear cover for assembling the mechanism ✔️ Great Halloween decoration, desk toy or fidget clicker Print the parts, assemble the mechanism, press the stem and watch the eyes and mouth suddenly pop out of the pumpkin! Boost Me Boost me, you will help me to develop new project to be shared in the community
Jack o' Lantern Clicker
by Rinaldo F · original on MakerWorld ↗
♥ 21⬇ 18🖨 18 prints
Print profiles
Version NO AMS, 0.2mm layer
⏱ 2h 3m · 34 g · 3 material(s)
Prints on: X2D 0.4, H2S 0.4, X1 0.4, X1E 0.4, P2S 0.4, P1P 0.4, A1 0.4, H2D Pro 0.4, H2C 0.4, A2L 0.4, A1 mini 0.4, P1S 0.4, X1 Carbon 0.4, H2D 0.4PLAPLAPLA
Not in stock
A1 mini NO AMS Version
⏱ 2h 28m · 33 g · 3 material(s)
Prints on: A1 mini 0.4, X1E 0.4, P2S 0.4, H2C 0.4, H2D 0.4, A2L 0.4, X1 Carbon 0.4, X2D 0.4, H2D Pro 0.4, P1P 0.4, H2S 0.4, X1 0.4, P1S 0.4, A1 0.4PLAPLAPLA
Not in stock
Version with AMS and Print by Object
⏱ 2h 5m · 34 g · 3 material(s) · needs AMS
Prints on: X2D 0.4PLAPLAPLA
Not printable on our printers