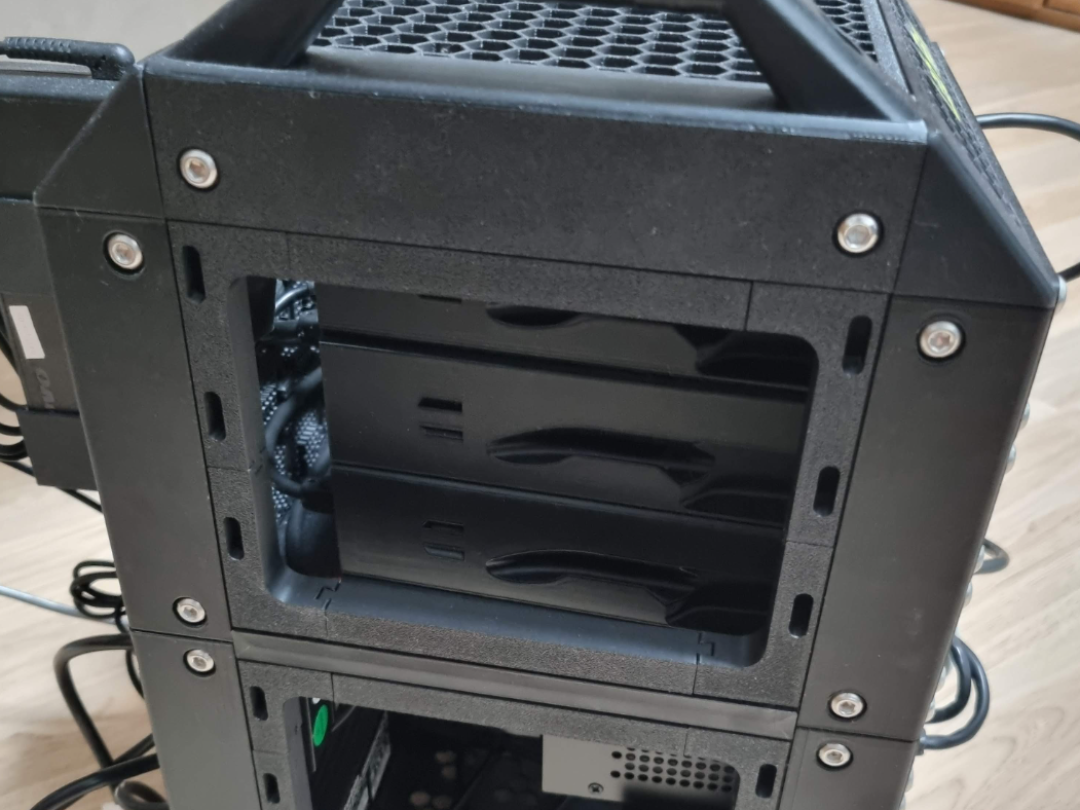
If you really like the LabRax rack design but are not particularly fond of its side panel implementation, meaning you do not want to disassemble the rack every time you need access to its internals, yet also do not want to leave it permanently open, then this frame may be a good option for you. The frame is composed of multiple parts. The key idea behind its design is to allow installation on an already assembled rack without requiring any disassembly. The frame is thin and adds only 12 mm to the rack frame. This should not be an issue in most cases, yet it provides enough space to incorporate Skadis mounting holes or magnets for mounting. In theory, the design could also be extended to support other mounting systems. If even the additional 12 mm becomes a problem and restricts access to the rack internals, the frame can be removed in less than a minute without the need for any tools. Important Note!!! I only tested this frame in the configuration of 5u EXPANSION Skadis and 3u EXPANSION Skadis. Use other configuration on your own risks. Make sure you split models which you get from customizer by objects. Make sure you ALWAYS use supports when printing. Skadis Panels Since it uses the standard EXPANSION panel dimensions (see this Post Joiner ) (alternatively STANDARD sizes via Customizer), you can attach any standard EXPANSION panels (or STANDARD if frame is created via Customazer as mode=STANDARD) to the frame. BUT, make sure that the mounting holes on the frame are aligned with those on the side panels, allowing them to be secured together. One example of compatible side panel is this Kumiko Side Panel . There are several other compatible options available, but be sure to verify panel dimensions and mounting hole spacing before use. I used a Twin Variation of My Own panels . Note that the Skadis sockets back side may not fit to your Skadis snap/mount, here is mine Skadis Cradle / Snap Back-To-Back I used for assembling above. I used 2 form factors for assembling, for now I published only one. If I'm able to publish the other, I'll update the description. BTW, the rack becomes much stiffener after adding this frame. Customizable Version Besides the 2 sizes I used myself (3u EXPANSION and 5u EXPANSION), I'm publishing a customizable option so that you can fine tune it for your needs, but be cautious with sizes, especially with where splits land, they may make certain mount sockets unusable. Also, if you need a custom frame for a custom rack depths, calculate the size and re-verify it after the export. I only tested it for my two scenarios i.e. EXPANSION panels for standard rack depth and 3u and 5u height. Those two print files attached. Same configuration for magnets attached as well, but it was not tested.
LabRax side frame EXPANSION/STD (Customizable)
by 0xcfff · original on MakerWorld ↗
♥ 8⬇ 6🖨 1 prints
Print profiles
0.2mm layer, 2 walls, 15% infill - 3u EXPANSION
⏱ 2h 3m · 53 g · 1 material(s)
Prints on: A1 0.4, H2D 0.4, H2C 0.4, P2S 0.4, H2S 0.4, X1E 0.4, X1 Carbon 0.4, P1P 0.4, X2D 0.4, X1 0.4, H2D Pro 0.4, A2L 0.4, P1S 0.4PLA
Not printable on our printers
0.2mm layer, 2 walls, 15% infill - 5u EXPANSION
⏱ 2h 42m · 71 g · 1 material(s)
Prints on: A1 0.4, P1S 0.4, X1 Carbon 0.4, X1 0.4, X2D 0.4, P2S 0.4, X1E 0.4, H2D 0.4, H2S 0.4, H2C 0.4, P1P 0.4, A2L 0.4, H2D Pro 0.4PLA
Not printable on our printers