If this design works well for you, and only if you want to support ZeeFilamentFund, you can send me a small donation, totally optional and only if you feel like it! Thanks https://ko-fi.com/zeeflyboy Many thanks to those of you who have kindly donated - much appreciated.
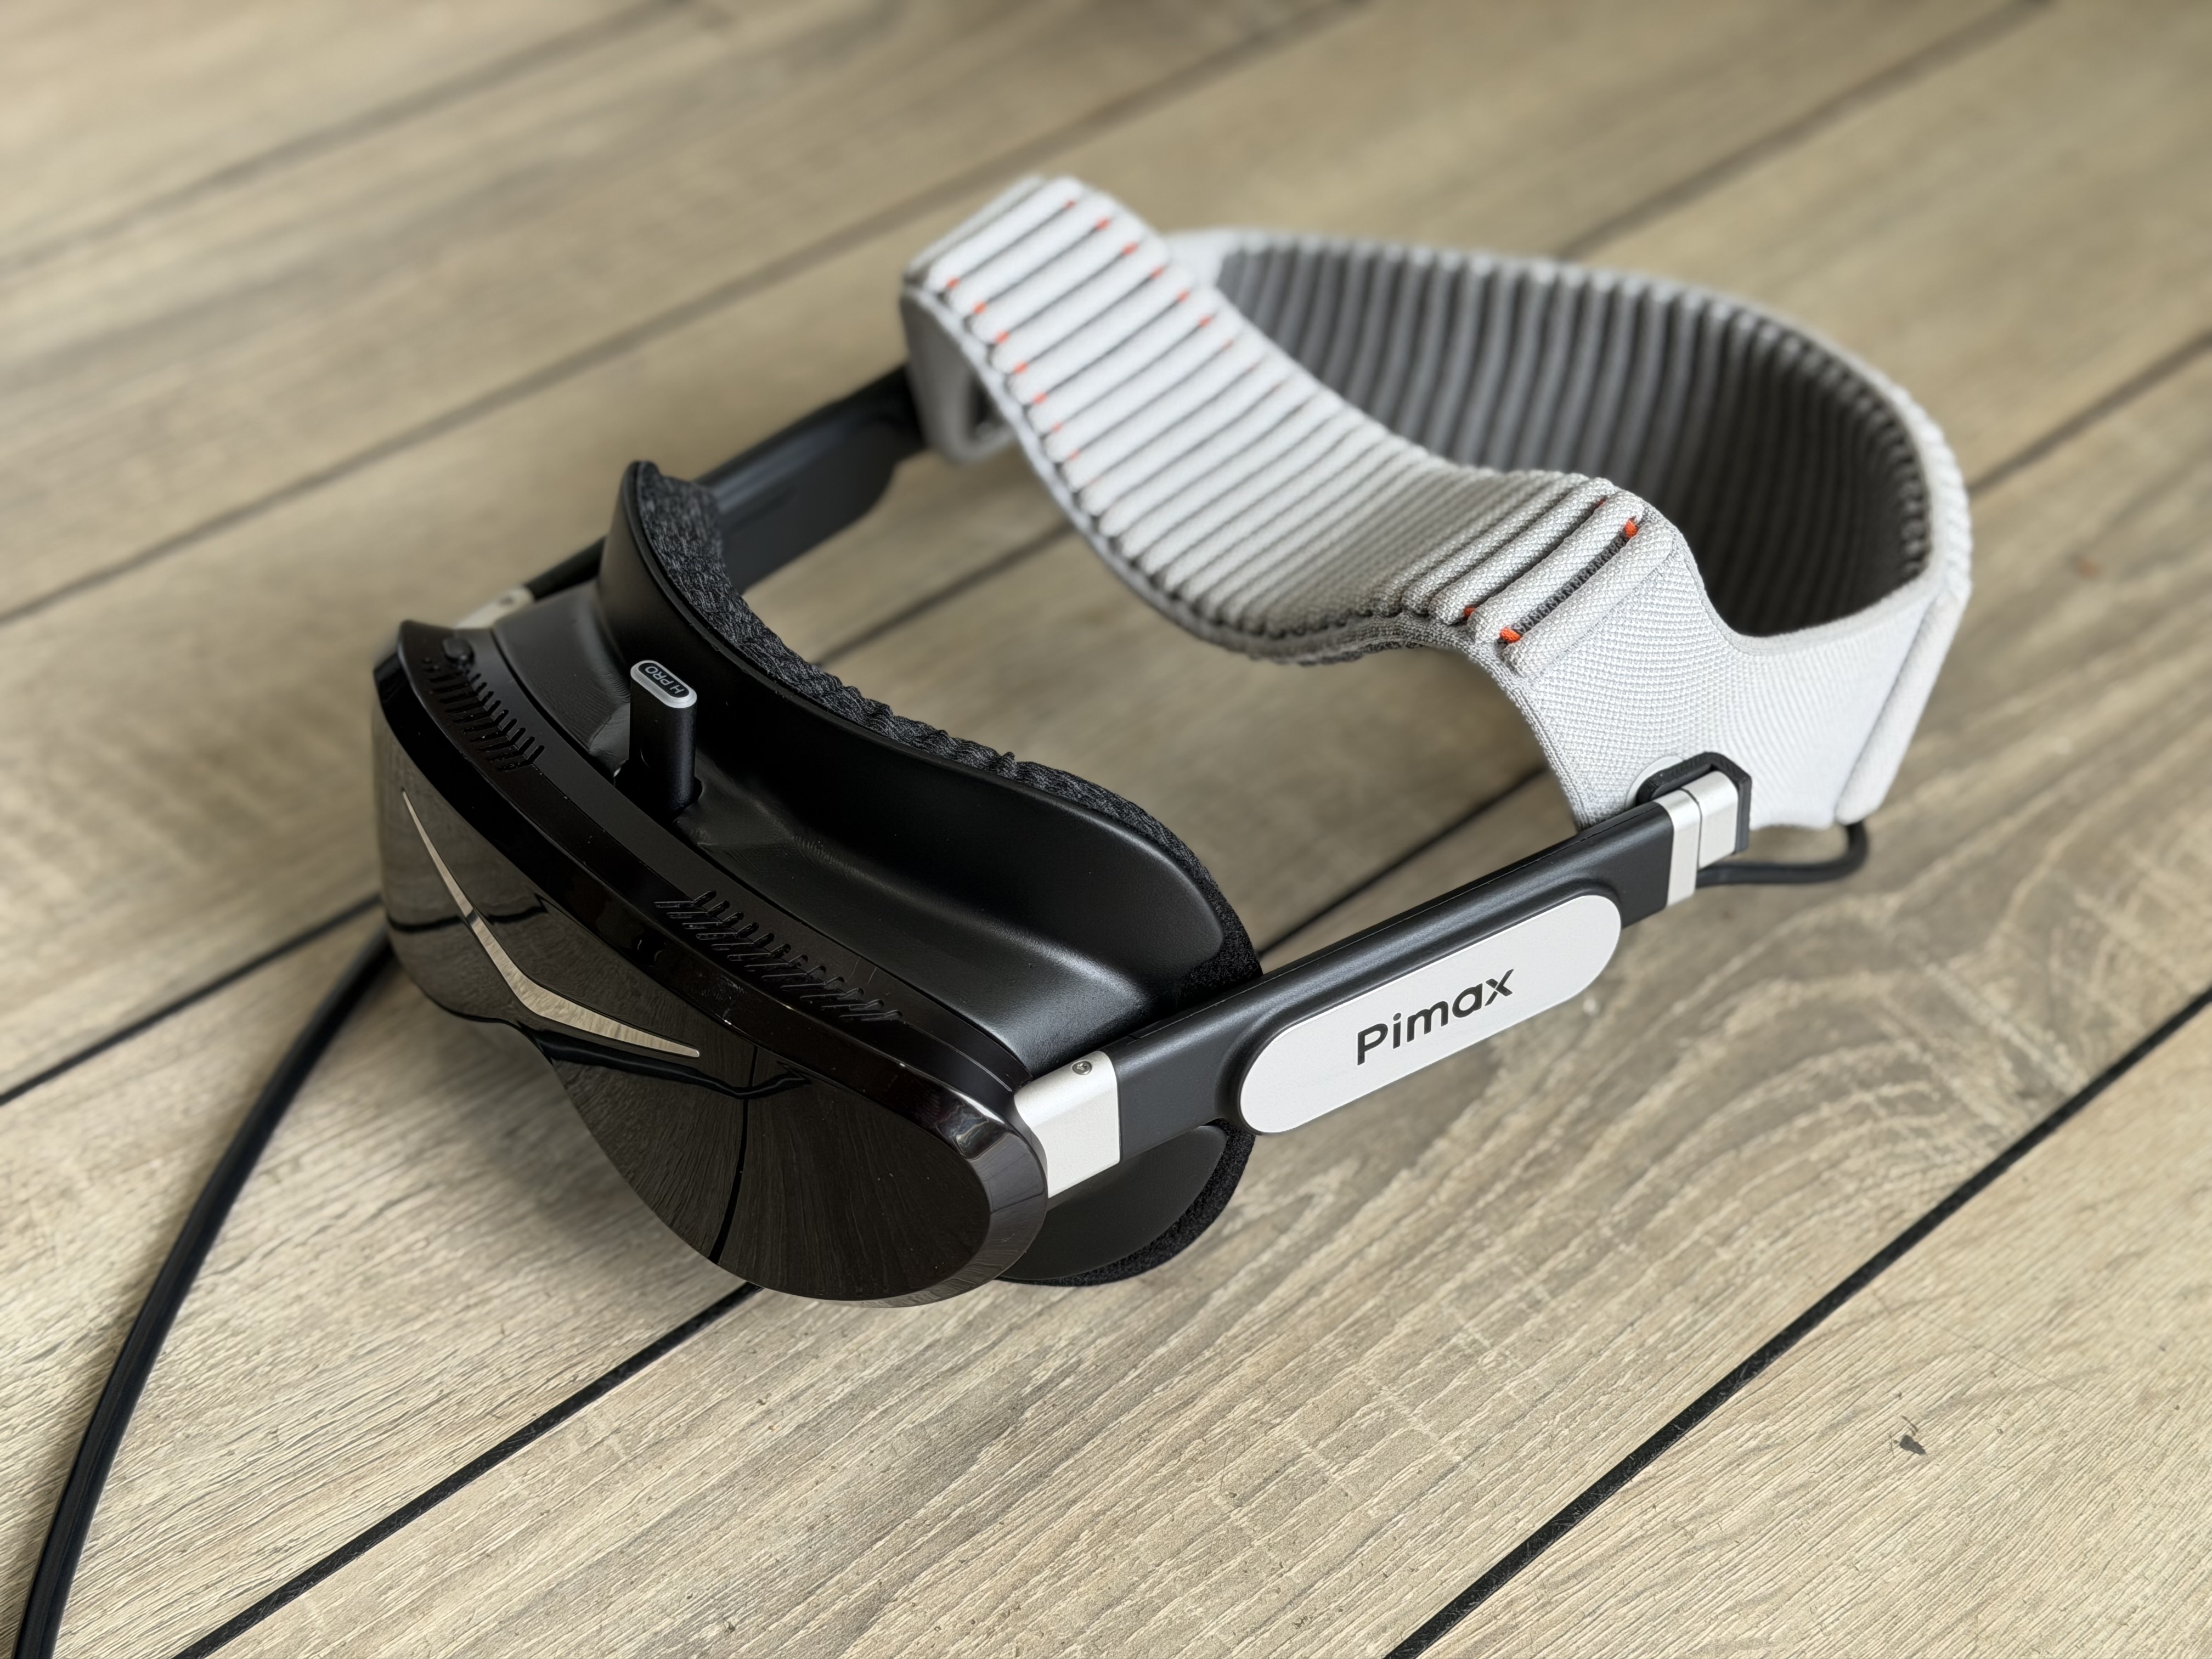
After Pimax released some of the cad files I've made a ground up re-design of my ergonomic facial interface... this includes a USB cut out, and keeps some airflow pathways open.
This reuses the default pimax metal bracket which is easily removed using a jewellers screwdriver (appears to be PH00 head) and is fully reversible with no damage as long as you are careful not to strip the screws. Carefully remove the metal bracket from the stock interface (highly recommend a magnetised screw driver or at least sticking a neodymium magnet to you standard driver. Fit the bracket to the printed interface seating the top first... not all screws are required if you can't be bothered, at least fit the inner 4 screws.... outer 4 screws are optional. If screws are difficult to drive in it may be due to print tolerances... you can open them up again with a 1mm drill bit (they are scaled at 1.2mm in the print file to try and make it easier).
When mounting the new interface, fit bottom side first and then rotate the top into place, ensuring the alignment pin on the bracket seats fully.
I have initially just released my personal favourite which is the closest version, intended to be used with the thicker cushion from studioform (12mm). Spacers and different cushions can be used to adjust the fit. (edit - nominal now available which is 3mm further from the lenses if max is too close for you)
The foams intended to be used are by studioform, personally I find the fabric ones most comfortable - just change them occasionally and treat them as ultimately disposable!
If you are going to purchase these and wanted to help ZeeFilamentFund you can use these referral links, no cost to yourself and I get a few pennies in the jar.
Full kit: Pimax Dream Air DIY Face Pad Modders Kit | Studioform Creative
12mm foam Thick Replacement Face Pads For Pimax Dream Air X1-P Interface 12mm (2 Pack) | Studioform Creative
8mm foam Replacement Face Pads For Pimax Dream Air X1-P Interface Standard 8mm (2 Pack) | Studioform Creative
3mm (why!?) foam Ultra Thin Replacement Face Pads For Pimax Dream Air X1-P Interface 3mm | Studioform Creative
If DIY ain't for you - Full Studioform interface Pimax Dream Air Interface X1-P Kit | Studioform Creative
I recommend the thin style hook tape Studioform uses, if you have their full kit then you can trim the stock velcro slightly and get a good enough fit with a few minutes and some scissor work. Easier no-skill option is just to cut multiple tabs and tbh works fine too (see photos). Any hook side adhesive tape should work though.
If you are in the UK and need one printed, but don’t know anyone with a printer then feel free to send me a message.
Printing advice - you do you. However I recommend a fairly low layer height (eg 0.16) to improve overhang performance, and I tilt back 125-130 degrees from the STL/3MF and change support threshold to 40 degrees to ensure really solid supports that won't allow any shifting.
Post Processing - carefully remove support material and I would recommend a quick sand of the sharper edges. If you want to finish them like in the above photos give them a first wet sand with 240 grit, allow to dry thoroughly. Do several coats of filler primer and allow to cure properly... wet sand over again with 240 or 400 grit and then one final very light coat of primer. Finish in the paint of your choice, just choose something fairly tough... I used generic black car bumper paint here.
Design history:
EDIT 20/05/26 - v3 I have enlarged the screw hole diameter by 0.2mm to make the screws easier to fit.
EDIT 21/05/26 - added vented variant with bottom vents to aid airflow. While it's not needed due to the vents being under the lens barrel, optionally cover over the bottom vent internally with a small piece of open cell foam glued in place to remove any light leakage.
EDIT - 24/05/26 small revision returning the bracket mounting screw holes to full through holes - makes it much easier to run a 1mm drill through if needed due print tolerances to avoid excessively hard to tighten screws.
EDIT - 24/05/26 - added both vented and unvented "Nominal" variants which put you 3mm further from the lenses, useful if the "Max" version is too close for you and your funny face.
EDIT - 24/05/26 - added my own take on the apple strap adaptors, heavily inspired by Ancilliary's great original adaptors, I've designed these with slightly different dimensions for a better fit on my printer at least, and print optimised with hole designed for vertical printing and optional print in place supports if you import as single object with multiple parts (feel free not to use them, clearly labelled and you can delete in favour of your own supports). Print vertically to optimise strength for this application, 4 walls to ensure 100% fill, low layer height for more accurate curves. May require minor clean up at the bottom of the curve of the part that goes into the apple strap depending on your print settings.
EDIT - 30/05/26 - added v5 Max Cushion... This has an enlarged USB slot that fits even the larger Creative BT-W6 low latency audio dongle, and also has an improved bracket standoff for a tighter fit to the headset. The interface also now covers the USB slot which means a USB accessory or dummy usb cover will also secure the interface to the headset. Other minor tweaks for better aesthetic.
EDIT - 31/05/26 - add v6 Nominal and Nominal Vented. This features cleaner lines, the USB enhancements of v5 Max, and a slightly redesigned face cushion gasket for (hopefully) improved fit to the studio form pad and reduced change of light leakage at the sides with more velcro contact area. v6 of the Max on the way with same improvements. As yet untested - use at own discretion.
EDIT - v7 Max and Max vented versions... small improvements made over v6 to remove pressure on central brow for some and a larger fillet for smoother look. Nominal to follow.
EDIT - 15/07/26 - added STEP files for v7 Max Vented and v7 Nominal Vented, plus separate parts to enable easier modding for others. Please enjoy and let me know what you come up with!
Pimax Dream Air Facial Interface and Apple Strap Adaptors
by Zeeflyboy · original on Printables ↗
Gadgets / Virtual Reality
♥ 52⬇ 1.7k🖨 4 prints
Print profiles
Apple Strap Adaptor (integrated support).3mf
⏱ time and weight estimated after preparation · 1 material(s)
Made to order: we prepare this file when you order, which adds a few minutes before printing starts.
Prints on: A1 mini 0.4PLA
Order this print
Apple Strap Adaptor (integrated support).stl
⏱ time and weight estimated after preparation · 1 material(s)
Made to order: we prepare this file when you order, which adds a few minutes before printing starts.
Prints on: A1 mini 0.4PLA
Order this print
Max Cushion v5.3mf
⏱ time and weight estimated after preparation · 1 material(s)
Made to order: we prepare this file when you order, which adds a few minutes before printing starts.
Prints on: A1 mini 0.4PLA
Order this print
Max Cushion v5.stl
⏱ time and weight estimated after preparation · 1 material(s)
Made to order: we prepare this file when you order, which adds a few minutes before printing starts.
Prints on: A1 mini 0.4PLA
Order this print
Max Cushion Vented v5.3mf
⏱ time and weight estimated after preparation · 1 material(s)
Made to order: we prepare this file when you order, which adds a few minutes before printing starts.
Prints on: A1 mini 0.4PLA
Order this print
Max Cushion Vented v5.stl
⏱ time and weight estimated after preparation · 1 material(s)
Made to order: we prepare this file when you order, which adds a few minutes before printing starts.
Prints on: A1 mini 0.4PLA
Order this print
Max Cushion V7 VENTED.stl
⏱ time and weight estimated after preparation · 1 material(s)
Made to order: we prepare this file when you order, which adds a few minutes before printing starts.
Prints on: A1 mini 0.4PLA
Order this print
Max Cushion V7.stl
⏱ time and weight estimated after preparation · 1 material(s)
Made to order: we prepare this file when you order, which adds a few minutes before printing starts.
Prints on: A1 mini 0.4PLA
Order this print
Nominal V7.stl
⏱ time and weight estimated after preparation · 1 material(s)
Made to order: we prepare this file when you order, which adds a few minutes before printing starts.
Prints on: A1 mini 0.4PLA
Order this print
Nominal V7 Vented.stlDEFAULT
⏱ time and weight estimated after preparation · 1 material(s)
Made to order: we prepare this file when you order, which adds a few minutes before printing starts.
Prints on: A1 mini 0.4PLA
Order this print