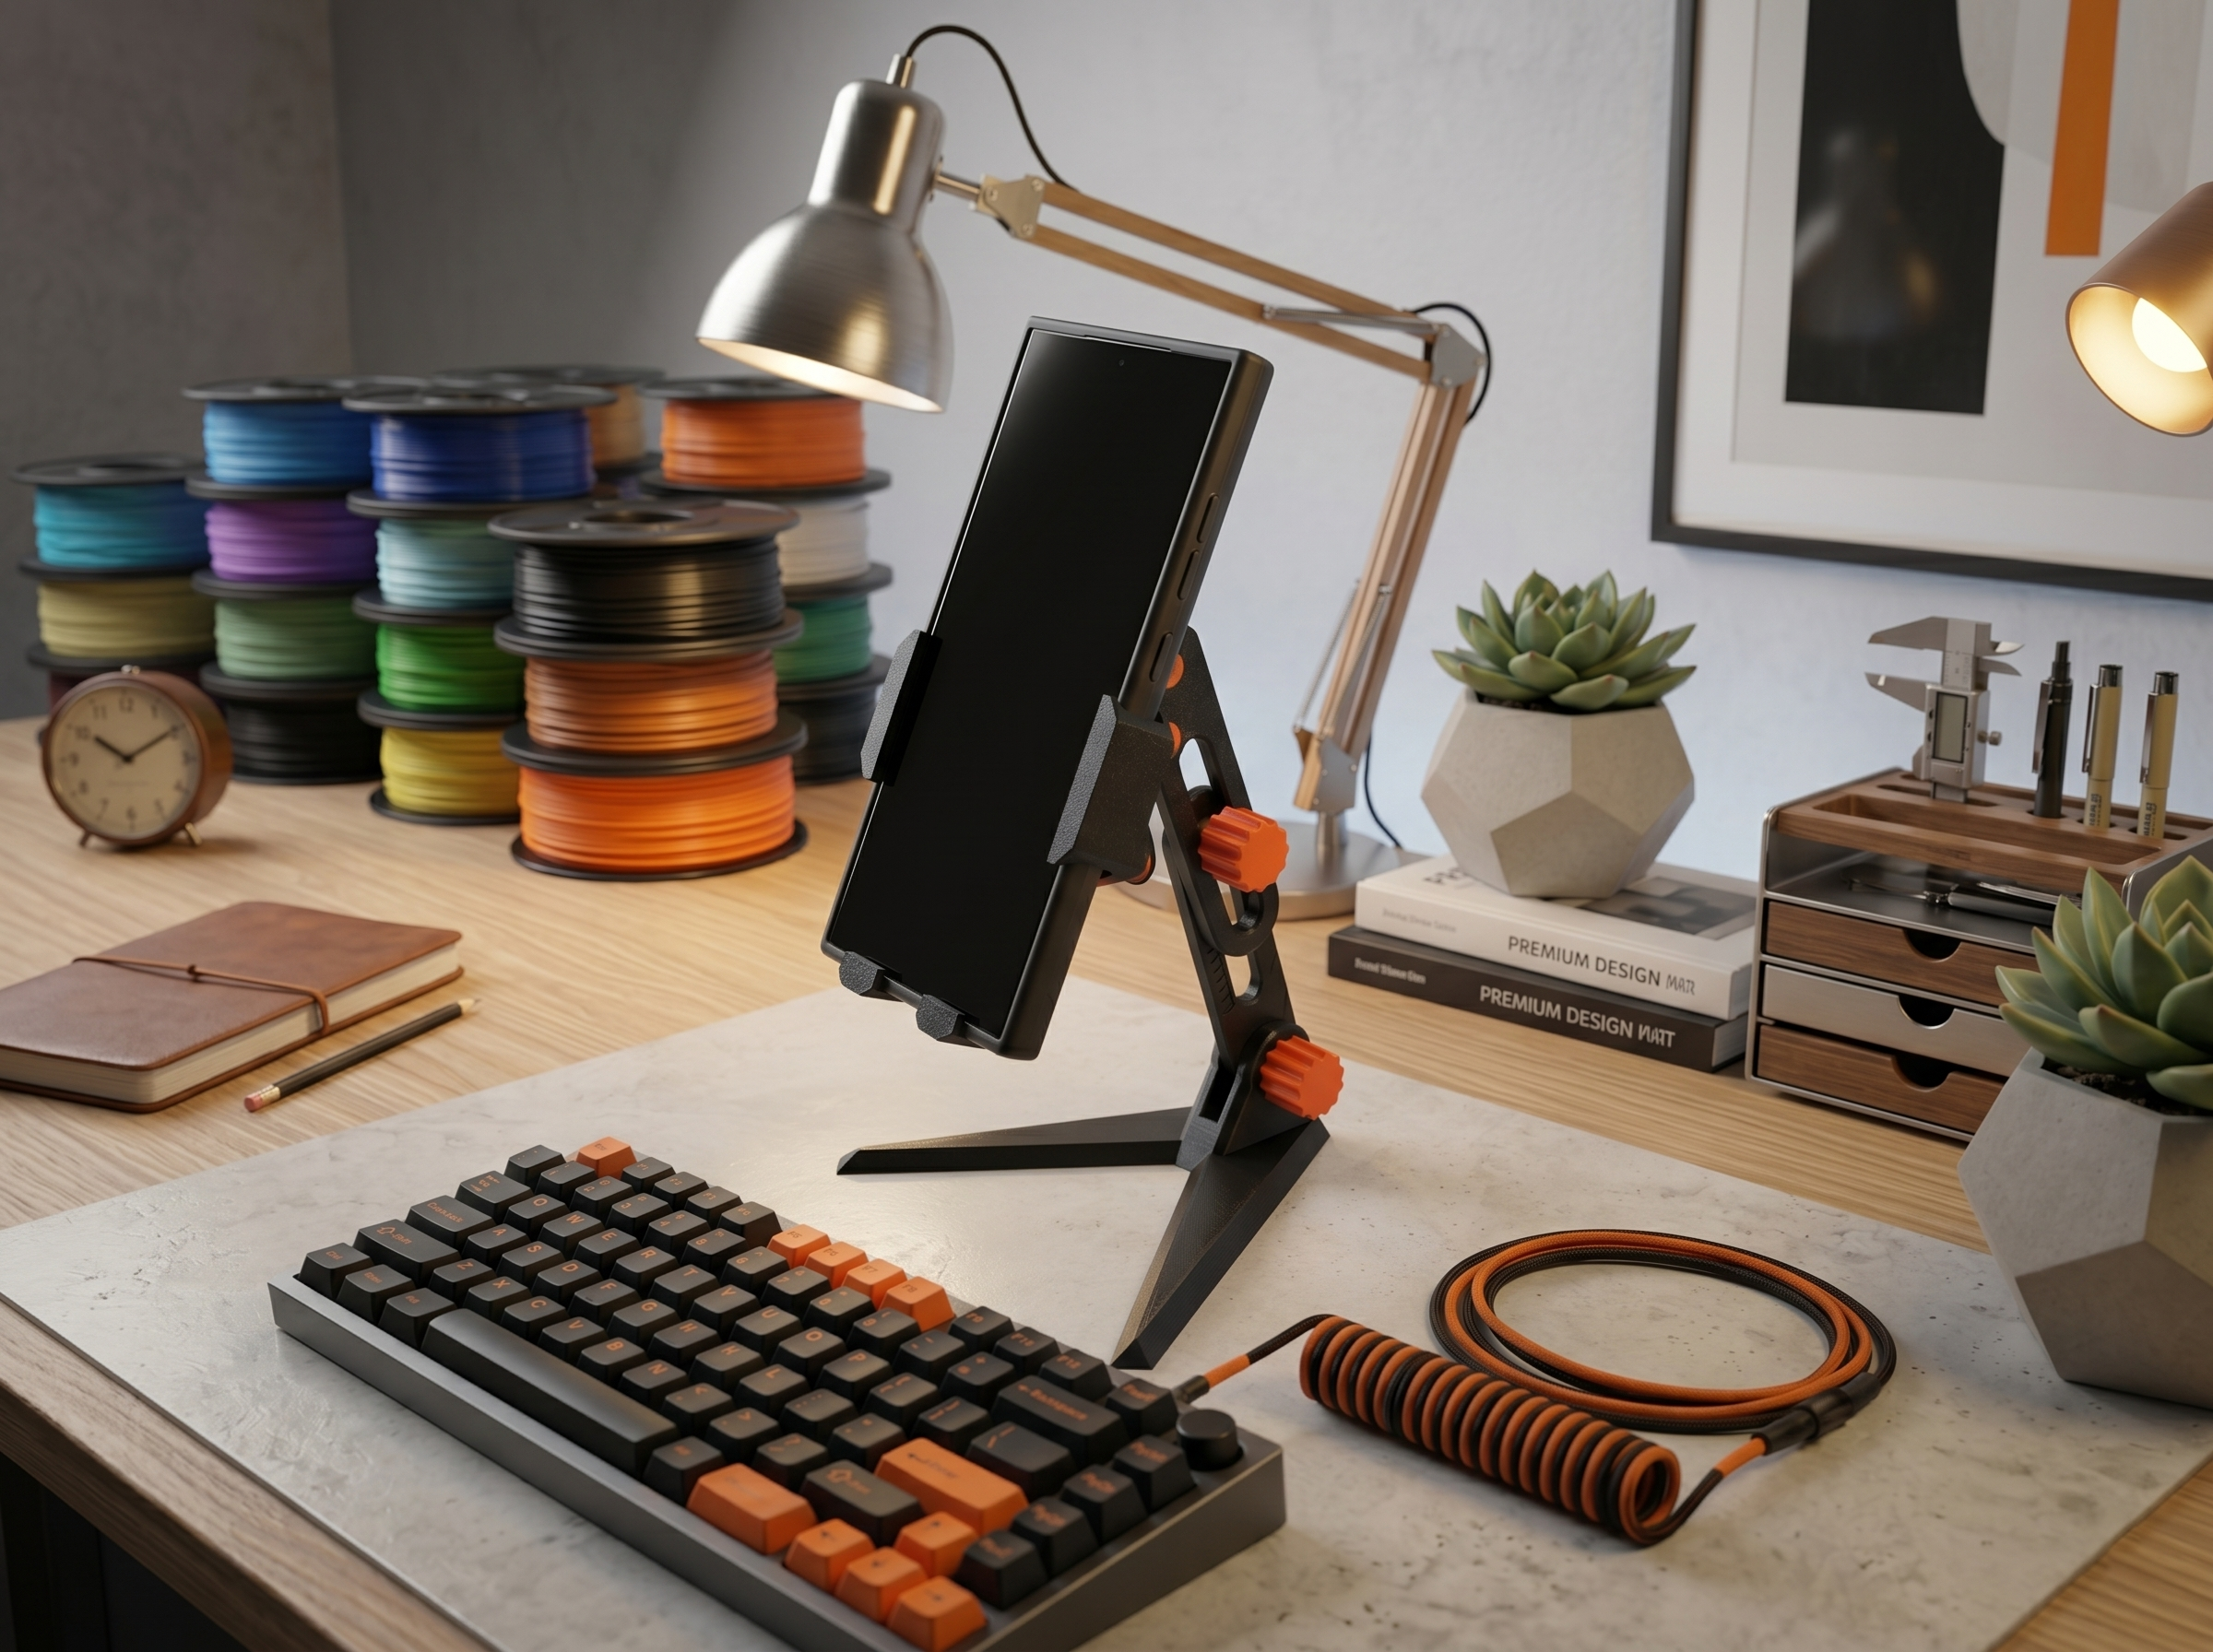
Tired of phone stands that sag under the weight of an Ultra or Pro Max smartphone?
This Gravity Desk Station is a heavy-duty, professional-grade solution designed for maximum stability and precision. It uses a smart mechanical linkage to secure your phone and a ratchet-style locking system to ensure it never slips.
Features
Designed for maximum practical organization and convenience, this model includes:
Automatic Grip: Simply place your phone on the base, and its weight triggers the side clamps via a 4-bar linkage system.
Parallel Precision: Dual arc links on each side ensure the clamps stay perfectly vertical, preventing any phone tilt.
Elastic Return: Uses a simple rubber band to automatically open the clamps when you lift your phone.
Safety First: Built-in safety pins prevent the moving parts from over-extending.
Ratchet Tilt Joint: Instead of relying on friction, the tilt mechanism uses radial teeth (Hirth-style joint) for a rock-solid lock at any angle.
Step-Lock Height: The telescopic arm features internal serrations and an M10 bolt, ensuring your desired height stays fixed even under heavy load.
Dovetail Compression: The V-base connects via a precision dovetail joint for a wobble-free experience.
Technical Specifications
Key dimensional, functional, and structural parameters for this model are listed below:
Feature | Value |
|---|---|
Clamping Range | 70 mm – 118 mm (Fits 99% of phones) |
Max Device Thickness | 13 mm (Compatible with bulky cases) |
Height Adjustment | +50 mm extension |
Base Footprint | 136 mm (W) x 128 mm (D) |
What You'll Need
To fully assemble this model, you will need the following hardware and components:
Elastic Band: 1x standard rubber band
3D Printed Fasteners: 3D printed M10 bolts (included in print files)
How to Assemble
Follow these step-by-step instructions to assemble the phone holder and stand components:
Phone Holder
Print List: 1 HolderBase, 1 HolderBottom, 1 HolderBottomStopper, 1 HolderSideLeft, 1 HolderSideRight, 2 HolderArcLeft, 2 HolderArcRight, and 10 HolderShims.
You can use the provided .3mf file, where all of these objects are already arranged on the build plates.
Tip: Try printing HolderArcLeft, HolderArcRight, and HolderShim on a smooth, non-textured plate. This will help the holder slide more smoothly.
Take the HolderBase and place one HolderArcLeft and one HolderArcRight onto the middle pins, ensuring the arrows on the arcs are pointing inward.
Tip: For better sliding and a cleaner look, it is best to place the arcs with the build-plate side facing away from the base.
Secure the arcs using two HolderShim clips. Try to slide, it should be easy.
Slide the installed arcs inward, then position the HolderBottom part so that the middle pins fit into the holes on the arcs.
Place the HolderBottomStopper into the cutout on the HolderBottom part and into the hole in the HolderBase.
Place the second HolderArcLeft and HolderArcRight onto the bottom pins of the HolderBase and the outer pins of the HolderBottomStopper, ensuring the arrows point inward.
Lock the arcs in place with four more HolderShim clips.
Tip: Test the slider. It should move easily; if it is too stiff, check the pins for any remaining support material or try reducing the height of the clips.
Insert the HolderSideLeft part into the left side of the arcs so the pins fit into the holes, then secure it with two HolderShim clips.
Repeat this process for the HolderSideRight part on the right side.
Choose an elastic band size that allows the holder to compress the bottom part snugly, but without pushing the phone out of the mount when it was installed.
Holder Stand
Print List: 1 StandBase, 1 StandNut, 1 StandLathBottom, 1 StandLathTop, 1 StandBoltBig and 2 StandBoltShort.
You can use the provided .3mf file, where all of these objects are already arranged on the build plates.
Take the StandBase and place the StandNut into the left side of the base.
Position the StandLathBottom (the side with the unthreaded hole) into the space between the base and the StandNut.
Align the small pins on the StandLathBottom with the matching small holes on the base.
Adjust the angle, then secure it in place with the StandBoltBig.
Align the slotted side of the StandLathTop with the StandLathBottom.
Secure the StandLathTop by inserting the StandBoltShort through the slot and into the StandLathBottom.
Tip: Keep both parts aligned in a straight line to allow for easy height adjustment of the holder.
Now, at the top of the assembled stand, you will find the threaded hole of the StandLathTop.
Use another StandBoltShort to secure the holder (assembled in the first Phone holder part) to the StandLathTop.
Make sure the small alignment pins fit into the corresponding small holes on the holder.
Adjust the angle for the best viewing position for your phone.
Recommended Print Settings
For optimal print quality, structural durability, and functional performance, use the following slicer settings:
Material: PLA for everyday use; PETG or ABS for enhanced durability
Layer Height: 0.2 mm
Infill: 20–25% (Gyroid or similar recommended)
Wall Loops: 6–7 wall loops
Supports: Required only for the Phone Holder main part (upper assembly); not required for the stand components
Orientation: Print the legs and pins horizontally to maximize load-bearing capacity
Hardware & Fasteners: Modular design using C-clips for easy maintenance. No glue or metal screws required!
Troubleshooting
If you encounter issues during printing or assembly, review the following troubleshooting solutions:
Mechanical Friction: For smoother articulation, avoid printing the C-clips on a textured build plate. Alternatively, adjust the C-clip scale in your slicer (Z-height to 95–98%, diameter to 103–105%) to reduce mechanical friction.
Support Block
❤ Enjoyed this print? All my models here are completely free for personal use. If you like my design and want to show your appreciation — or help me buy more filament for testing new projects — you can support my work by purchasing this model on Cults3D: https://cults3d.com/:4352141
Commercial License Block
💼 Commercial License & STEP Files: If you want to legally sell physical 3D-printed copies of this model, you can purchase the Commercial License and get editable STEP files on Cults3D here: https://cults3d.com/:4811614
Similar models
Gravity Adjustable Phone Desk Stand
by bod_3d · original on Printables ↗
Household / Office
♥ 940⬇ 2.0k🖨 11 prints
Print profiles
StandBoltBig.stl
⏱ time and weight estimated after preparation · 1 material(s)
Made to order: we prepare this file when you order, which adds a few minutes before printing starts.
Prints on: A1 mini 0.4PLA
Order this print
StandBase.stl
⏱ time and weight estimated after preparation · 1 material(s)
Made to order: we prepare this file when you order, which adds a few minutes before printing starts.
Prints on: A1 mini 0.4PLA
Order this print
StandNut.stl
⏱ time and weight estimated after preparation · 1 material(s)
Made to order: we prepare this file when you order, which adds a few minutes before printing starts.
Prints on: A1 mini 0.4PLA
Order this print
StandBoltShort.stl
⏱ time and weight estimated after preparation · 1 material(s)
Made to order: we prepare this file when you order, which adds a few minutes before printing starts.
Prints on: A1 mini 0.4PLA
Order this print
PhoneStand.3mfDEFAULT
⏱ time and weight estimated after preparation · 1 material(s)
Made to order: we prepare this file when you order, which adds a few minutes before printing starts.
Prints on: A1 mini 0.4PLA
Order this print
StandLathTop.stl
⏱ time and weight estimated after preparation · 1 material(s)
Made to order: we prepare this file when you order, which adds a few minutes before printing starts.
Prints on: A1 mini 0.4PLA
Order this print
StandLathBottom.stl
⏱ time and weight estimated after preparation · 1 material(s)
Made to order: we prepare this file when you order, which adds a few minutes before printing starts.
Prints on: A1 mini 0.4PLA
Order this print
HolderBottomStopper.stl
⏱ time and weight estimated after preparation · 1 material(s)
Made to order: we prepare this file when you order, which adds a few minutes before printing starts.
Prints on: A1 mini 0.4PLA
Order this print
HolderShim.stl
⏱ time and weight estimated after preparation · 1 material(s)
Made to order: we prepare this file when you order, which adds a few minutes before printing starts.
Prints on: A1 mini 0.4PLA
Order this print
HolderSideRight.stl
⏱ time and weight estimated after preparation · 1 material(s)
Made to order: we prepare this file when you order, which adds a few minutes before printing starts.
Prints on: A1 mini 0.4PLA
Order this print
HolderArcLeft.stl
⏱ time and weight estimated after preparation · 1 material(s)
Made to order: we prepare this file when you order, which adds a few minutes before printing starts.
Prints on: A1 mini 0.4PLA
Order this print
HolderArcRight.stl
⏱ time and weight estimated after preparation · 1 material(s)
Made to order: we prepare this file when you order, which adds a few minutes before printing starts.
Prints on: A1 mini 0.4PLA
Order this print
PhoneHolder.3mf
⏱ time and weight estimated after preparation · 1 material(s)
Made to order: we prepare this file when you order, which adds a few minutes before printing starts.
Prints on: A1 mini 0.4PLA
Order this print
HolderSideLeft.stl
⏱ time and weight estimated after preparation · 1 material(s)
Made to order: we prepare this file when you order, which adds a few minutes before printing starts.
Prints on: A1 mini 0.4PLA
Order this print
HolderBottom.stl
⏱ time and weight estimated after preparation · 1 material(s)
Made to order: we prepare this file when you order, which adds a few minutes before printing starts.
Prints on: A1 mini 0.4PLA
Order this print
HolderBase.stl
⏱ time and weight estimated after preparation · 1 material(s)
Made to order: we prepare this file when you order, which adds a few minutes before printing starts.
Prints on: A1 mini 0.4PLA
Order this print