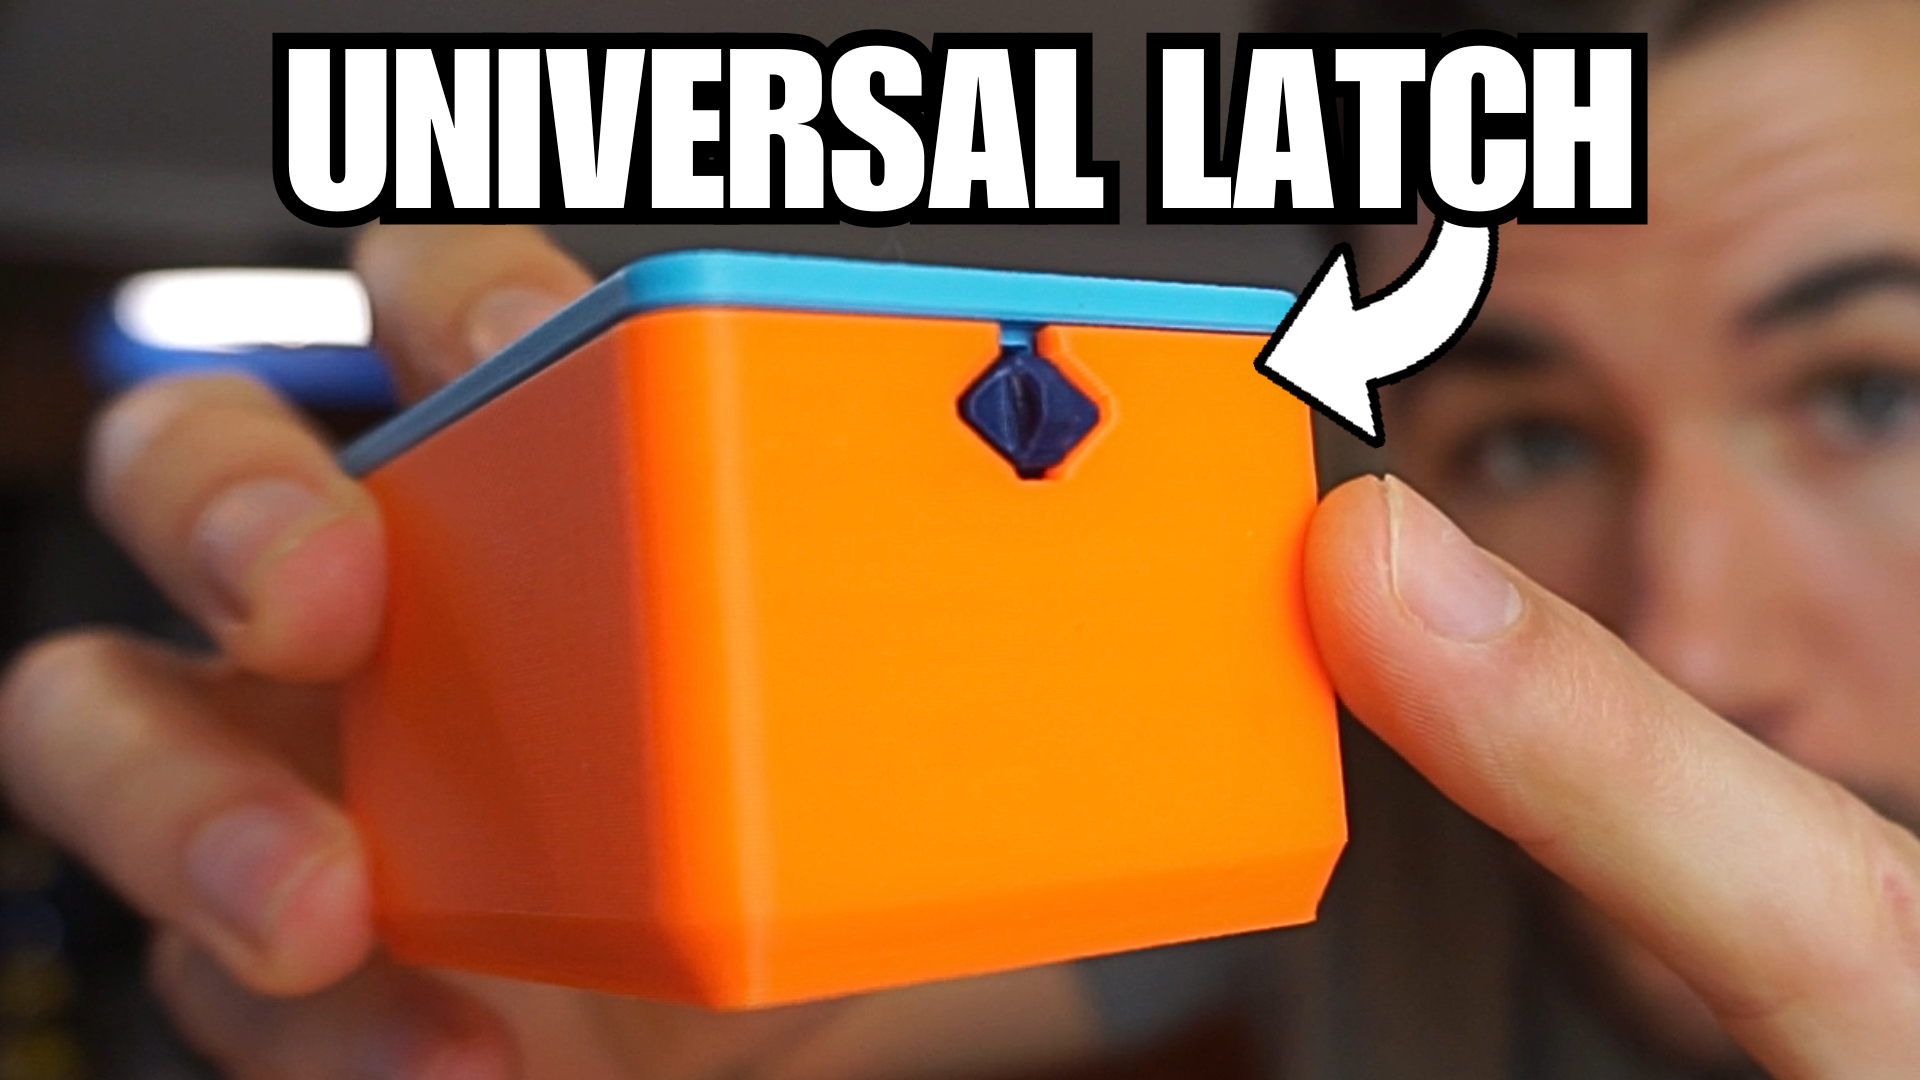
🌟 Universal 3D-Printable Spring Latch Mechanism
A reliable, support-free, fully modular system for connecting 3D-printed parts.
Import it. Place it. Combine. Done.
🎥 YouTube Tutorial
A complete breakdown of how the spring works, how to integrate it, and how to modify the button.
This project provides a universal latch mechanism you can embed into any 3D model—boxes, lids, enclosures, drawers, panels, tools, anything that needs a clean, reliable click-to-close & press-to-open system.
No screws, no inserts, no tolerances headaches, no fragile snap-fits.
Just a simple spring + housing + button, all printed on any machine with zero supports.
🔧 How the Mechanism Works
The system is made of three elements:
1 Spring Button (the dark blue part)
Fully 3D-printed spring, 1.2 mm thick, extremely durable.
Works in the optimal orientation for layer strength → very hard to break.
Two side heads lock into the housing so the spring cannot escape.
Interchangeable button styles depending on how often you want to open the mechanism.
2 Latch Housing (the light blue part)
You import this STEP into your CAD software (Fusion recommended).
Align it where you want the latch → combine → finished.
Includes internal geometry to hold the spring securely.
Designed with 45° printable walls so the cavity prints perfectly without supports.
3 Outer Cut Guide (the red bar inside the housing STEP)
This defines the exact opening the button needs on the outer wall of your model.
Simply extrude-cut using this guide → hide/delete → export your STL.
🚀 Why This Mechanism Matters
After printing dozens of snap-fits, I realized something:
there is no standardized, reliable way to connect 3D-printed parts with a clean, reusable latch.
Snap-fits break.
Tolerances vary.
Orientation matters too much.
✔ New Auto-Snap Button variant that installs itself without pressing the spring manually.
So I designed a mechanism that is:
✔ Universally embeddable in any CAD model
✔ Totally support-free
✔ Material-independent (PLA, PETG, ABS all work)
✔ Durable — spring works along the layer lines
✔ Interchangeable — buttons and springs can be swapped
✔ Parametric-friendly — available as STEP
✔ Professional & clean — no exposed weak geometry
My goal is to make this a standard connector for the 3D printing community.
Take it, modify it, use it in your own projects!
🧩 Included Button Types
You now get 4 fully compatible spring-button variants:
• Base Button (3 mm / 3 mm)
Reference spring with minimal ends for designing custom button heads.
• Flat Button (3 mm inside / 6 mm outside)
Stays flush with the surface. Ideal for designs that shouldn’t open accidentally.
• Finger-Press Button (6 mm + grip protrusion)
Best for boxes or enclosures that need to be opened frequently.
• Auto-Snap Button (self-closing) 🆕
This button is printed with a built-in angled geometry that automatically snaps into position during assembly.
You don’t need to press the spring to install it—the head slides in by itself and locks automatically.
To remove it, you still press the small inner head and slide it out.
Perfect for fast assembly or modular projects.
📦 Included Files
Mechanism (STEP files)
Latch_Housing_STEP.step
Buttons_STEP.step
Example_Box_Empty_STEP.step
Example_Box_With_Latch_STEP.step
Spring Buttons (STL)
SpringButton_Reference_3mm3mm.stl
SpringButton_Flat_3mm6mm.stl
SpringButton_FingerPress_3mm6mm.stl
SpringButton_AutoSnap.stl 🆕
Example Box (STL)
ExampleBox_Empty.stl
ExampleBox_WithLatch.stl
ExampleLid_Empty.stl
ExampleLid_WithLatch.stl
🛠 How to Integrate the Mechanism in Fusion 360
Import the Latch Housing STEP.
Place it where you want your latch.
Modify → Combineto embed it into your model.Extrude-cut the outer wall to create the button opening using the red profile inside the Latch Housing.
Hide/delete guide & housing.
Export your STL.
Print → Insert button → done.
(Full tutorial in the YouTube link)
🛠 How to Insert the Spring Button
The mechanism is designed so the spring always works in the optimal orientation, and it cannot escape accidentally.
Follow these steps:
1 Insert the spring with the curved section pointing toward the lid
The spring must be oriented so that the spring curve faces the inside (toward the lid side of the housing).
This ensures:
The spring sits as close as possible to the lid,
It does not occupy unnecessary internal space inside the box,
It is protected by the upper walls of the housing,
If the spring bends backwards, it hits the lid wall immediately → no damage.
2 Insert the large head first
Slide the large outer head of the button into its opening until it hits the stop.
This is the head that will sit on the outside of the box/tapa.
3 Compress the spring slightly and snap in the small head
Once the large head is in place:
Press the spring inwards,
Align the small inner head,
Push until you hear/feel a click.
Now the spring is fully locked inside the housing.
It cannot fall out, cannot rotate incorrectly, and remains pre-tensioned.
4 How to remove the spring
The mechanism is designed so the spring only comes out intentionally:
Press the small inner head (the one inside the box)
Push it inward and upward at the same time
The spring pops out safely
You cannot remove the spring by pressing the large external head.
This prevents any accidental release during normal use.
5 Printing orientation
Just let your slicer auto-orient the spring.
It will naturally choose the optimal orientation where the layers run along the spring arms, giving maximum durability.
The spring is pre-tensioned and designed specifically for 3 mm wall thickness, so everything aligns perfectly.
6 Auto-Snap Button (Self-Closing) – How it works 🆕
This new version of the button includes a 45° angled lead-in that guides the button into the housing automatically.
To install it:
Align the large head with the housing opening
Push the button forward → it will self-engage without needing to manually compress the spring
The angled geometry deflects the spring just enough for it to slide into place
Once it passes the internal ridge → click → the button is locked
To remove it:
Press the small inner head
Push inward + upward
The spring releases safely (same removal method as the other buttons)
This variant is perfect for fast assembly, production runs, or designs where users should install the latch with minimal effort.
🖨 Print Settings
No supports required
Works with any layer height (0.12–0.28 tested)
PLA, PETG, ABS, ASA all work
Spring prints in the strongest possible orientation automatically
No special calibration needed
❤ If you use this mechanism…
Please share your makes or remix it!
I’d love to see this evolve into a standard reusable connector for 3D printing.
Iker Libano l KNIN Custom
Universal 3D-Printable Spring Latch Mechanism (No Supports, Fully Modular)
by Iker Libano | KNIN Custom · original on Printables ↗
Hobby & Makers / Mechanical Parts
♥ 771⬇ 3.3k🖨 4 prints
Print profiles
BIG_SpringButton_FingerPress_3mm6mm.stl
⏱ time and weight estimated after preparation · 1 material(s)
Made to order: we prepare this file when you order, which adds a few minutes before printing starts.
Prints on: A1 mini 0.4PLA
Order this print
BIG_ExampleBox_Empty.stl
⏱ time and weight estimated after preparation · 1 material(s)
Made to order: we prepare this file when you order, which adds a few minutes before printing starts.
Prints on: A1 mini 0.4PLA
Order this print
BIG_SpringButton_Flat_3mm6mm.stl
⏱ time and weight estimated after preparation · 1 material(s)
Made to order: we prepare this file when you order, which adds a few minutes before printing starts.
Prints on: A1 mini 0.4PLA
Order this print
BIG_ExampleLid_Empty.stl
⏱ time and weight estimated after preparation · 1 material(s)
Made to order: we prepare this file when you order, which adds a few minutes before printing starts.
Prints on: A1 mini 0.4PLA
Order this print
BIG_SpringButton_Flat_3mm6mm.stl
⏱ time and weight estimated after preparation · 1 material(s)
Made to order: we prepare this file when you order, which adds a few minutes before printing starts.
Prints on: A1 mini 0.4PLA
Order this print
BIG_ExampleBox_WithLatch.stl
⏱ time and weight estimated after preparation · 1 material(s)
Made to order: we prepare this file when you order, which adds a few minutes before printing starts.
Prints on: A1 mini 0.4PLA
Order this print
BIG_ExampleLid_WithLatch.stl
⏱ time and weight estimated after preparation · 1 material(s)
Made to order: we prepare this file when you order, which adds a few minutes before printing starts.
Prints on: A1 mini 0.4PLA
Order this print
BIG_SpringButton_AutoSnap.stlDEFAULT
⏱ time and weight estimated after preparation · 1 material(s)
Made to order: we prepare this file when you order, which adds a few minutes before printing starts.
Prints on: A1 mini 0.4PLA
Order this print
SMALL_ExampleBox_WithLatch.stl
⏱ time and weight estimated after preparation · 1 material(s)
Made to order: we prepare this file when you order, which adds a few minutes before printing starts.
Prints on: A1 mini 0.4PLA
Order this print
SMALL_ExampleLid_WithLatch.stl
⏱ time and weight estimated after preparation · 1 material(s)
Made to order: we prepare this file when you order, which adds a few minutes before printing starts.
Prints on: A1 mini 0.4PLA
Order this print
SMALL_ExampleLid_Empty.stl
⏱ time and weight estimated after preparation · 1 material(s)
Made to order: we prepare this file when you order, which adds a few minutes before printing starts.
Prints on: A1 mini 0.4PLA
Order this print
SMALL_ExampleBox_Empty.stl
⏱ time and weight estimated after preparation · 1 material(s)
Made to order: we prepare this file when you order, which adds a few minutes before printing starts.
Prints on: A1 mini 0.4PLA
Order this print
SMALL_SpringButton_AutoSnap.stl
⏱ time and weight estimated after preparation · 1 material(s)
Made to order: we prepare this file when you order, which adds a few minutes before printing starts.
Prints on: A1 mini 0.4PLA
Order this print
SMALL_SpringButton_FingerPress_3mm6mm.stl
⏱ time and weight estimated after preparation · 1 material(s)
Made to order: we prepare this file when you order, which adds a few minutes before printing starts.
Prints on: A1 mini 0.4PLA
Order this print
SMALL_SpringButton_Flat_3mm6mm.stl
⏱ time and weight estimated after preparation · 1 material(s)
Made to order: we prepare this file when you order, which adds a few minutes before printing starts.
Prints on: A1 mini 0.4PLA
Order this print
SMALL_SpringButton_Flat_3mm6mm.stl
⏱ time and weight estimated after preparation · 1 material(s)
Made to order: we prepare this file when you order, which adds a few minutes before printing starts.
Prints on: A1 mini 0.4PLA
Order this print