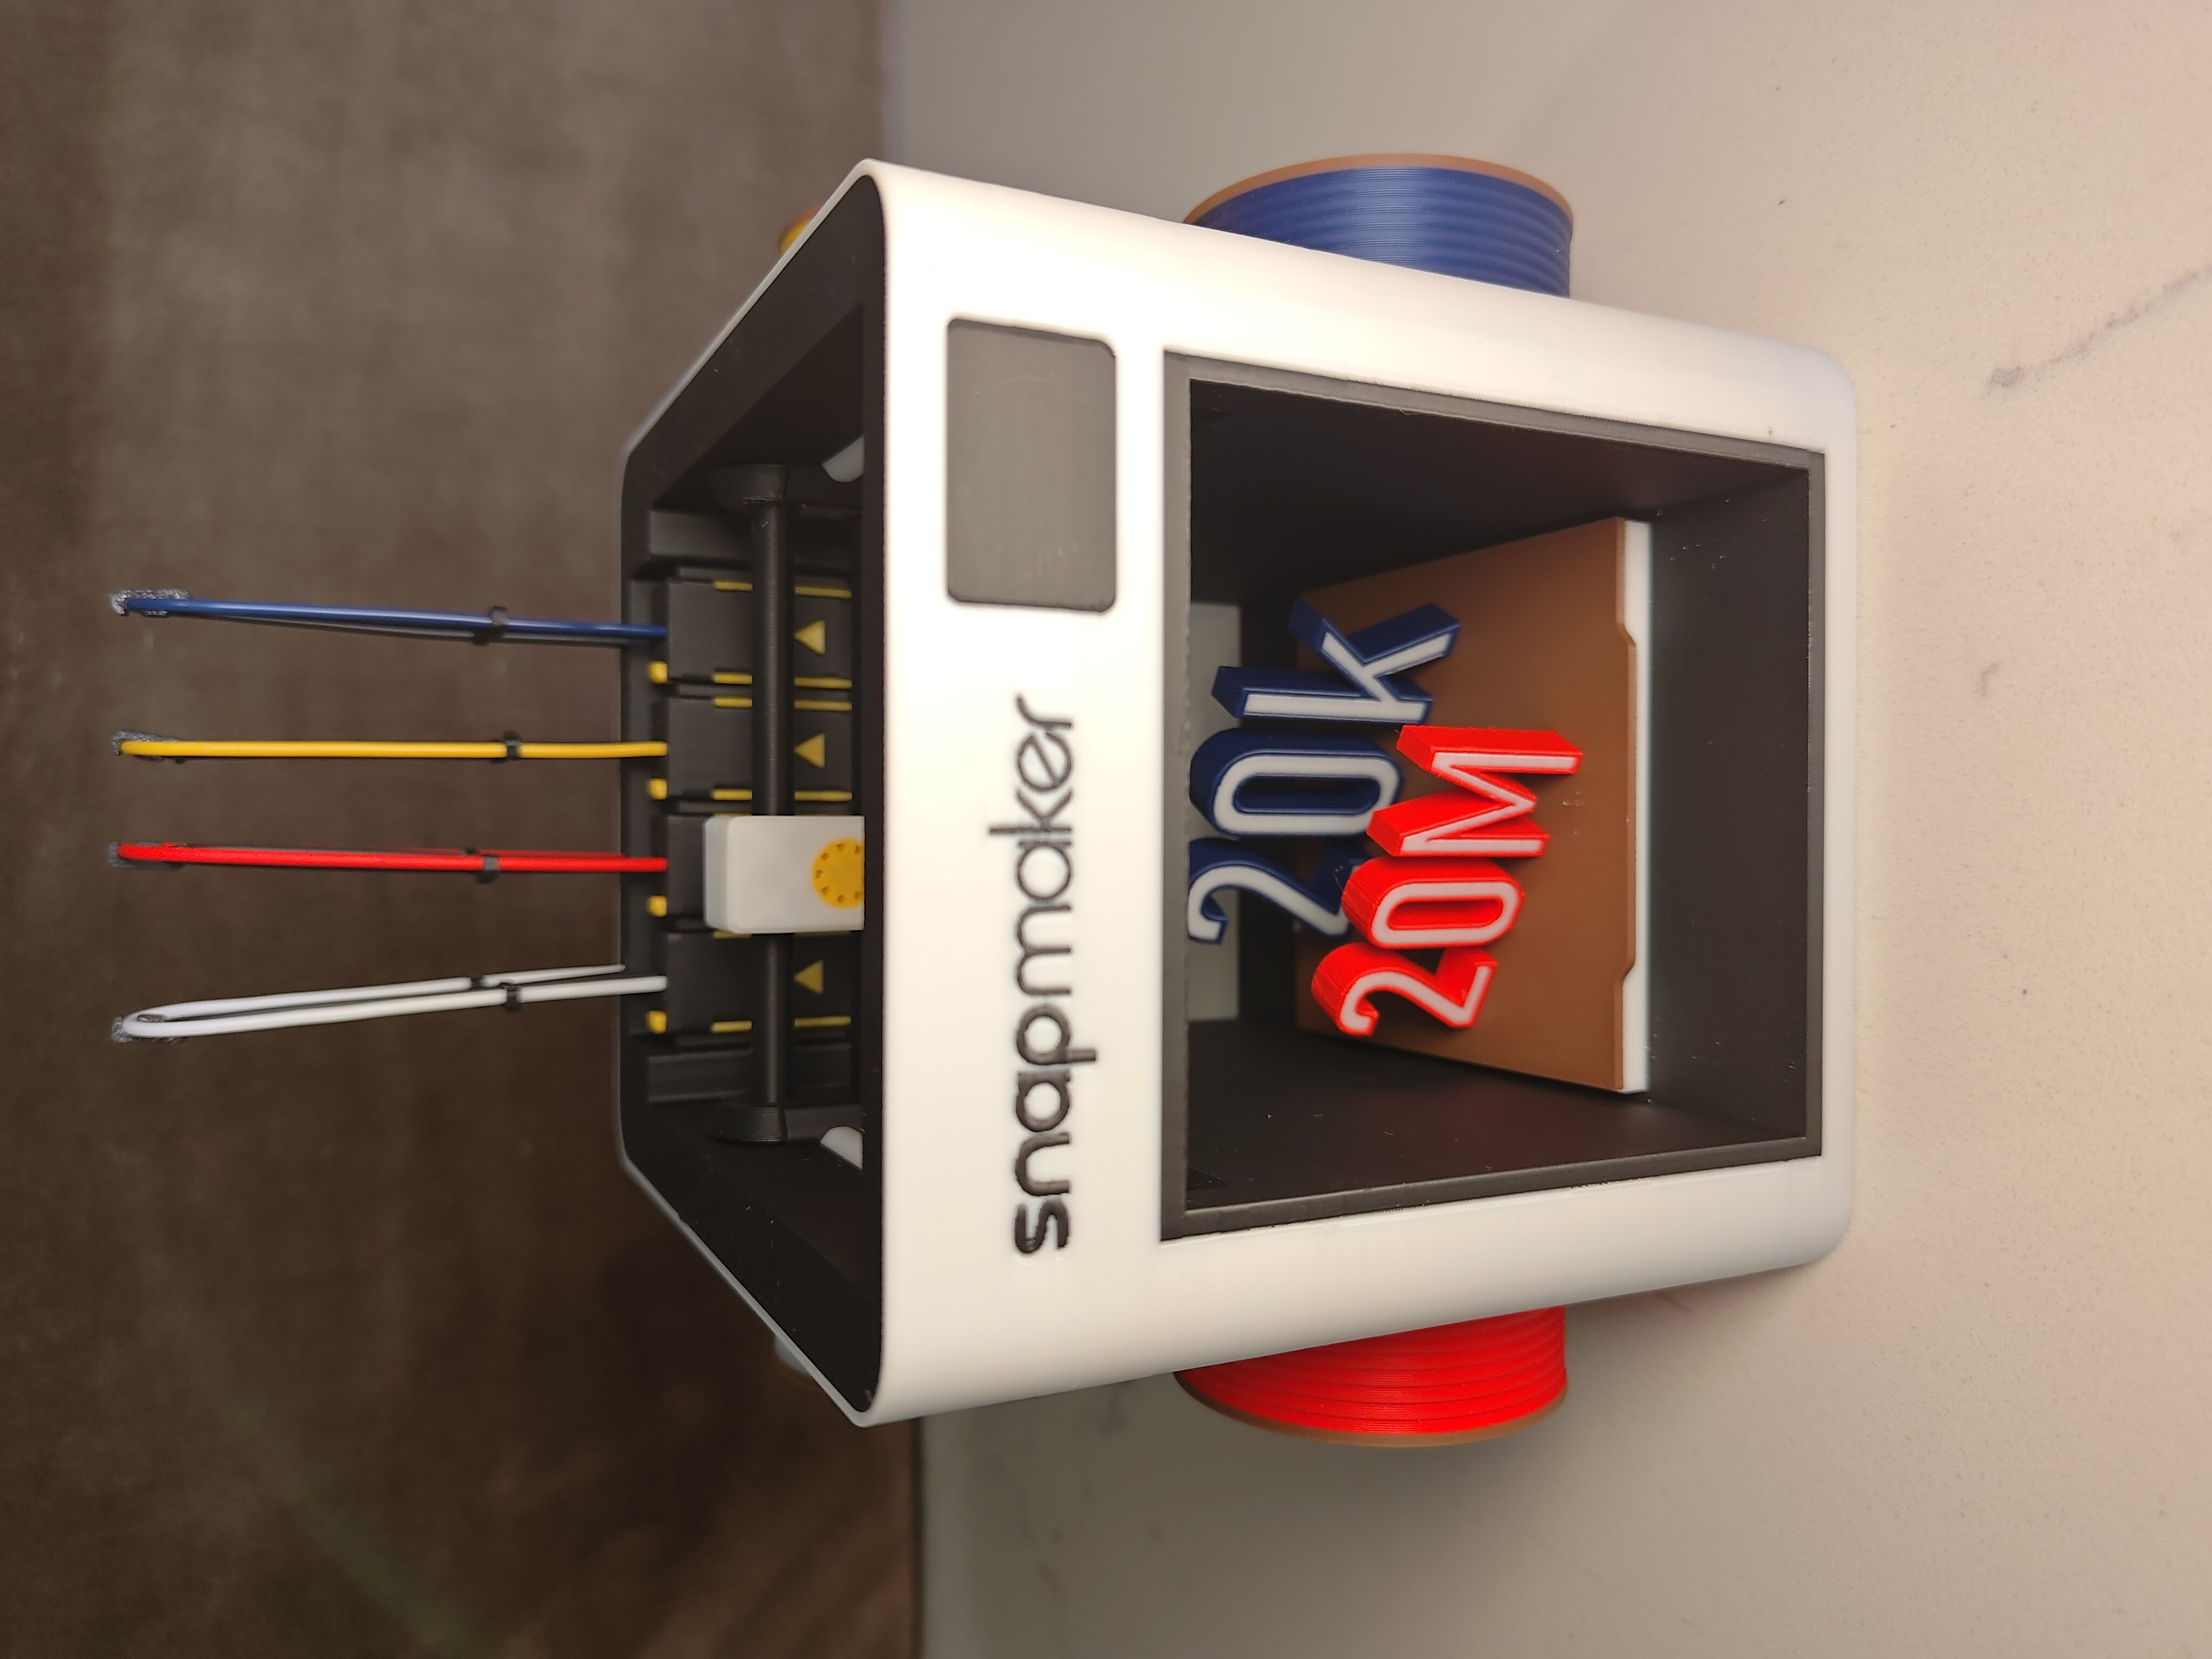
By popular demand, and with permission (even encouragement!) to share by Snapmaker including the logo, my miniature display model of the Snapmaker U1 3d printer.
The build and video were not sponsored by Snapmaker, though they did provide the printer for community pre-release testing purposes.
This was originally designed as a celebration of the end of the Snapmaker U1 Kickstarter campaign, just blown away by how many backers showed up. As a Snapmaker Test Pilot for the U1, this has been an exciting thing to be part of. In my experience the whole team at Snapmaker are truly incredible, and the community, during testing and after, are the best.
This project was inspired by two of my fellow test pilots. The style of @Generation Y-Fi's YouTube videos moved me to make a video of a build just for the fun of it. And I recalled Matej (@MPWDIZAJN on Instagram) sharing photos in the Facebook group of a mini U1 in the very first days of testing. And yeah, that seemed a fitting subject to model and print! Shout out to all my fellow beta testers.
For the backers, I hope your U1 runs smoothly and gives you many awesome prints! Watch the video here for an idea of the build (more details below):
This is modeled in many parts so colors can easily be assigned in the slicer. Sections of real 1.75mm filament are used to run from the spools to the tools, along with some black “cable-colored” segments for the umbilicals. The gantry is printed separately and simply slots in place. Spools are mounted using square pegs for easy printability. This was only meant for display, so no moving parts aside from the carriage sliding easily back and forth.
Please read the notes carefully for printing and assembly advice…
The 3MF files are slightly modified to be up to date with the current slicer, by matching in settings, seam painting, supports used before. I pray for you that I got it all right a second time…
Printing notes:
3MF files were sliced for the Snapmaker U1 (firmware v0.9.0) using Snapmaker Orca (v2.1.1)0.2 mm layer height everywhere, including first layer
Support settings depend on components (see 3MF files and notes below)
Supports were designed for Snapmaker Breakaway Support for PLA or similar. PETG may not work in certain places, including the tower defaults/3MF.
When loading 3MF files, confirm all non-support filaments set to the "Project-Inside preset" material “Snapmaker PLA Snapspeed…"
Warning: If you want to scale this, be warned the white "shell" is only 2 or 3 walls thick. Trying to scale it down may result in single wall shell layers that don't extrude well!
Full disclosure: I personally use bed adhesive/glue stick on the actual print bed to guarantee success, especially on longer prints
3MF files included (for Snapmaker U1, Snapmaker Orca):
Body:
White, yellow, and black high-speed PLA
Breakaway for PLA support interface layer
3MF includes a modifier for more top layers in the bed surface. This is in case of using semi-translucent white PLA.
Spools:
Need to print 2x in 4 colors each
Once for spools on left side (spools 1 and 2) and once for spools on right side (spools 3 and 4).
Inside/Outside: Brown
Tip: White
Filament colors: Your choice!
CFRods:
Black high-speed PLA
Breakaway for PLA support interface layer
Includes modifier for 3 wall rods, no infill
Carriage:
White, yellow, and black high-speed PLA
Breakaway for PLA support (full tree support)
Sheet-Kickstarter (4 colors + support):
Print bed including the “20k/20M” text
Breakaway for PLA support (full support, on-part)
White (inner text), brown (bed sheet), blue (20k outer), and red (20M outer) high-speed PLA
Requires a spool change during print pause at start of layer 8!
Start with brown/bed sheet color loaded instead of whatever is used for the inner text colors
When printing, confirm at print start that “white” is mapped to the actually brown/bed spool
When the print pauses (layer 8), unload the spool that's brown/bed colored, and mount the new spool that's white/inner text colored
Alternative, 3-color, no-pause print:
Assign only 3 colors, 1 for the print bed, 1 for both outer text objects, and 1 for both inner text objects. Then you can delete the inserted Pause command (right preview slider) and print in one go.
Sheet only:
The standalone sheet is in the All-STLs zip file, for a clean look.
STL files included (All-STLs.zip):
PEGS - 4x needed (no 3MF)
JIGS - 2 parts, 1x each (no 3MF)
To assist with heat-shaping the filaments (see video)
CLIPS - 12x needed (no 3MF)
CFRods - 1x needed
SPOOL assemblies - 2x each needed (import each as one object of multiple parts)
BODY assembly (import as one object of multiple parts)
CARRIAGE assembly (import as one object of multiple parts)
SHEET assembly (import as assembly or print one “Sheet-Brown” standalone)
Filament running:
Filament must be shaped using a small heat gun or similar.
Not using heat to relax the filament into shape may result in stresses that later cause the filament to snap as it becomes brittle
Be very cautious using heat shaping around other printed parts! Keep other PLA/printed objects away from the heat to avoid them becoming unintentionally distorted.
Jigs are provided for uniformly shaping the filament arcs at the top of the printer
For remainder of filament runs, suggest running from point A to point B, using heat to let the filament gently relax into its natural shape along the path.
Do this with only 1 out of 8 of the filament pieces mounted at a time, to avoid accidentally re-heating a neighboring filament run!
Once each filament has been shaped individually, they may then all be mounted/assembled
12 clips can then be printed to tidy up the look, as shown in the video/photos
And yes! A U1 in a U1 in a U1 in a U1 in a U1. Hahahaha, also by popular demand, I did eventually do a very low effort “Print-ception” for laughs. I didn't optimize this much, just shrank it a few times and let it rip. But here ya go:
Happy printing! It's a slightly complicated build, and I'd love to see your makes.
Mini Snapmaker U1
by Wombley · original on Printables ↗
Art & Design / Sculptures
♥ 179⬇ 671🖨 6 prints
Print profiles
CFRods (for Snapmaker U1).3mf
⏱ time and weight estimated after preparation · 1 material(s)
Made to order: we prepare this file when you order, which adds a few minutes before printing starts.
Prints on: A1 mini 0.4PLA
Order this print
Carriage (for Snapmaker U1).3mf
⏱ time and weight estimated after preparation · 1 material(s)
Made to order: we prepare this file when you order, which adds a few minutes before printing starts.
Prints on: A1 mini 0.4PLA
Order this print
Sheet-Kickstarter (for Snapmaker U1).3mf
⏱ time and weight estimated after preparation · 1 material(s)
Made to order: we prepare this file when you order, which adds a few minutes before printing starts.
Prints on: A1 mini 0.4PLA
Order this print
Spools (for Snapmaker U1).3mf
⏱ time and weight estimated after preparation · 1 material(s)
Made to order: we prepare this file when you order, which adds a few minutes before printing starts.
Prints on: A1 mini 0.4PLA
Order this print
Body (for Snapmaker U1).3mfDEFAULT
⏱ time and weight estimated after preparation · 1 material(s)
Made to order: we prepare this file when you order, which adds a few minutes before printing starts.
Prints on: A1 mini 0.4PLA
Order this print