----------------------------
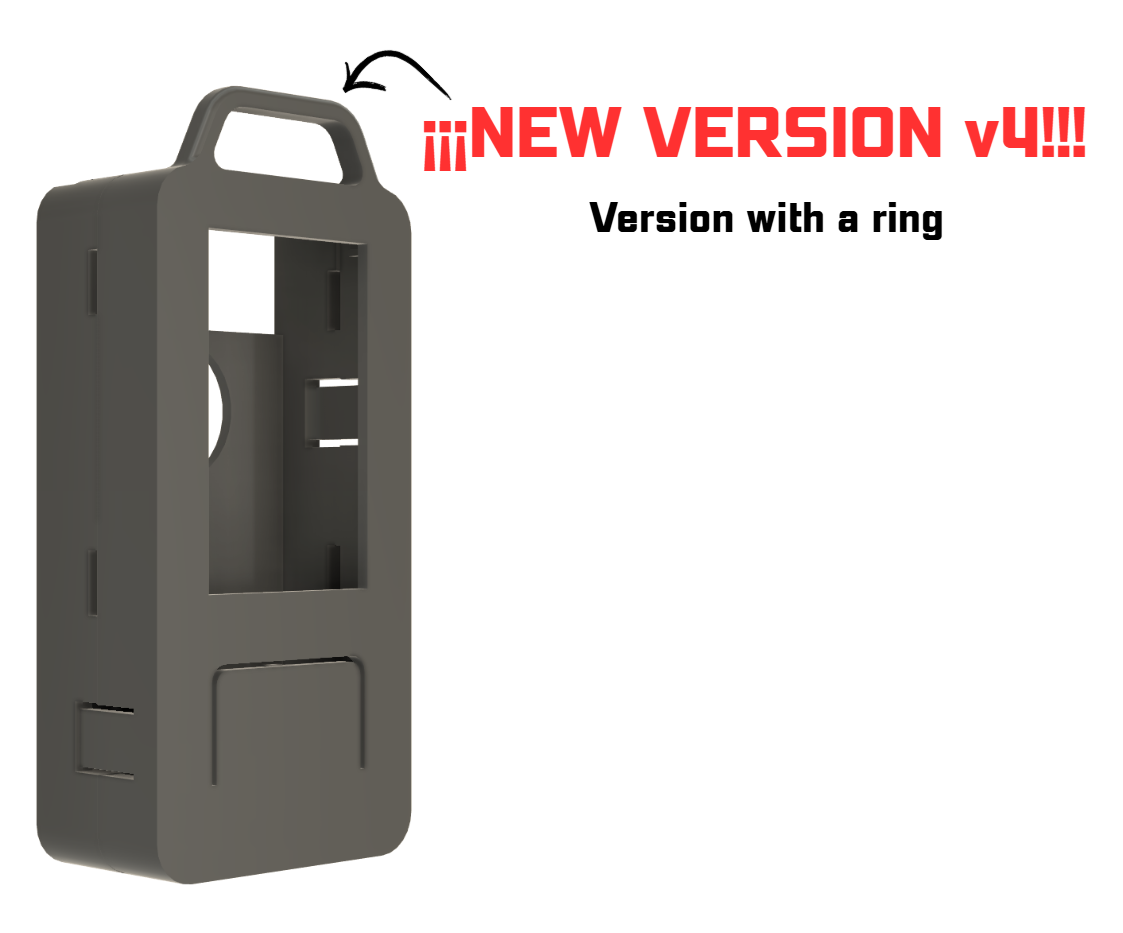
¡¡¡¡Version 4!!!!
----------------------------
This new version comes with a ring/loop for attaching a lanyard so you can carry it on your keychain or wherever you want.
---------------------------------------------------------------------------
---------------------------------------------------------------------------
I also solved a problem where, when the screws were inserted/put in, the top part would lift up and sometimes bend.
By applying a wedge mechanism to prevent the top part from lifting when the screws are put in.
---------------------------------------------------------------------------
I read in the comments that some people were having trouble with the central button, which sometimes wouldn't click. That was because if you screwed the center button down too tightly, it would shift and stop working. Now, the button is larger, and I've added a splice/joint to make it more resistant and prevent it from breaking.
=============
New update (v3)
=============
A simple update where the only thing I changed was the thickness of the back cover, since after reviewing the original model, it measured 13.5 mm in total, and the one I designed was 14.5 mm. Now everything is correct, and both models — the original and mine — measure exactly the same.
✅fix:
Height of the back cover modified to a total of 13.5 mm.
=============
New update (v2)
=============
I present the new update of the M5 Stick C Plus 2 model as I promised, with some modifications that I've added.
I designed the back side of the M5 Stick C Plus 2.
How to print it correctly:
🔹Layer Height → 0.1 mm
🔹Low speed → 40-50 mm/s
🔹Smoothing mode
|→ Smoothing pattern: zigzag
🔹Count of wall lines → 3
🔹line width → 0.3 mm
steps to disassemble the M5 Stick C Plus 2
1.
Unscrew the 2 Allen screws and remove the top part.
2.
Carefully remove the sticker on the back (it comes off easier with a little heat).
3.
Remove the magnet right after taking off the sticker (it’s attached to the battery, be careful not to use sharp objects).
4.
Remove the board from the back chassis; it is also attached to the chassis (a little prying helps to detach it easily).
5.
And finally, once the parts are printed, reassemble everything.
If for any reason your screen’s flex cable is broken or it stops displaying an image and you need a cheap replacement, I'll leave the link to where I bought the replacement.
https://tr.aliexpress.com/item/1005003404417634.html
Choose the 8-pin one, NOT the 13-pin one.
upgrade
✅fix:
The button system has been improved; it is now much more durable because the printing orientation was changed to horizontal. Previously, the button layers were printed horizontally, which made the piece weak and prone to breaking after minimal use. This change has been applied to both the back and front parts of the M5.
A splice has been added to the lower area of the button, making it more resistant to presses.
Print time: 29 mins
amount of material: 2-3g
I modified some parts of the front of the M5 Stick C Plus. I will edit the published models so that only the most recent version can be downloaded. This will apply to future versions I release of this model.
=============
Version v1
=============
Future update:
- Rebuild the other half of the back
- Create a modification to accommodate a higher-capacity (mAh) battery
Design a replacement for the IoT development board of the M5 Stick C Plus 2.
how to print it correctly:
- Layer height 0.1
- Low speed (40-50 mm/s)
- Smoothing mode
- Line width 0.3 (if you have a 0.4 nozzle, you can set it to 0.3 without any problem)
- Wall line count 3, to avoid fill and make the part more solid
Print time: 20-30 mins
amount of material spent: 2-3g
======================================================================
ENG
Note: If you liked this design, please give it a thumbs up! It not only supports me but also motivates me to keep creating more.
ES
Nota: Si te gustó este diseño, por favor dale me gusta. Además de apoyarme, me anima a seguir diseñando.
======================================================================
M5 Stick c plus 2
by C0rNfLaK3 · original on Printables ↗
Gadgets / Other Gadgets
♥ 55⬇ 1.5k🖨 3 prints
Print profiles
M5 stick c plus 2 front old version.stlDEFAULT
⏱ time and weight estimated after preparation · 1 material(s)
Made to order: we prepare this file when you order, which adds a few minutes before printing starts.
Prints on: A1 mini 0.4PLA
Order this print
M5 stick c plus 2 back old version.stl
⏱ time and weight estimated after preparation · 1 material(s)
Made to order: we prepare this file when you order, which adds a few minutes before printing starts.
Prints on: A1 mini 0.4PLA
Order this print
M5 stick c plus 2 back NEW VERSION.stl
⏱ time and weight estimated after preparation · 1 material(s)
Made to order: we prepare this file when you order, which adds a few minutes before printing starts.
Prints on: A1 mini 0.4PLA
Order this print
M5 stick c plus 2 back NEW VERSION.stl
⏱ time and weight estimated after preparation · 1 material(s)
Made to order: we prepare this file when you order, which adds a few minutes before printing starts.
Prints on: A1 mini 0.4PLA
Order this print