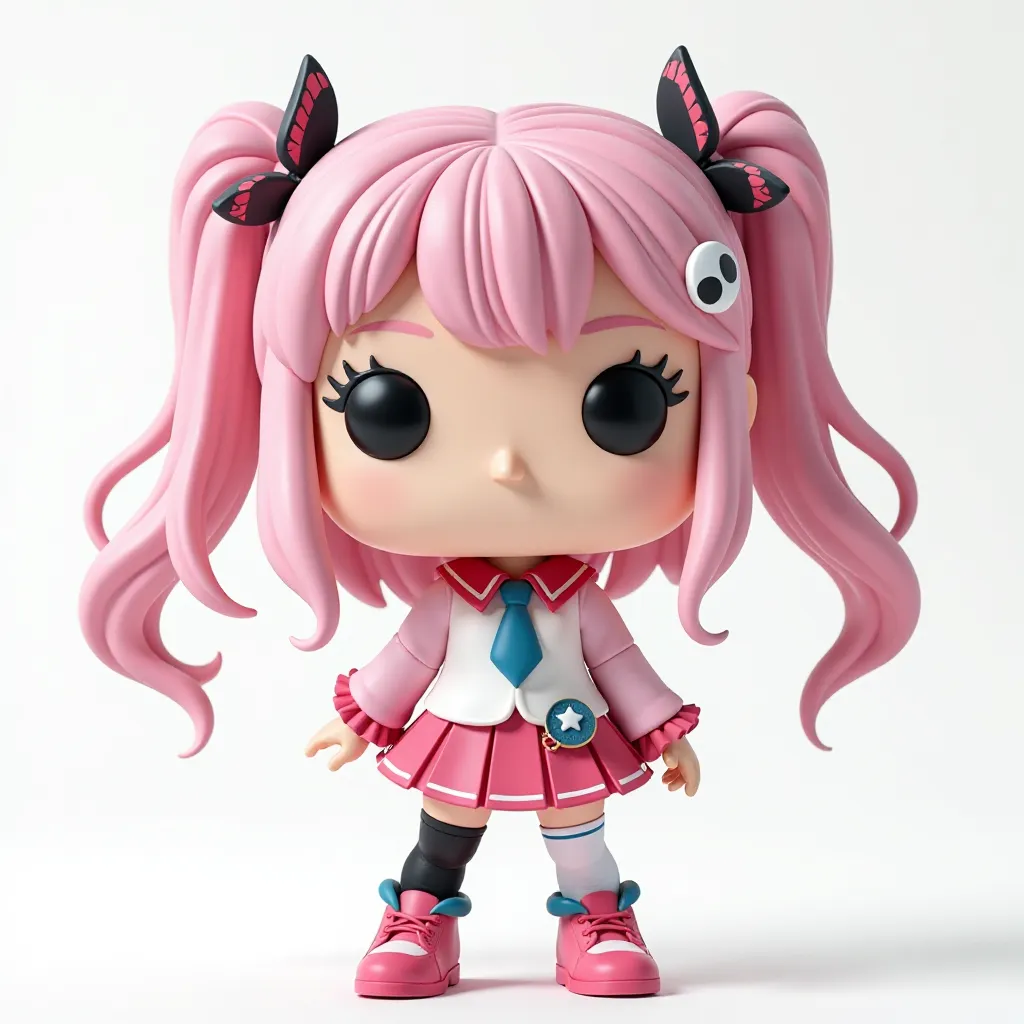
3D Printing Guide for Cute Anime-Style Chibi Girl Model (Optimal Settings & Tips)
This guide will help you achieve the best quality when printing the Anime-Style Chibi Girl 3D model. Since this is a detailed, decorative model, following these tips will ensure smooth surfaces, crisp details, and minimal post-processing.
Recommended Print Settings:
✅ Layer Height (Resolution):
- 0.1mm to 0.12mm for high detail and smoother surfaces.
- For faster prints, you can go up to 0.16mm, but details like hair strands and facial features may lose sharpness.
- Avoid 0.2mm or higher layer heights, as the print will look blocky and require significant post-processing.
✅ Wall Thickness:
- 1.2mm to 1.6mm for strong, detailed prints.
- Use 3 perimeters (walls) to ensure durability, especially for fragile parts like pigtails, arms, or accessories.
✅ Infill Density:
- 10-15% infill is sufficient for decorative prints.
- Use a Gyroid or Grid infill for strength without increasing print time.
✅ Print Speed:
- 30-50 mm/s is the optimal range to balance quality and print time.
- Slower speeds (30 mm/s) will give better results for detailed areas like the hair and face.
✅ Support Settings:
- Supports are essential for overhangs, particularly under the hair, arms, and accessories like ribbons.
- Use tree supports or custom supports to minimize contact points and reduce post-processing work.
- Support overhang angle: 50°-55° to avoid unnecessary supports.
✅ Build Plate Adhesion:
- Use a brim if the model has small contact points with the build plate (such as small feet).
- Skirt can be used if adhesion isn’t a concern.
Material Recommendations:
| Material | Pros | Cons |
|---|---|---|
| PLA | Easy to print, smooth finish, wide color options | Less durable for handling |
| PETG | Stronger and more flexible than PLA | Can string more if not dialed in |
| Resin | Best for ultra-fine details | Requires post-curing and can be brittle |
For FDM printers, PLA is the easiest to use, while resin printers will give you the best detail, especially for small features like the eyes and hair strands.
Post-Processing Tips:
- Sanding: Start with 400-grit sandpaper for smoothing layer lines. For a smoother finish, progress to 1000-grit.
- Priming & Painting: Use spray primer to prepare the surface for painting. Acrylic paints work well for detailed painting.
- Sealing: Use a clear coat or matte varnish to protect the paint and give a professional finish.
Recommended Print Orientation:
- Body and head: Print upright to reduce visible layer lines on the face.
- Hair pieces: Print separately, with supports, to avoid issues with overhangs.
- Accessories (like bows or ribbons): Lay them flat to reduce supports and improve surface quality.
Summary of Key Settings:
| Setting | Recommended Value |
|---|---|
| Layer Height | 0.1mm to 0.12mm |
| Wall Thickness | 1.2mm to 1.6mm |
| Infill Density | 10-15% |
| Print Speed | 30-50 mm/s |
| Supports | Tree/Custom |
| Adhesion | Brim or Skirt |
By following these settings and tips, you’ll achieve a high-quality print that captures all the cute, anime-inspired details of the model with minimal post-processing required. Happy printing! 🎨
Cute Anime-Style Chibi Girl 3D Model for 3D Printing – Kawaii Collectible Figurine with Pink Hair and Pigtails – DIY Funko Pop-Inspired Desktop Toy
by Brave 3D · original on Printables ↗
Art & Design / Sculptures
♥ 186⬇ 1.5k🖨 3 prints
Print profiles
anime girl .stlDEFAULT
⏱ time and weight estimated after preparation · 1 material(s)
Made to order: we prepare this file when you order, which adds a few minutes before printing starts.
Prints on: A1 mini 0.4PLA
Order this print