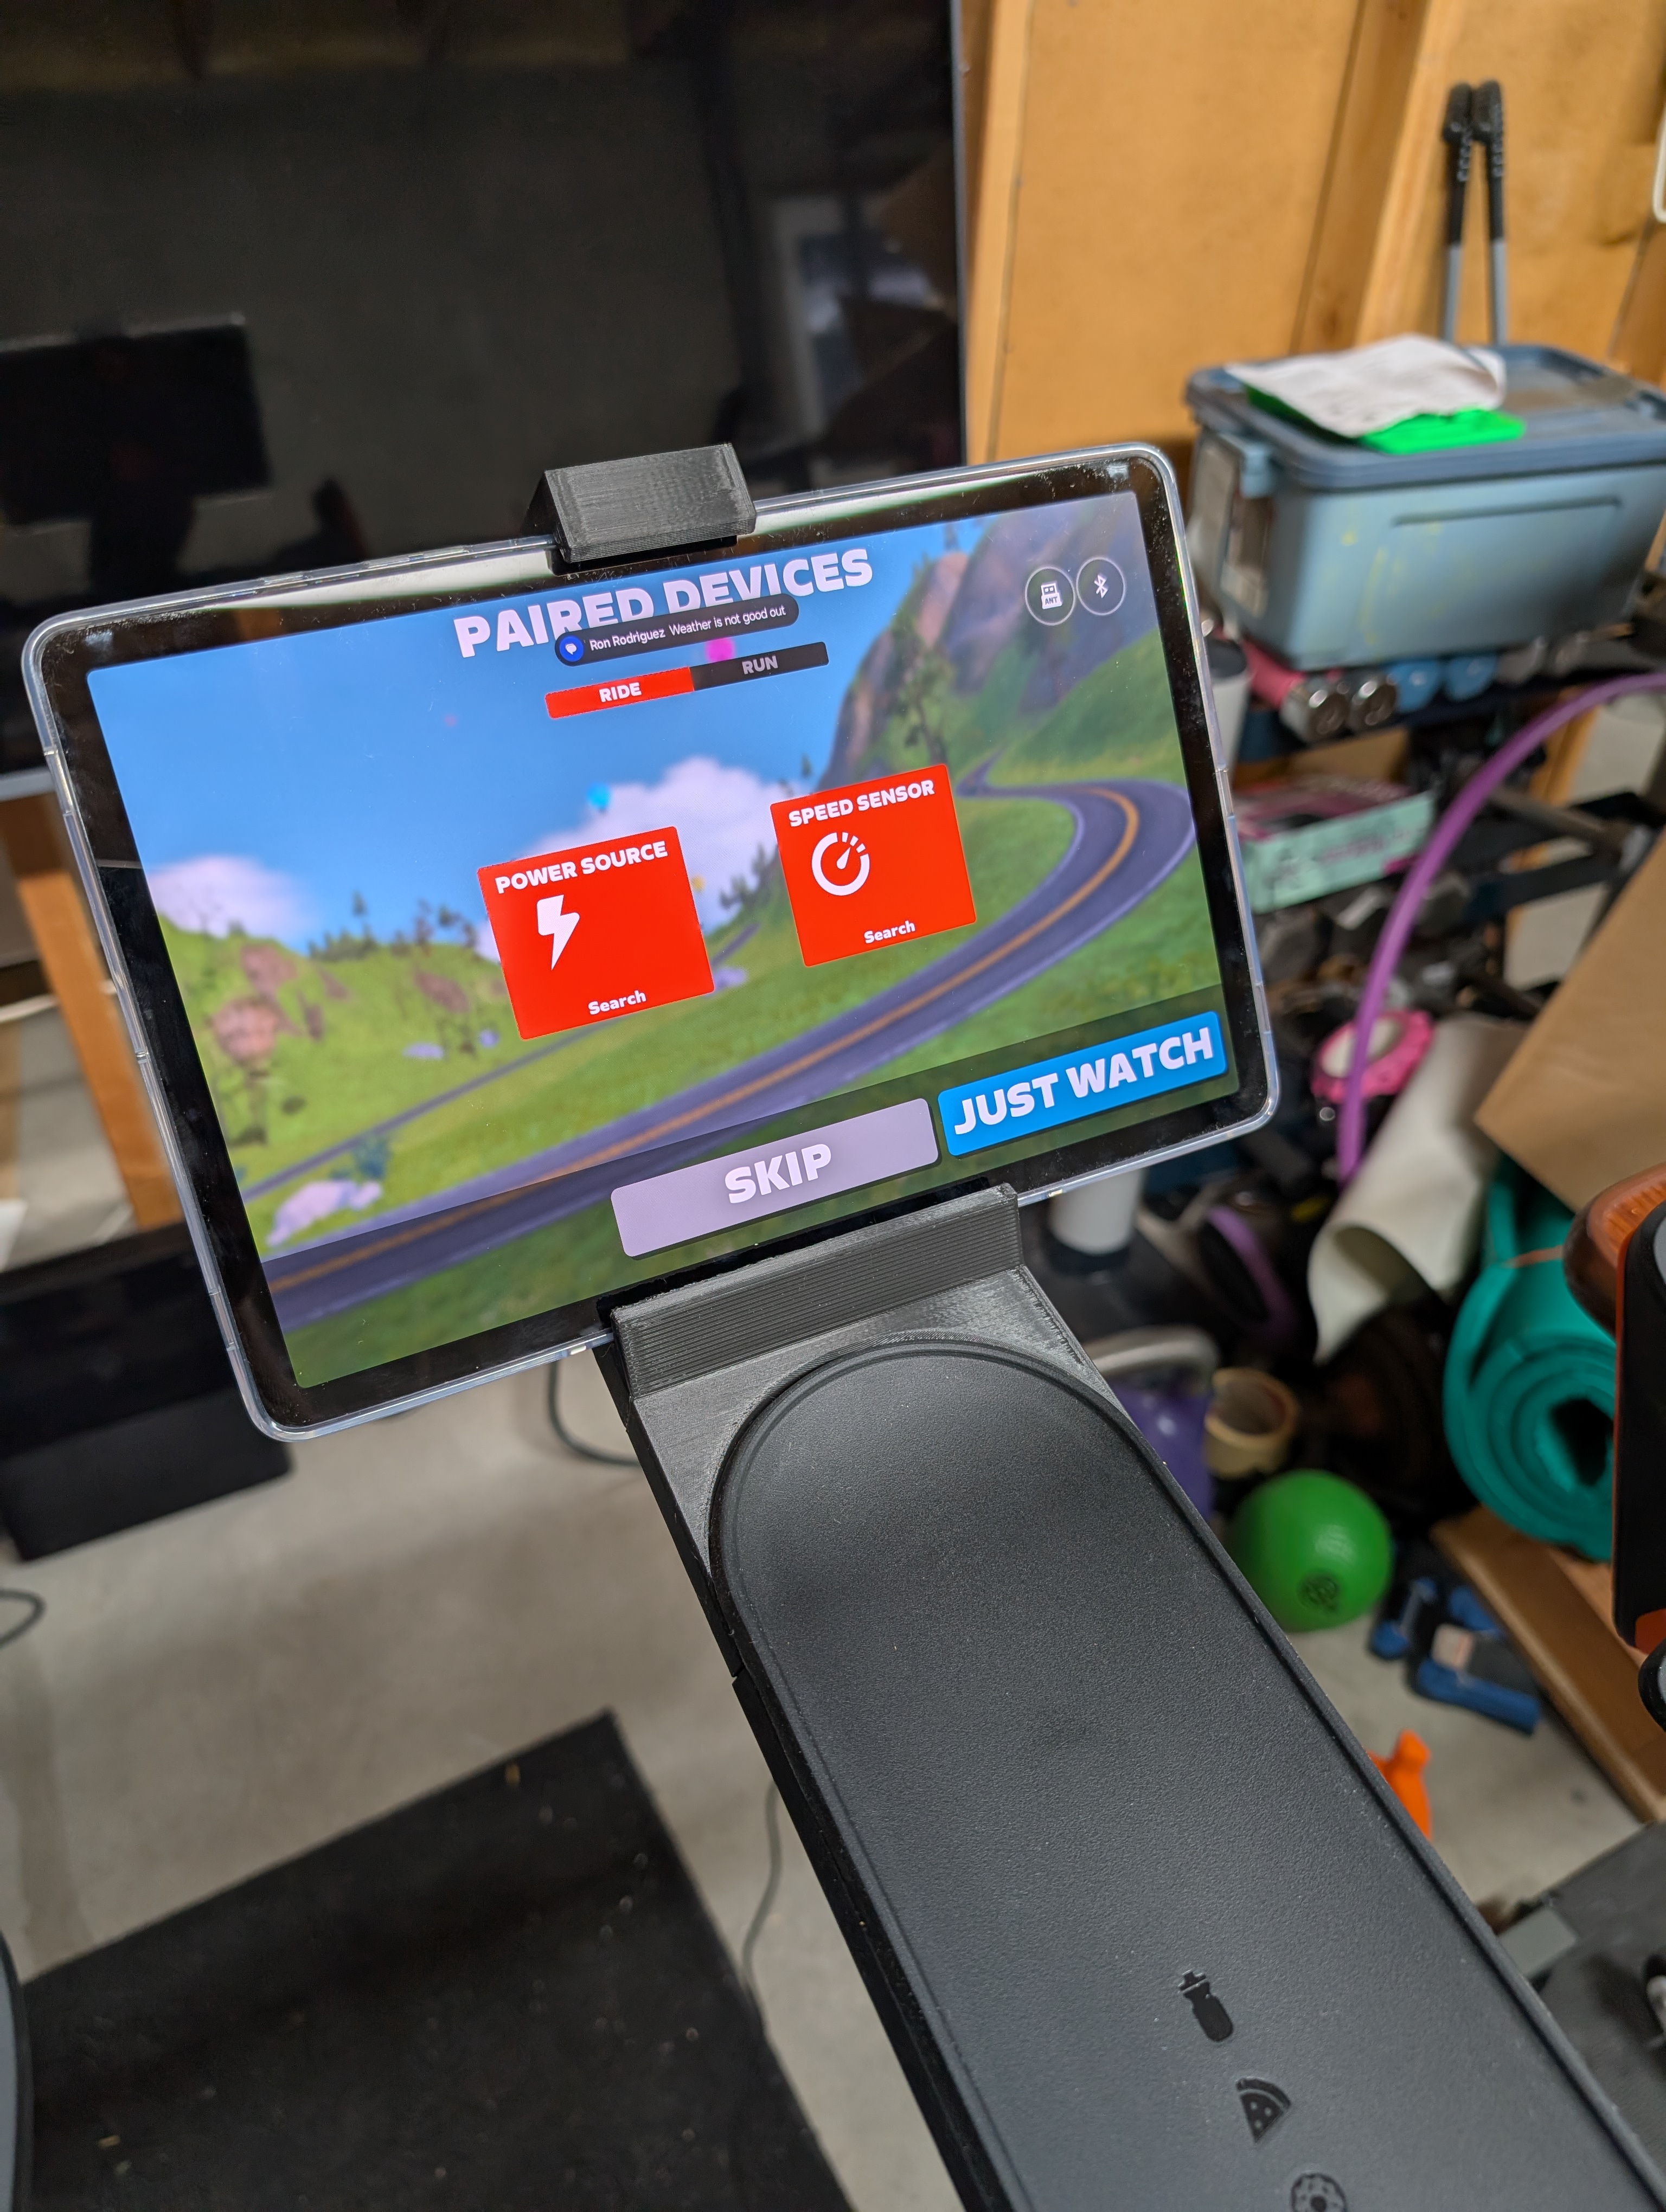
I've released a newer version that is better looking, requires no additional hardware, and is more secure. Only downside is it uses more filament. It can be found here:
https://www.printables.com/model/1160468-tablet-holder-for-zwift-ride
Fit:
This model will fit tablets that are up to 0.5in/12mm thick. Minimum height is 5.5in/140mm tall. The tablet shown in my photos is a Galaxy Tab S9.
Required Print Settings:
- 6 Walls (Gives more meat for the Thread Tapping Screws to grab onto)
- Tree supports, build plate only
Recommended Print Settings and Material:
- 4 top and bottom shell layers
- 15% or more infill, cubic
- As an indoor application with little static and dynamic load, about any rigid material will work
Supports and Orientation:
The models should be oriented correctly when you load them in your slicer. If not see the image below for optimal orientation and support locations.
Parts List and Hardware:
- 2x M4x10 Socket Head Cap Screws (SHCS)
- 2x M4 Nuts
- A short length of inner tube at least 6in/150mm long and 1in/25mm wide when cut in half
Installation:
First the existing stem cap needs to be removed. Use the 6mm allen key that comes with the frame to loosen the bolt underneath the cap and slide it off.
Remove the 6 Thread Tapping Screws from the cap. The cap will disassemble into three pieces. Set aside the plastic parts and two of the screws. Keep them in case you decide to replace the original cap.
Now you need to cut your inner tube to size. The length you need is dependent on the tablet you have and how stretchy your tube is. I suggest you start a little long then cut it down till it provides adequate hold.
To get the right shape you can lay the tube flat on a table then line the clamp up with one of the seams on the tube and trace it with a pen. Don't forget to mark the hole. Flip the clamp around and trace it at a place that will give you the lenght you need. Then cut it out.
Attach the inner tube to the holder using the M4 screws and nuts.
Reuse 4 of the Tread Tapping Screws to mount the tablet mount cap you printed to the metal piece that was in the frame.
Install the newly assembled tablet holder cap into the bike and reinstall the screw with the frame tool. Then replace the rubber cover.
Thats it. Ride on.
Tablet Mount for Zwift Ride
by blur_457 · original on Printables ↗
Sports & Outdoor / Indoor Sports
♥ 49⬇ 759🖨 1 prints
Print profiles
TabHolderTubeBase.stlDEFAULT
⏱ time and weight estimated after preparation · 1 material(s)
Made to order: we prepare this file when you order, which adds a few minutes before printing starts.
Prints on: A1 mini 0.4PLA
Order this print
TabHolderTubeTop.stl
⏱ time and weight estimated after preparation · 1 material(s)
Made to order: we prepare this file when you order, which adds a few minutes before printing starts.
Prints on: A1 mini 0.4PLA
Order this print
TabHolderTubeClamp.stl
⏱ time and weight estimated after preparation · 1 material(s)
Made to order: we prepare this file when you order, which adds a few minutes before printing starts.
Prints on: A1 mini 0.4PLA
Order this print