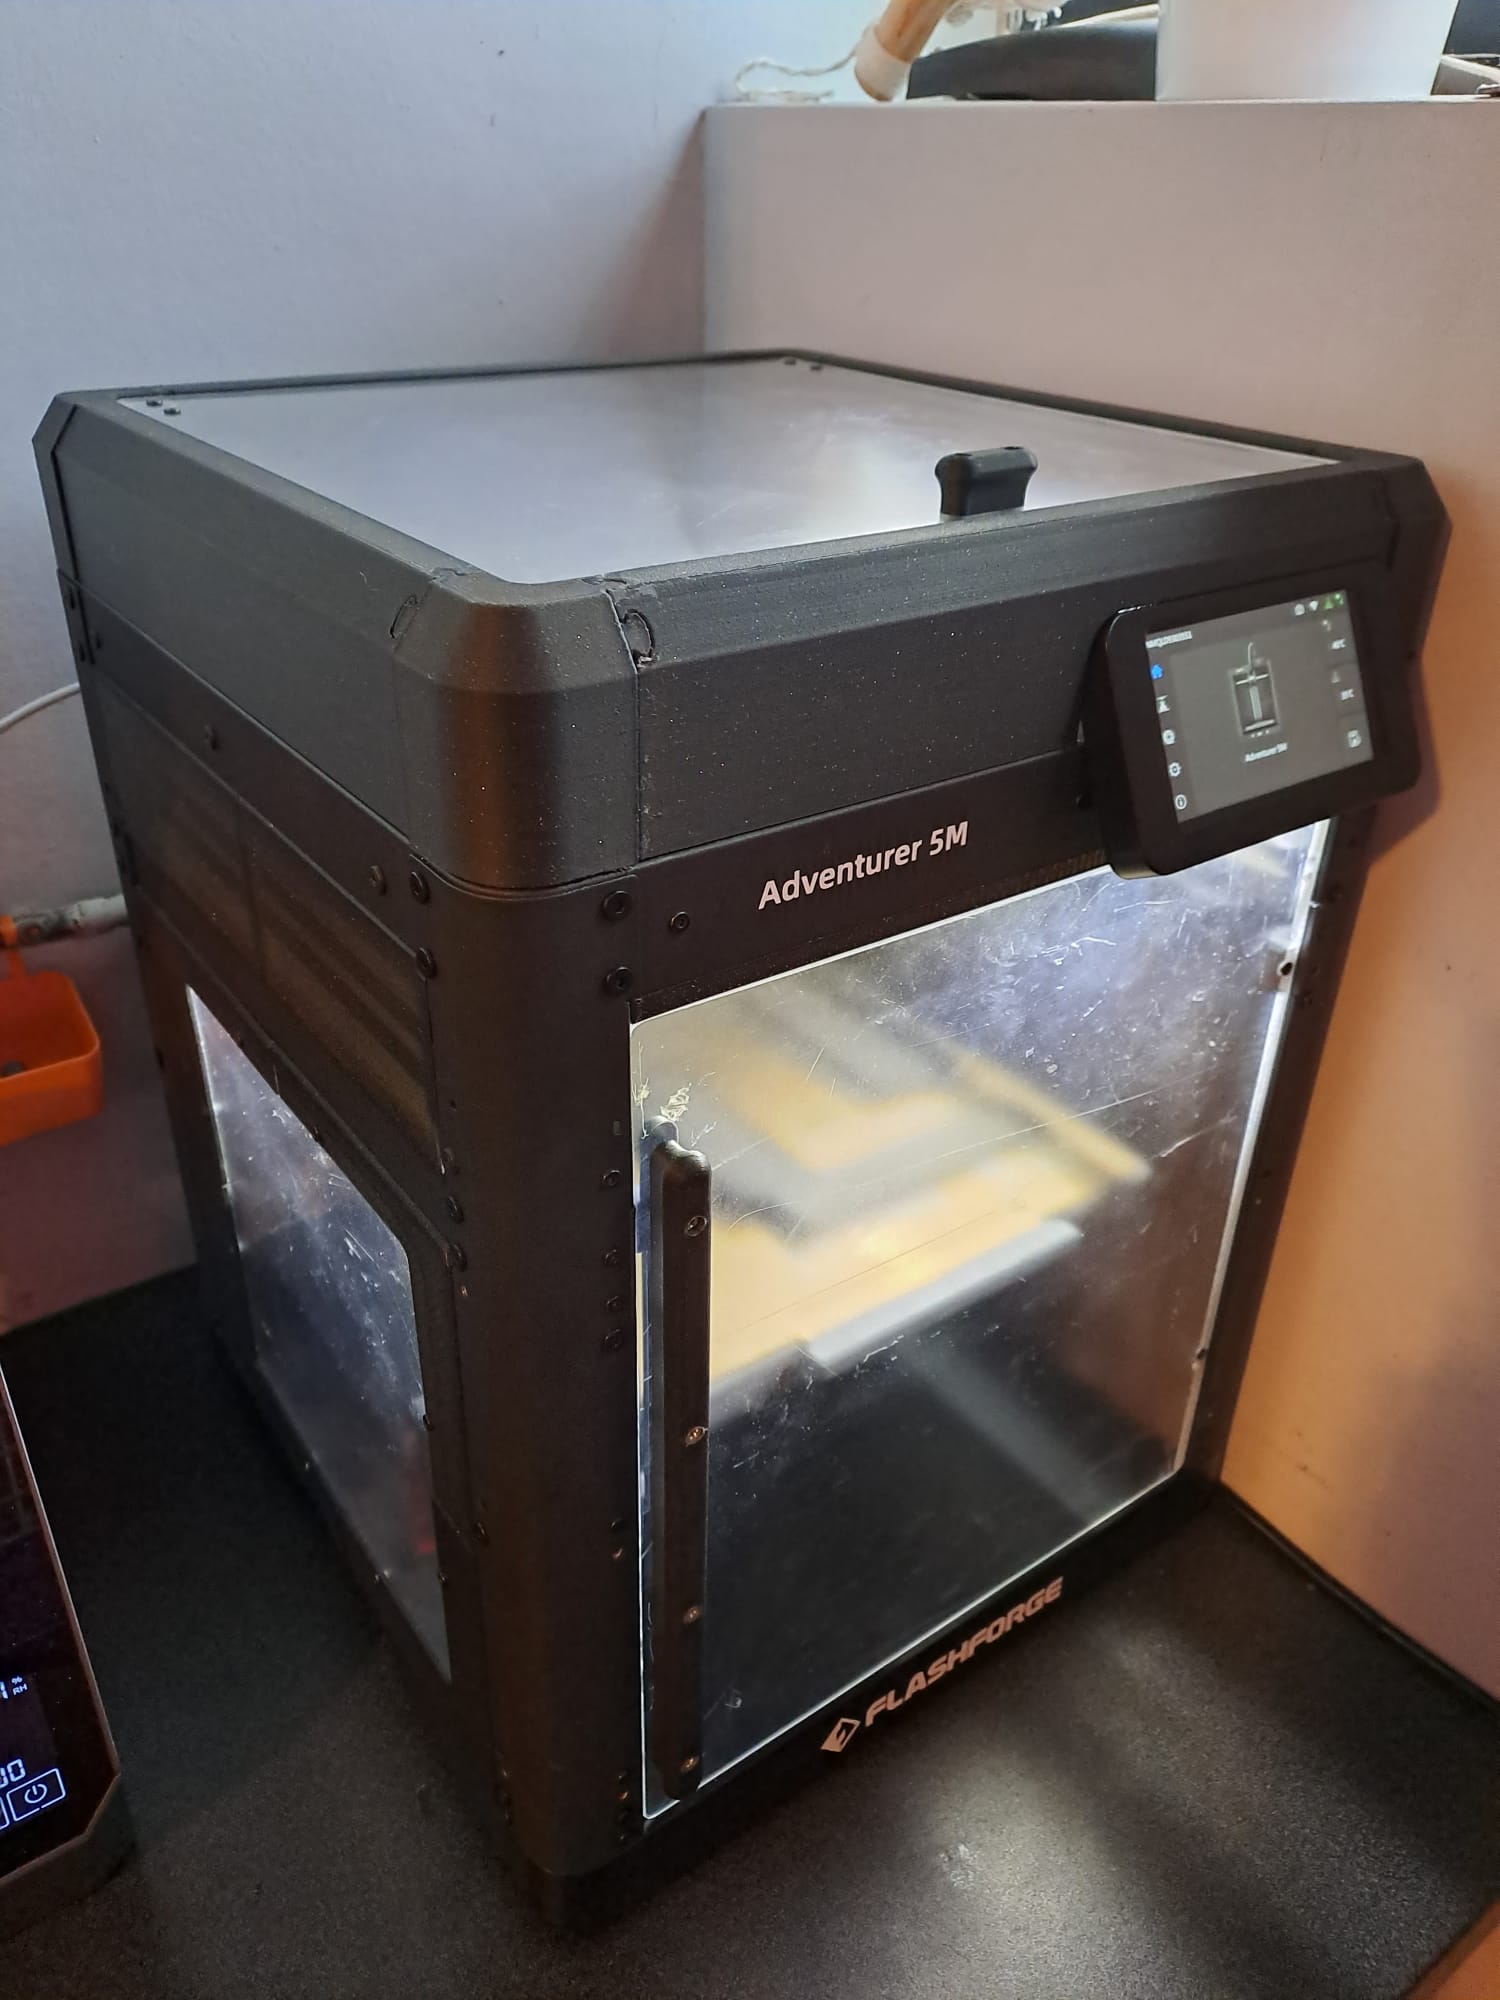
Complete enclosure as tiny as possible and with multiple opening options.
I didn't like the official enclosure as I think makes the printer very big and has some kind of a toy appearance.
- Original metal frame at sight (not bigger than de original frame).
- Front door can be left hand o right hand with hidden hinges (have to mirror some pieces).
- Upper window has multiple opening options also with hidden hinges.
- closed
- almost closed (just for ventilation)
- semi opened.
- fully opened.
- Also the complete top can be opened to easier access (also with hidden hinges).
- No need to be glued.
- Side panels can be windowed or solid.
- All pieces obviously can be printed in the 220x220 bed (some of them very very tight).
- Most of the cuts are almost invisible.
LIST OF REQUIREMENTS:
17 6x3mm MAGNETS (not all really needed)
7 8x3mm MAGNETS
50 M3 NUTS
8 M4 NUTS
6 M3x16mm SCREWS
6 M3x25mm SCREWS
21 M3x5mm SCREWS (I didn't have so used M3x10mm and sanded)
17 M3x10mm SCREWS
9 M4x10mm SCREWS
4 M5x25mm SCREWS
310x310x4mm Top door PLEXIGLASS (5mm rounded squares)
320x280x4mm main door PLEXIGLASS (rounded squares if you prefer)
220x220x2 side windows (2 units) PLEXIGLASS (10mm rounded squares). If you prefer not windowed side panels you can print these pieces.
Not all the magnets are really needed (even none of them if you want).
Not all the screws and nuts are needed but I preferred to cover all the frame holes.
The door handle is clearly overengineered but I like the feel of two magnets trying to stick together without being in touch.
As I preferred all the hinges to be hidden, all pieces fit very tight and even I had to sand the outer edge of the front door in some places to overpass the screws heads when opening.
Is just a question of aesthetics, but I prefer hidden hinges, although it makes every thing a bit more difficult…..
In the next days I'll try to upload printing instructions about supports and pieces orientation for best results. Some of the pieces fit very very tight in the printer bed (but of course all of them can be printed with the adventurer 5M)
I will also try to upload some kind of tools for drilling in the right place the plexiglass doors and windows
Hope you enjoy it and feel free for any suggestion.
P.D.
Added a thinner upper right side panel, in case the carriage hits the original one (reported on some units).
Also added alternative front-right corner with enough space for the USB port.
Flashforge Adventurer 5M enclosure
by ffontana · original on Printables ↗
3D Printers / Other Printer Parts & Upgrades
♥ 278⬇ 1.7k🖨 3 prints
Print profiles
AD5M enclosure by ffontana.3mfDEFAULT
⏱ time and weight estimated after preparation · 1 material(s)
Made to order: we prepare this file when you order, which adds a few minutes before printing starts.
Prints on: A1 mini 0.4PLA
Order this print
upper right side panel.stl
⏱ time and weight estimated after preparation · 1 material(s)
Made to order: we prepare this file when you order, which adds a few minutes before printing starts.
Prints on: A1 mini 0.4PLA
Order this print
front right corner with USB cut-out.stl
⏱ time and weight estimated after preparation · 1 material(s)
Made to order: we prepare this file when you order, which adds a few minutes before printing starts.
Prints on: A1 mini 0.4PLA
Order this print