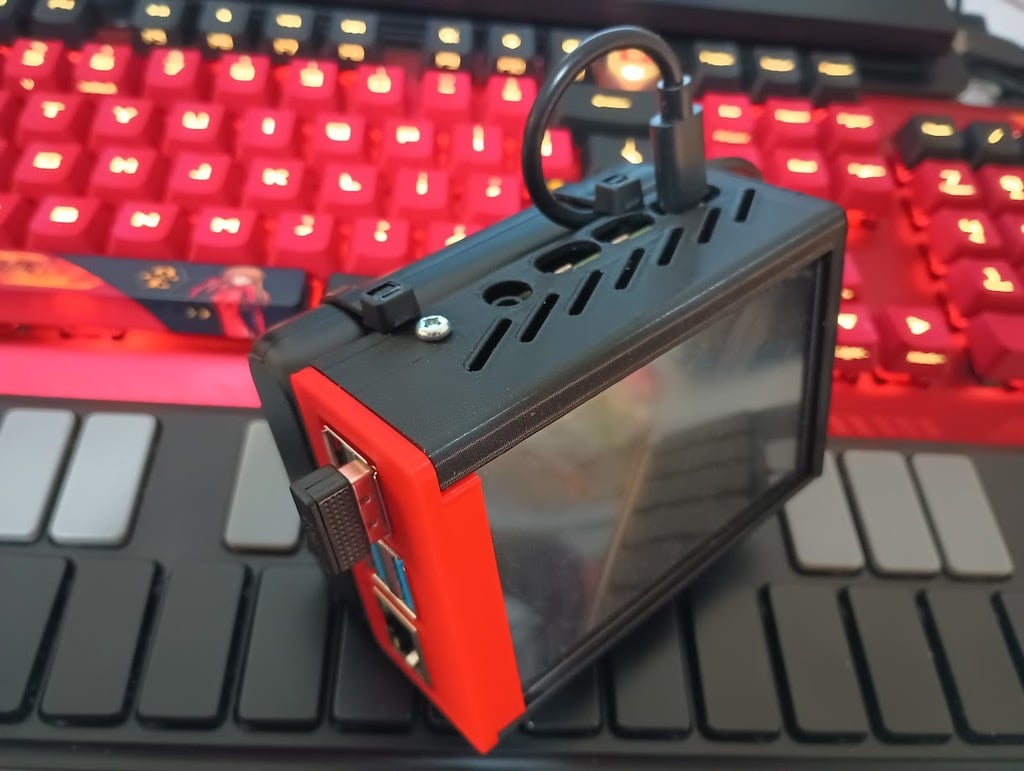
Case for the Raspberry Pi 4 with a 3.5" TFT display module. Enlarged holes around micro HDMI ports to facilitate cables with larger ends, adjusted positioning of port holes, and added a view slot so the PWR and ACT LEDs can be easily seen. Added airflow vents to help with cooling. The screen is raised slightly to accommodate the cooler I used (https://www.pishop.ca/product/dedicated-all-in-one-aluminum-cooler-for-raspberry-pi-4b-pwm-with-fan-adapter/).
This case holds the display slightly further from the Pi than where it would normally sit. This means that the screen's female headers don't push all the way down onto the Pi's GPIO pins, and about 1-2mm of the pins are left exposed. This means it may be possible to fit a shim PCB underneath to add connections for fan power, though I haven't tried it.
I used a display with fan power connections on its underside, and left the fan PWM control disconnected. It was a tight fit - the wires are short, and it was difficult to route them so that they wouldn't risk touching the fan during operation. If you decide to go the active cooling route, be aware that the case is a very snug fit, and there is no space to run wires underneath the Pi to solder onto the GPIO header from beneath.
The front piece of the case is held on using two 6mm M3 screws and two M3 nuts.
Four discreet holes in the case allow zip ties to be fed through along the bottom, making it easy to attach a power bank underneath the Pi for portable use. Link to the power bank I used, which has approximately the same footprint as the case: https://www.amazon.ca/dp/B07L933SN5. If you use a different one, make sure it's rated for 5V 3A output.
Some form of cooling is probably a good idea here. The Pi 4 tends to run hot, and even with the added vents, it'll get pretty warm under load without added cooling.
Print Settings
Printer Brand: Creality
Printer: Ender 2 Pro
Rafts: No
Supports: No
Resolution: 0.25mm
Infill: 50%
Filament: PLA
Notes: The nuts are a bit of a tight fit, but they need to fit snugly so they don't fall out while you're closing the case. f3d files have been provided along with the STLs to facilitate easy modification of the design (they're a bit messy though, sorry about that).
Post-Printing
Assembly instructions
- Attach heat sinks/cooling to the Pi
- Push the two m3 nuts into their slots on either side of the front cover. If they don't fit securely or push in all the way, you can try just putting the screws in and tightening the nuts into their slots. Once the nuts are set in place, remove the screws.
- Put the front cover onto the Pi. It'll be a tight fit, and you may need to bend the front cover's arms a little to get it to fit around the USB and Ethernet ports. When it's on, the fronts of the USB and ethernet ports should sit flush with the front of the cover, and the nuts and the protruding parts of the arms should be behind the ports.
- Put the display module on the Pi. Don't push it down all the way onto the GPIO header, leave 1-2mm of space. This case deliberately holds the screen slightly higher up than normal, to accommodate the cooling fan without it hitting the display module's underside.
- Slide the Pi + display module and front cover into the case. The Pi should be pushed all the way to the back, until there's no gap between the case and the front cover. It's a snug fit, so make sure everything is lined up properly - the board and display fit into grooves on either side of the case, the microSD card protrudes into a slot at the back of the case, and the Pi and screen should push right up against the back of the case. If a fan wire gets in between the pi and the back of the case, it won't go in all the way, so make sure the wires are tucked away.
- Use two 6mm m3 screws to secure the front cover to the case.
- If you are going to zip tie a power bank to the Pi, feed zip ties through the two pairs of rectangular slots on the case's bottom edge. Depending on the power bank you use (and how long your zip ties are), you will probably need to chain two zip ties together to fit all the way around the power bank.
Category: Computer
Raspberry Pi 4 case with 3.5" touchscreen
by robots914 · original on Printables ↗
Gadgets / Computers
♥ 30⬇ 800🖨 3 prints
Print profiles
rpi4_case_raised_screen_ziptie_holes.stlDEFAULT
⏱ time and weight estimated after preparation · 1 material(s)
Made to order: we prepare this file when you order, which adds a few minutes before printing starts.
Prints on: A1 mini 0.4PLA
Order this print
cover_v3_raised_screen_updated_adjusted_nut_holders.stl
⏱ time and weight estimated after preparation · 1 material(s)
Made to order: we prepare this file when you order, which adds a few minutes before printing starts.
Prints on: A1 mini 0.4PLA
Order this print