Motivation
The xTool RA2 rotary is a great accessory, but it can be challenging to square the workpiece up to the RA2 rotation axis.
Solution
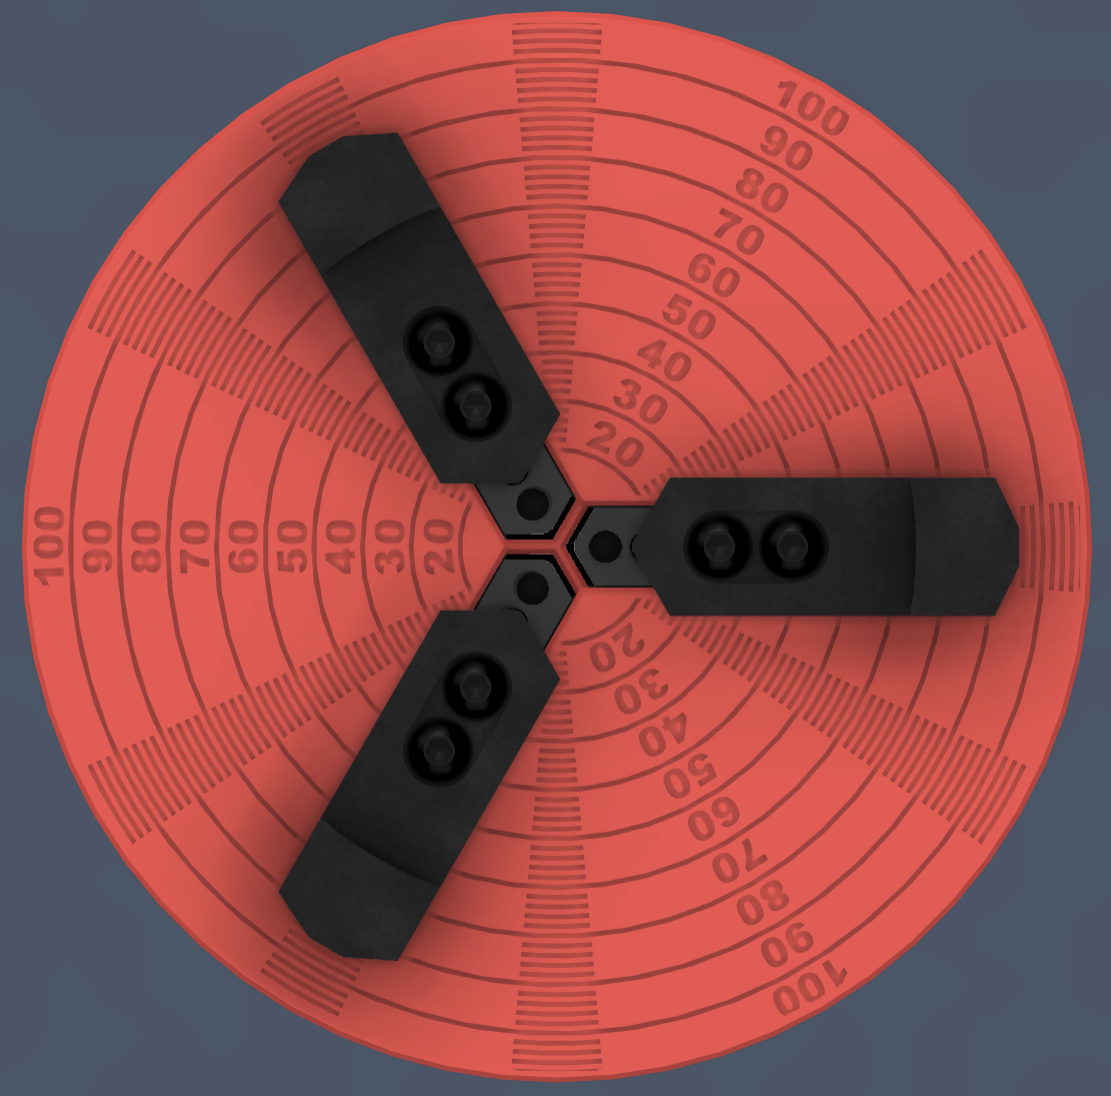
Design and print a fence to achieve the following objectives:
Allow workpiece to be held square to the RA2 rotation axis while tightening the chuck jaws
Fully parametric providing customization of all dimensions (e.g. diameter, thickness, etc.)
Ruler indices to take accurate diameter measurements even after the workpiece is mounted to the chuck
(Optional) Spacer to allow the fence to sit completely flush to the underside of mounted jaws without unnecessarily printing the entire fence at the full thickness.
With the default settings, you will lose ~3 mm of available minimum diameter since the slides will not be able to fully close
The fence works fine without this spacer if you press the workpiece evenly against the fence while tightening the chuck
Customization
The Fusion file is included. In the process of designing this and my Custom Chuck Jaws, I also reverse engineered the chuck mechanism. That design is included in the Fusion files along with the bundled Chuck Jaw and screw assemblies (.f3z).
You can customize the parameters (DESIGN | SOLID | MODIFY | Change Parameters) to suit your workpiece and needs. The most common parameters you should need are Favorited. The non-favorited parameters should work as well but may require more tinkering to repair broken downstream features. Here are a few notes to clarify some of the favorited parameters:
I prototyped a honeycomb structure to save filament but found that made the fence too flexible (at least at 2 mm thickness). That component is suppressed but I left it available for further modifications.
I designed and prototyped on a Prusa MK4.
Let me know (Messenger | Printables.com) if you have any questions.
Printing
See the attached .3mf for my settings. I recommend printing with 100% perimeters.
(New in v1.1!) Lasering
I was asked if it was possible to make the backstop fence using a laser. It seems only fitting, so I added projected sketches to the Fusion file that should allow for export even after customization by right clicking on the respective sketches and selecting ‘Save as DXF’. The geometry in these sketches is optimized for laser processes and you can find them using the LaserProcessSketches selection set. I've included those five .dxf's for the default 100 mm target diameter - four for the backstop fence and one for the optional spacer. Since I have not personally cut these files and your laser kerf may vary, please pay attention to these notes:
There is only 6 mm (~15/64") from the face of the rotary chuck body and the front surface of the jaw slides. If the thickness of your material (or combined thickness if using the spacer) exceeds 6 mm, you will have problems getting your jaws to slide smoothly over the backstop fence and mate properly to the jaw slide.
For the backstop fence cut sketch, I used Fusion to create three offsets for each of two paths at 0.1 mm steps so that you can ungroup and delete a total of six paths leaving only the two paths which should provide the most accurate cut based on the half kerf of your laser. Keep in mind the direction of the waste side of the cut - the inner geometry that will key around the jaw slides is offset inward while the outer circle is offset outward.
For any sketch with geometry that does not allow for it to be concentric when aligning to centers, I added a large circle that should be deleted after alignment but before processing. This should make sense in XCS but let me know if you have questions.
I welcome feedback so that I can make any necessary adjustments to the Fusion and .dxf files.
Installation
The default tolerance is 0.2 mm. For me, this was exactly right, but does require a little flexing of the fence to install it.
Shameless Plug
If this model helped you solve a problem, save some time, or in any way made your life a little easier then please consider clicking the Like button and posting your Makes! If it fell short after clicking on the title of the model, please let me know (Messenger | Printables.com). Either way, Thank you!
Related
Complete exhaust configuration
Adapters - Convert machine exhausts to ducting diameter and/or MagDuct
xTool P2 Exhaust Duct Adapter (configured as 4 in)
MagDuct xTool F2 Ultra UV Slip Adapter
MagDuct CORE One Exhaust Adapter and Gasket
Ducting
xTool pipe (included w/ xTool IF2 2.0 and xTool F2 Ultra UV)
xTool 72.5 mm ducting (included w/ xTool P2)
Couplers - Convert flexible ducting or pipe/rigid ducting to MagDuct
Connectors - Convert ducting for attachment to inline fan or external surface
Duct Expander (configured as 4 to 6 in expander)
Ducting to Window Insert Connector (attached to a piece of 1/4" acrylic inserted in the channels of my double hung windows which allows for quick installation/uninstallation (configured as 148.0 mm (6") and 72.5 mm exhaust port)
Inline Exhaust Fans
Mounts - Securely mount MagDuct components to a surface using a third-party mount
Accessories
MagDuct Fume Extraction Nozzle and Screen - Direct smoke and fumes (e.g., soldering) into exhaust ducting
MagDuct Generic Accessories - Control airflow volume and chamber temperature (e.g., enclosed 3D printers)
xTool Accessories
Parametric xTool RA2 Rotary Chuck and Backstop Fence
by Gizmo Goody · original on Printables ↗
Hobby & Makers / Tools
♥ 92⬇ 929🖨 3 prints
Print profiles
RA2RotaryChuckBackstopFenceSpacer25_v1_0.stlDEFAULT
⏱ time and weight estimated after preparation · 1 material(s)
Made to order: we prepare this file when you order, which adds a few minutes before printing starts.
Prints on: A1 mini 0.4PLA
Order this print
RA2RotaryChuckBackstopFenceSolid_v1_0.stl
⏱ time and weight estimated after preparation · 1 material(s)
Made to order: we prepare this file when you order, which adds a few minutes before printing starts.
Prints on: A1 mini 0.4PLA
Order this print
RA2RotaryChuckBackstopFence_v1_0.3mf
⏱ time and weight estimated after preparation · 1 material(s)
Made to order: we prepare this file when you order, which adds a few minutes before printing starts.
Prints on: A1 mini 0.4PLA
Order this print