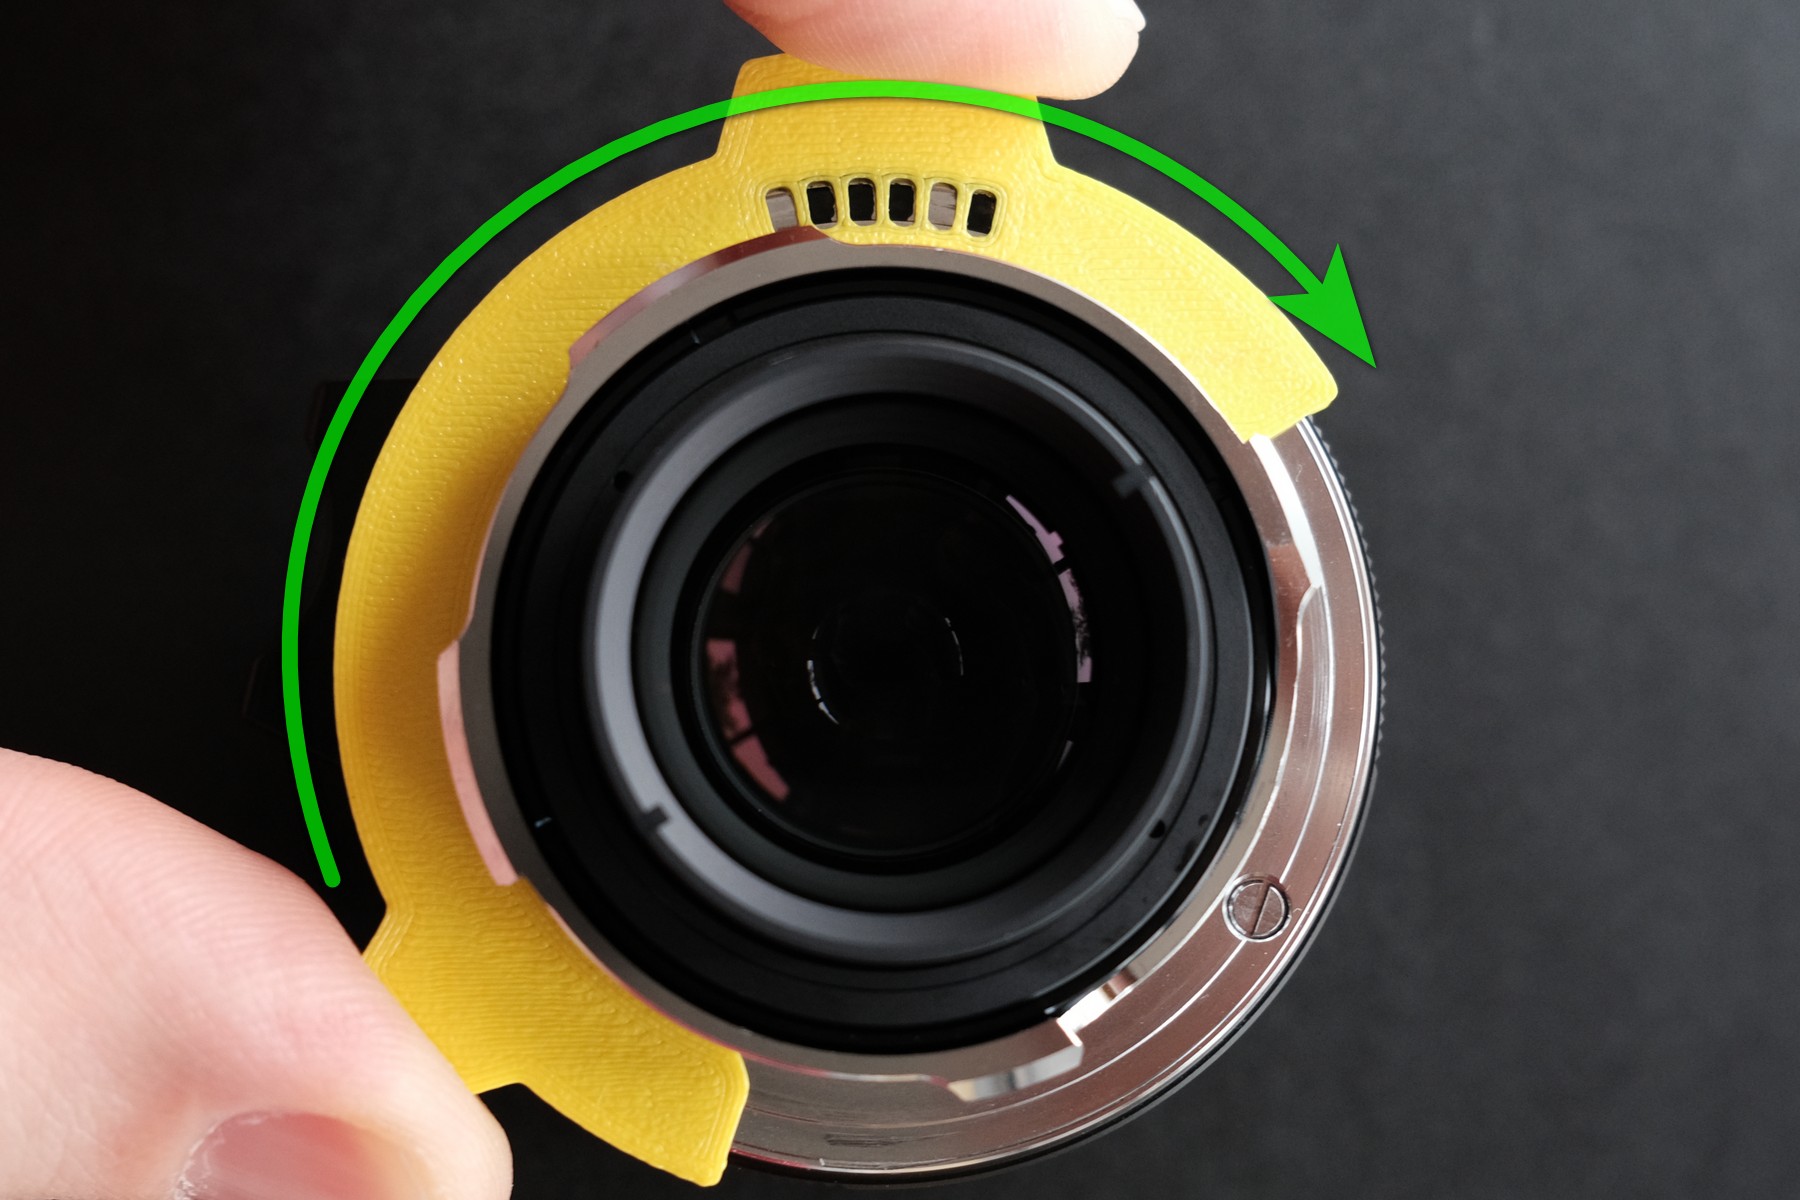
Precise template for 6bit coding of Leica M mount lenses.
It's inspired by existing "Leica M Coding Tool" but that one didn't work for me, so I've used caliper to measure Leica M10 mount and designed more precise model from scratch.
NOTE: For accurate printing of 6bit socket holes you need to set slower and more precise print settings and also count on filament expansion. Please check details in Print Settings section.
Versions:
- V2C - slightly more narrow lock pin, should work better on Voigtlander lenses
- V2C_II - a bit wider lock pin, for lenses with wider lock socket comparing to Voigtlander lenses
- V2D - added hole near 6bits, when set 3 wall lines and 0.3mm line width - print starts from the hole and moving to 6bit sockets, providing more clean sockets print
How to use:
- 6bit Lens Coding Guide on devonbuy
- Extended list of Leica 6bit codes (compiled by fredmiranda forum member Thury)
I tested printed tool precision (V2C) with following Voigtlander lenses on Leica M10 body (with codes listed) using Mr.Metal Color black hobby paint:
- Voigtlander 28mm F2.8 II [00X0XX] - Summaron-M 28mm f/5.6 (re)
- Voigtlander 35mm F2 Ultron [0XXXX0] - Summicron-M 35mm f/2 ASPH (II)
- Voigtlander 35mm F1.5 Nokton [0XXX0X] - Summilux-M 35mm f/1.4 ASPH
- Voigtlander 35mm F1.4 II S.C [00XX00] - Summilux-M 35mm f/1.4 steel rim
- Voigtlander 50mm F1 Nokton [0XXXXX] - Noctilux-M 50mm f/1
- Voigtlander 90mm F2.8 Apo [X00XX0] - Elmarit-M 90mm f/2.8
One way for checking print precision if you don't have 6bit coded Leica lens, but have Leica 14397 body cap. It should be snap fit, then take centered picture of 6bit template mounted on Leica body cap. The straight line above letters should merge with 6bit template edge (see below), if line is tilted up/down by 1-2mm - it is indicating print precision issue. Of course this method is not perfect, but at least guiding a bit.
Second hint of more precise using of this 6bit template on lens while coding - the petals of tool are not cosmetic, they serve for precise template positioning and need to be grabbed with fingers like pictured. Use left thumb to secure lock pin position, then gently press with index finger on wider petal in CW radial direction to make sure 6bit template inner edge connects to lens mount cylinder.
Print Settings
Printer Brand:
ELEGOO
Printer:
ELEGOO NEPTUNE 3 Pro
Rafts:
No
Supports:
No
Resolution:
0.2
Infill:
15%
Filament: ELEGOO PLA Yellow
Notes:
If printing with default 0.4 nozzle, set:
Print Speed: 30 mm/s
Wall count: 3
Wall Width: 0.3mm
Inifill Wall Width: 0.5mm
Initial Layer Line Width: 90% (to address heat expansion)
The model starts printing from the 6bit socket with these settings, so watch if adhesion works well, or stop and recalibrate if sockets are not printing well.
Category: Camera
Leica M mount 6bit lens coding template
by yukosteel · original on Printables ↗
Gadgets / Photo & Video
♥ 34⬇ 1.1k🖨 0 prints
Print profiles
Leica_6bit_V2C_II.stlDEFAULT
⏱ time and weight estimated after preparation · 1 material(s)
Made to order: we prepare this file when you order, which adds a few minutes before printing starts.
Prints on: A1 mini 0.4PLA
Order this print
Leica_6bit_V2C.stl
⏱ time and weight estimated after preparation · 1 material(s)
Made to order: we prepare this file when you order, which adds a few minutes before printing starts.
Prints on: A1 mini 0.4PLA
Order this print
Leica_6bit_V2D.stl
⏱ time and weight estimated after preparation · 1 material(s)
Made to order: we prepare this file when you order, which adds a few minutes before printing starts.
Prints on: A1 mini 0.4PLA
Order this print