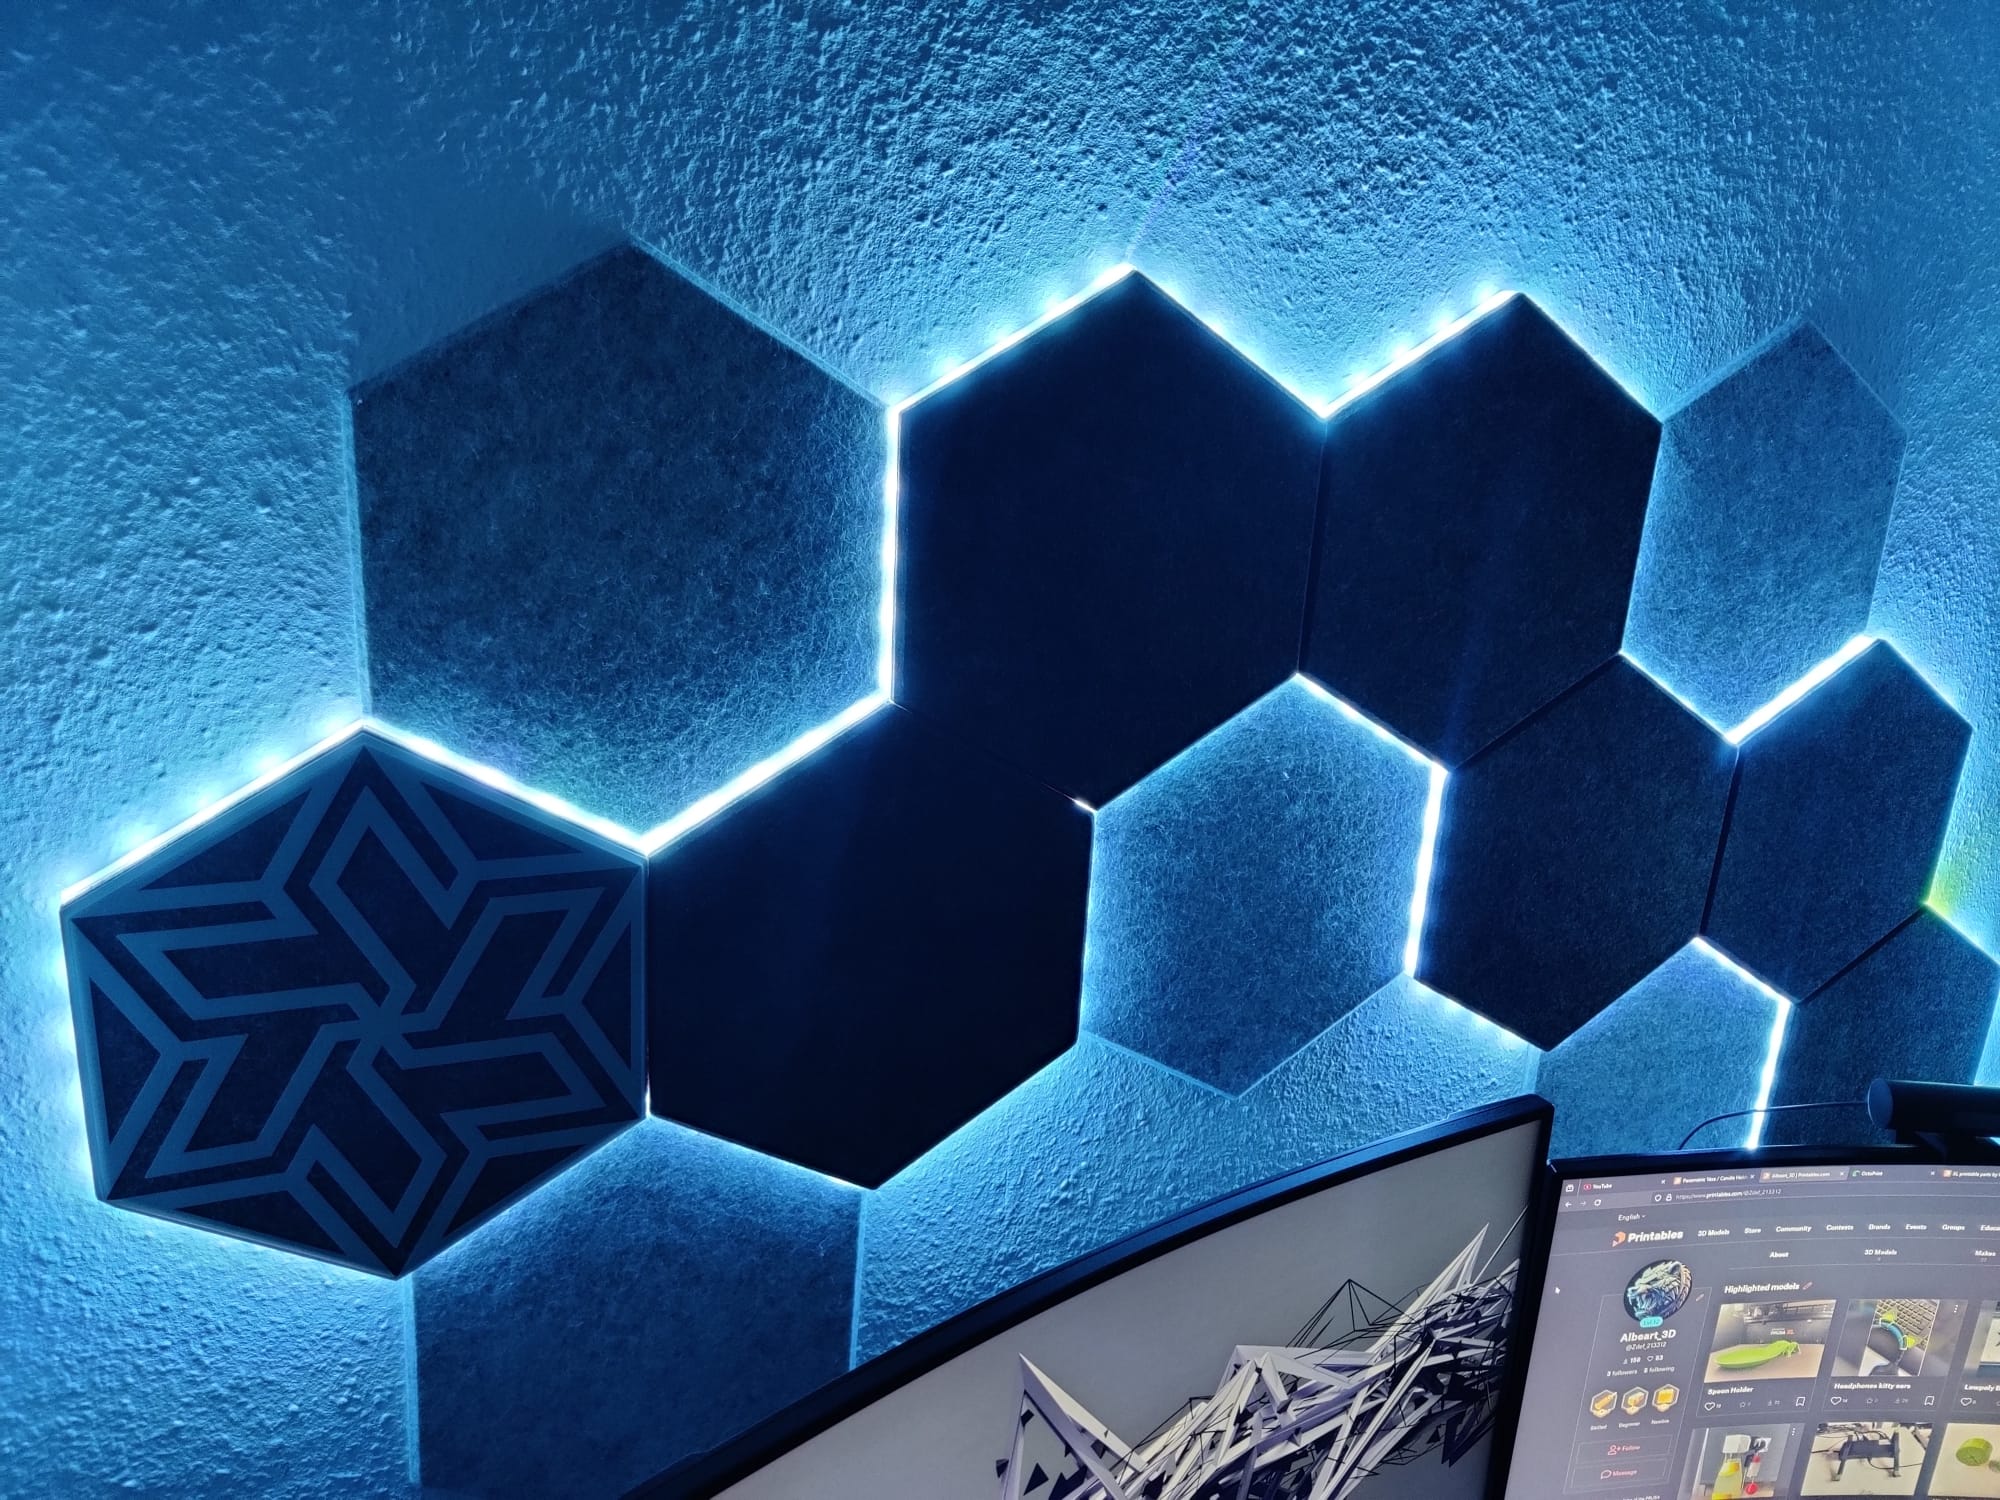
Modular LED channels for hexagonal acoustic (or 3D printed) panels.
The channels are designed to be printed with 0,4mm nozzle.
Assembly material:
- Hexagonal Acoustic Panels 30cm x 26cm
- 3D printed Channels
- LED Strip:
- Minimum 60 LED/meter ( on the pictures I used an old 30 LED/meter)
- Maximum Strip width: 10 mm
- Double side Tape
- Glue (optional)
Project Instructions:
1.Planning
Plan the path of the LED strip. Depending on the length on you LED strip, select where do you want to have the light installed. For each side of the (30x26 cm) hexagon calculate 15 cm of LED strip.
LED channels are divided in two parts that snap together, for easier print. The channels have slide in connections on both sides, that allow the to connect with other channels within the same hexagon or with connections for adjacent panels.
When the channels needs to connect to a channel from another hexagon, a connection it is needed.
Here there is an example of how I planned my 4,5m long LED strip distribution:
Amount of sides: 4500mm of LED strip / 150mm of hexagon side = 30 Sides
Knowing I can Illuminate a maximum of 30 sides I planned my possible geometry.
In orange, red and yellow I marked the sides I would use and in green I marked where I would need a connection, so I could plan how many I need.
2.Printing
- Channels: A top and a bottom side are needed for each side
- Connections: A connection is needed for connecting different hexagons
- Light Diffuser: I added 0.2 and 0.4 mm thigh diffusers for printing. This does not need to be printed if you have a COB LED strip ( I would still recommend to print them for aesthetics) or if you want to add your own diffuser panel. There are 2mm thick slots on the panels.
- Supports: rectangular prism are available to provide supports in the back areas where there are no channels and the hexagon is not connected to the wall.
- Geometry Wall art Sleeves: There are 4 sleeves available to decorate your acoustic panels and a fifth one empty so you can add in PrusaSlicer your own design.
3.Assembly
Once your parts are printed and you have all the needed material, it is time to assemble!
Start by connecting the Top and Bottom part of the channels. here I recommend to use a bit of glue to ensure that they sty in place.
Then start to form the shape of your desired channel geometry. Here an example of mine:
Add double side tape on the channels to fix them to the acoustic panels. Example:
Attach the channels to the panels with the tape. Also add supports to the hexagons where there is no channel in the hexagons. See that I also recycled some failed parts as support:
Attach the strip at the back of the channel, with glue or double side tape:
Slide in the front slots the light diffusers:
Note: Diffusers are designed a bit longer to ensure total enclosure, do not be afraid of trimming some if needed.
Finally, Attach the channels and supports to the wall, with double side tape.
Extra: Print some sleeves and decorate your wall:
Empty Sleeve for adding your own designs
There is an empty sleeve, so you can easily add your own designs over the hexagonal panels.
How to:
Open the "Sleve_Pattern_0_emptycanva" on PrusaSlicer. Now there are two possible ways.
- SVG images: Right click on the model > Add part > Add part > SVG : Select you desired SVG design and make it fit in the hexagon. Remeber that it should touch the sides of the hexagon so it connects and it is stable.
2. Download an STL from Printables with a design you like. For example I downloaded this Mountain Range. Scale the STL , set z height to 0.2. Place the Stl in the hexagon, while touching the sides. Finally, select both STLs > Right click > Merge.
Enjoy!
Modular Led Channels for Hexagon Panels + Geometry Wall Art Sleeves
by Albeart3D · original on Printables ↗
Art & Design / Other Art & Designs
♥ 557⬇ 761🖨 1 prints
Print profiles
diffuser_thick.stl
⏱ time and weight estimated after preparation · 1 material(s)
Made to order: we prepare this file when you order, which adds a few minutes before printing starts.
Prints on: A1 mini 0.4PLA
Order this print
Hexagon_Platte.stl
⏱ time and weight estimated after preparation · 1 material(s)
Made to order: we prepare this file when you order, which adds a few minutes before printing starts.
Prints on: A1 mini 0.4PLA
Order this print
Led_channel_bottom.stl
⏱ time and weight estimated after preparation · 1 material(s)
Made to order: we prepare this file when you order, which adds a few minutes before printing starts.
Prints on: A1 mini 0.4PLA
Order this print
Diffusor_l.stl
⏱ time and weight estimated after preparation · 1 material(s)
Made to order: we prepare this file when you order, which adds a few minutes before printing starts.
Prints on: A1 mini 0.4PLA
Order this print
Sleve_Pattern_1.stl
⏱ time and weight estimated after preparation · 1 material(s)
Made to order: we prepare this file when you order, which adds a few minutes before printing starts.
Prints on: A1 mini 0.4PLA
Order this print
support.stl
⏱ time and weight estimated after preparation · 1 material(s)
Made to order: we prepare this file when you order, which adds a few minutes before printing starts.
Prints on: A1 mini 0.4PLA
Order this print
Sleve_Pattern_2.stl
⏱ time and weight estimated after preparation · 1 material(s)
Made to order: we prepare this file when you order, which adds a few minutes before printing starts.
Prints on: A1 mini 0.4PLA
Order this print
Sleve_Pattern_3.stl
⏱ time and weight estimated after preparation · 1 material(s)
Made to order: we prepare this file when you order, which adds a few minutes before printing starts.
Prints on: A1 mini 0.4PLA
Order this print
Sleve_Pattern_0_emptycanva.stl
⏱ time and weight estimated after preparation · 1 material(s)
Made to order: we prepare this file when you order, which adds a few minutes before printing starts.
Prints on: A1 mini 0.4PLA
Order this print
Led_channel_Top.stlDEFAULT
⏱ time and weight estimated after preparation · 1 material(s)
Made to order: we prepare this file when you order, which adds a few minutes before printing starts.
Prints on: A1 mini 0.4PLA
Order this print
Sleve_Pattern_4.stl
⏱ time and weight estimated after preparation · 1 material(s)
Made to order: we prepare this file when you order, which adds a few minutes before printing starts.
Prints on: A1 mini 0.4PLA
Order this print
Corner-connection.stl
⏱ time and weight estimated after preparation · 1 material(s)
Made to order: we prepare this file when you order, which adds a few minutes before printing starts.
Prints on: A1 mini 0.4PLA
Order this print