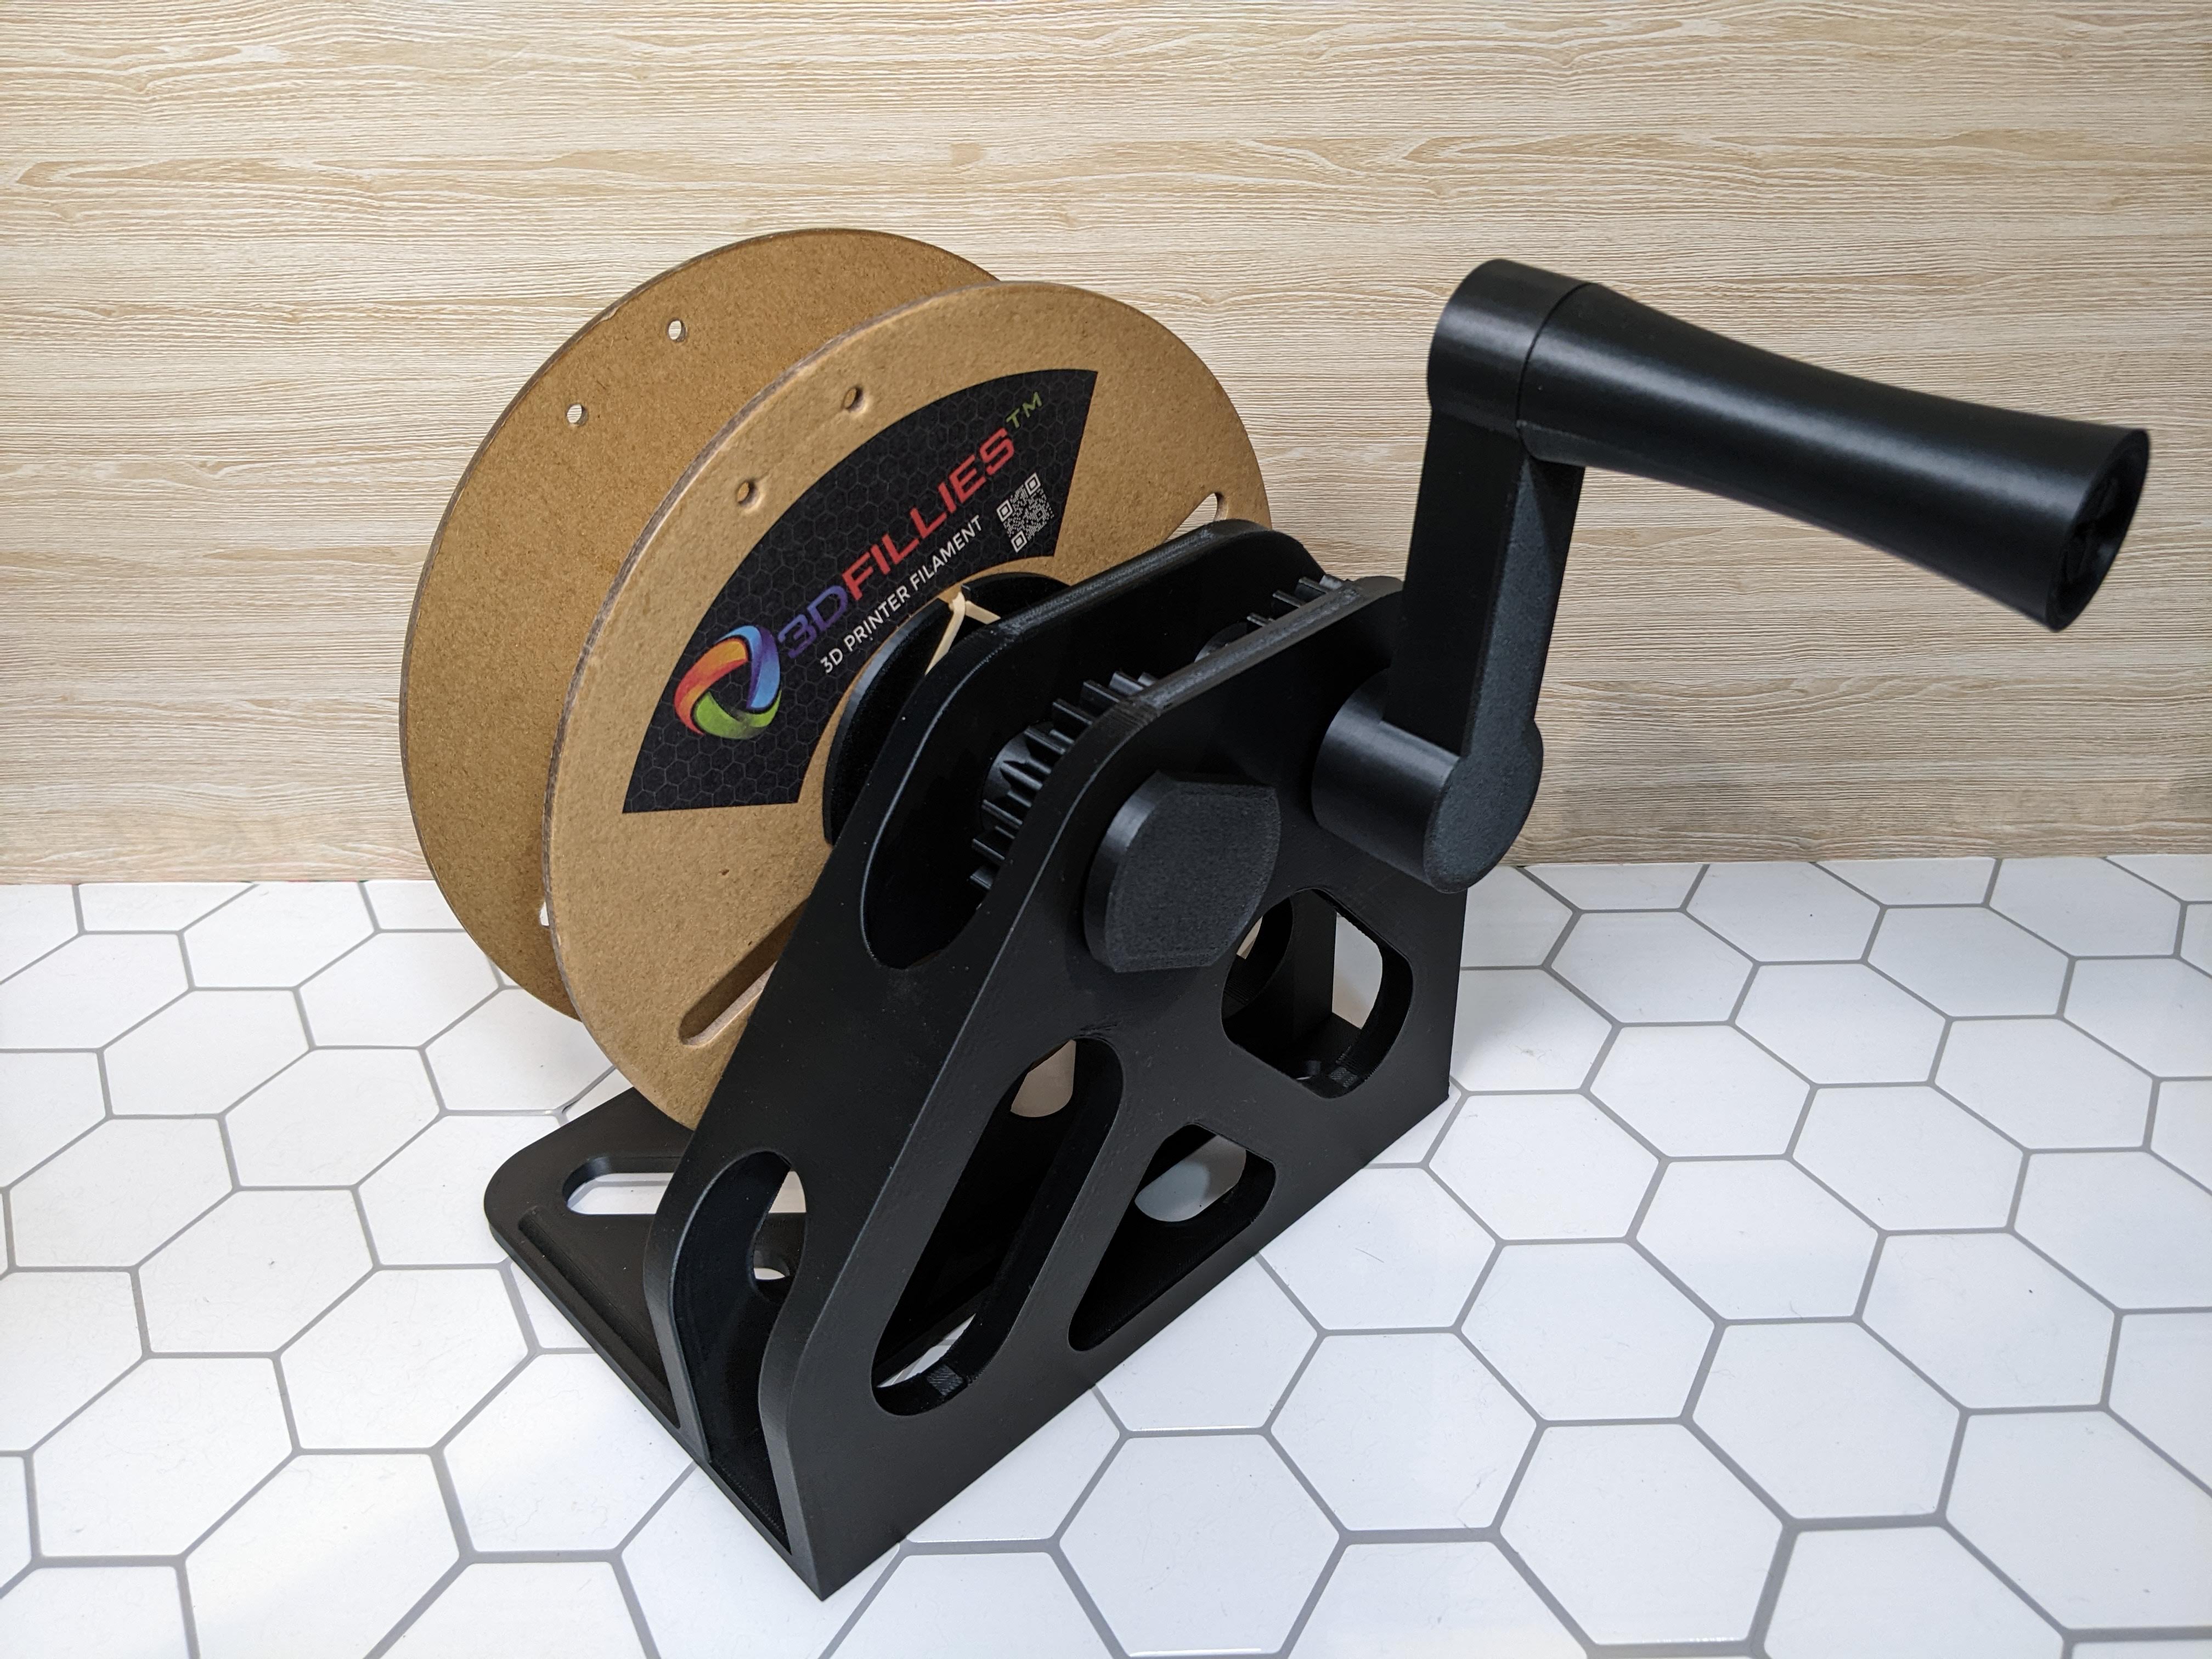
Back in Black! For no other reason than because I have more bulk black than white this time.
This is the second revision of my canter lever filament spool winder. You can find my first version here, along with the original description, which I will paraphrase here.
-I wanted a design that was simpler to load and unload, and have more flexibility in spool design. So I did what any unreasonable person would do and spent dozens of hours learning how to do something so that I could design something that saves me a few seconds to use compared to just going with any other current design!- *Insert clever meme*
In this new revision, I have touched on or redesigned every part.
Printing Notes:
All parts were printed in PLA.
Most parts do not need a lot of infill, but more walls/top/bottom layers are recommended. I did 5 walls and 6 top/bottom layers for most parts with 10% infill on .4mm. Exception would be the handle shaft parts, as they only need 2 bottom layers.
Flow and perimeter widths should be dialled in, as there are several examples of tight fitment that will impact your experience when assembling.
The frame is designed to be printed on either the bottom or back side. In most cases, printing from the bottom up is fine. The reason you may want to print on the back is to improve strength. As this is a canter lever design, the far wall would be levered up, which has the potential to delaminate the layer lines if there is too much force on it. However while this may be a consideration if you are going to load up a 3kg spool, it is likely not an issue for 1kg or less.
The holes for the shafts in the frame would benefit from some snug support material.
While I made each of the 50mm, 53mm, 56mm and 59mm diameter nuts available, you really only need to print which ever happens to fit your smallest spool hole. The same nut will work for larger diameter spools, as the wedge nut forces the spool to centre itself anyway.
The crank shaft and crank shaft handle have about 0.3mm of tolerance designed into it. If somehow this is too lose, a quick fix is simply to drill a hole into the crank shaft while the crank handle is inserted, and insert a length of filament through the hole. This would prevent the crank handle from backing out.
Assembly notes:
There are two parts to the shaft. Insert them together into the handle crank (notched side) and handle part (flat side) with one slightly ahead of the other. This allows room for the parts to flex as they hit sections of resistance. Once the first half snaps into the handle, the second half should snap in fairly smoothly (and if I may say, quite satisfyingly).
The crank handle now friction fits into the crank shaft. It should also be a lot stronger than the previous version (Mk1). The fitment will of course depend on your slicer settings
Suspend one of the gears in line with the rear hole, slide the crank shaft in, while aligning the key slots. Slide the crank handle into the shaft as depicted above.
Note: The screw on parts may be snug at first, so you may want to hand thread the spool nut/wedge nuts and endcap screw for the spool shaft to ensure there isn't too much resistance. Thread them firmly but carefully, as these parts are meant to be a little snug. Using the crank while braking in the nuts could cause it to snap. I have not done it, but it seems like something that might happen. If your cooling isn't crash hot… or cool... something, then you may want to slow down your prints on any threaded parts, as fitment will be affected if you have excessive curling.
Mount the gear and spool shaft in the front hole, and secure with the screw end cap.
Screw on your choice of spool nut.
When attaching the wedge nut, there should be a small amount of resistance. Tightening the wedge nut against a spool with the crank handle should be less prone to snapping compared to the Mk1 version (which is something I HAVE done on the Mk1)
Change log:
Handle assembly no longer uses the snap in ring, simplifying assembly.
Handle Shaft is now two parts. Requires a very small bit of support. End clip geometry adjusted slightly.
Handle adjusted to fit the new shaft design. Also includes contact points in the shaft to reduce friction, and noise. (the old one squeaked, and I hated it)
Shaft crank now uses a keyed design, instead of a screw. This should be much stronger, and will not have problems reverse spinning. This should friction fit into the crank shaft.
Crank shaft now keyed instead of tapped (screw). Key slots for gears shortened by 8mm. Hole punched in the end to allow a tool to be pressed against the crank handle shaft to aid in removal.
Gears are now 12mm wide, was 20mm.
Spool shaft has had some minor refinement. Key slots shortened by 8mm. 150mm and 190mm options.
Spool nut now chamfered, which affects it's length depending on the diameter. 50mm, 53mm, 56mm and 59mm diameters options available.
Spool wedge nut shortened by 25%. Improved the start of threading slightly.
Spool shaft endcap shaped change to allow better grip when screwing it in (don't overtighten).
Frame has had some reinforcement along the base. Include a riser along the centre tower to better fit a clamp.
Small Update: Added nuts and the end cap with more clearance in case they are too tight to thread properly. Found in High Tolerance Screw Parts. Updated STEP file.
Update2: Fixed threads on some spool nut models.
Update3: Added a v1.2 Shaft. 1.Better fitment for the threads. 2.Hollowed out to encourage more walls, which increases strength. 3.Improved geometry in the STEP.
Update4: Added HandleCrankv1.1 This updates the geometry and encouraging more walls around the most likely area to snap. This also includes three holes, hidden by the first layer, where 3mm x 50mm screws can be inserted. Screenshot added for illustration. Leave that first layer if you don't want to bother with screws, or punch them in with screws if you want the reinforcement.
Future thoughts:
I may add a revision of the crank shaft and an attachment that allows one to leverage a driver, drill or some other motor to spin the winder. However a 1:1 gear ratio is far too aggressive for that and would need significant down gearing. This is one of the considerations I had when I first started designing this, is that having two gears allows me to design a solution with different gear ratios.
I may go further with this design, but I have not decided what, how or when. I welcome any suggestions.
Cantilever Filament Spool Winder (MK2)
by Beta Gallagher · original on Printables ↗
Hobby & Makers / Tools
♥ 489⬇ 2.0k🖨 7 prints
Print profiles
HandleShaftAB.stl
⏱ time and weight estimated after preparation · 1 material(s)
Made to order: we prepare this file when you order, which adds a few minutes before printing starts.
Prints on: A1 mini 0.4PLA
Order this print
CrankShaft.stl
⏱ time and weight estimated after preparation · 1 material(s)
Made to order: we prepare this file when you order, which adds a few minutes before printing starts.
Prints on: A1 mini 0.4PLA
Order this print
Gears.stl
⏱ time and weight estimated after preparation · 1 material(s)
Made to order: we prepare this file when you order, which adds a few minutes before printing starts.
Prints on: A1 mini 0.4PLA
Order this print
HandleCrank.stl
⏱ time and weight estimated after preparation · 1 material(s)
Made to order: we prepare this file when you order, which adds a few minutes before printing starts.
Prints on: A1 mini 0.4PLA
Order this print
SpoolNut56mm.stl
⏱ time and weight estimated after preparation · 1 material(s)
Made to order: we prepare this file when you order, which adds a few minutes before printing starts.
Prints on: A1 mini 0.4PLA
Order this print
SpoolNut53mm.stl
⏱ time and weight estimated after preparation · 1 material(s)
Made to order: we prepare this file when you order, which adds a few minutes before printing starts.
Prints on: A1 mini 0.4PLA
Order this print
SpoolShaftEndCap.stl
⏱ time and weight estimated after preparation · 1 material(s)
Made to order: we prepare this file when you order, which adds a few minutes before printing starts.
Prints on: A1 mini 0.4PLA
Order this print
SpoolWedgeNut.stl
⏱ time and weight estimated after preparation · 1 material(s)
Made to order: we prepare this file when you order, which adds a few minutes before printing starts.
Prints on: A1 mini 0.4PLA
Order this print
SpoolNut50mm.stl
⏱ time and weight estimated after preparation · 1 material(s)
Made to order: we prepare this file when you order, which adds a few minutes before printing starts.
Prints on: A1 mini 0.4PLA
Order this print
SpoolShaft190mm.stl
⏱ time and weight estimated after preparation · 1 material(s)
Made to order: we prepare this file when you order, which adds a few minutes before printing starts.
Prints on: A1 mini 0.4PLA
Order this print
SpoolShaft150mm.stl
⏱ time and weight estimated after preparation · 1 material(s)
Made to order: we prepare this file when you order, which adds a few minutes before printing starts.
Prints on: A1 mini 0.4PLA
Order this print
Handle.stl
⏱ time and weight estimated after preparation · 1 material(s)
Made to order: we prepare this file when you order, which adds a few minutes before printing starts.
Prints on: A1 mini 0.4PLA
Order this print
Frame.stl
⏱ time and weight estimated after preparation · 1 material(s)
Made to order: we prepare this file when you order, which adds a few minutes before printing starts.
Prints on: A1 mini 0.4PLA
Order this print
Gear.stl
⏱ time and weight estimated after preparation · 1 material(s)
Made to order: we prepare this file when you order, which adds a few minutes before printing starts.
Prints on: A1 mini 0.4PLA
Order this print
EndCapHighTolerance.stl
⏱ time and weight estimated after preparation · 1 material(s)
Made to order: we prepare this file when you order, which adds a few minutes before printing starts.
Prints on: A1 mini 0.4PLA
Order this print
SpoolWedgeHighTolerane.stl
⏱ time and weight estimated after preparation · 1 material(s)
Made to order: we prepare this file when you order, which adds a few minutes before printing starts.
Prints on: A1 mini 0.4PLA
Order this print
SpoolNutBody50mmHighTolerance.stlDEFAULT
⏱ time and weight estimated after preparation · 1 material(s)
Made to order: we prepare this file when you order, which adds a few minutes before printing starts.
Prints on: A1 mini 0.4PLA
Order this print
SpoolNutBody56mmHighTolerance.stl
⏱ time and weight estimated after preparation · 1 material(s)
Made to order: we prepare this file when you order, which adds a few minutes before printing starts.
Prints on: A1 mini 0.4PLA
Order this print
SpoolNutBody53mmHighTolerance.stl
⏱ time and weight estimated after preparation · 1 material(s)
Made to order: we prepare this file when you order, which adds a few minutes before printing starts.
Prints on: A1 mini 0.4PLA
Order this print
SpoolNutBody59mmHighTolerance.stl
⏱ time and weight estimated after preparation · 1 material(s)
Made to order: we prepare this file when you order, which adds a few minutes before printing starts.
Prints on: A1 mini 0.4PLA
Order this print
SpoolNut59mm.stl
⏱ time and weight estimated after preparation · 1 material(s)
Made to order: we prepare this file when you order, which adds a few minutes before printing starts.
Prints on: A1 mini 0.4PLA
Order this print
SW-Shaft190v1.2.stl
⏱ time and weight estimated after preparation · 1 material(s)
Made to order: we prepare this file when you order, which adds a few minutes before printing starts.
Prints on: A1 mini 0.4PLA
Order this print
SW-Shaft150v1.2.stl
⏱ time and weight estimated after preparation · 1 material(s)
Made to order: we prepare this file when you order, which adds a few minutes before printing starts.
Prints on: A1 mini 0.4PLA
Order this print
HandleCrankv1.1.stl
⏱ time and weight estimated after preparation · 1 material(s)
Made to order: we prepare this file when you order, which adds a few minutes before printing starts.
Prints on: A1 mini 0.4PLA
Order this print