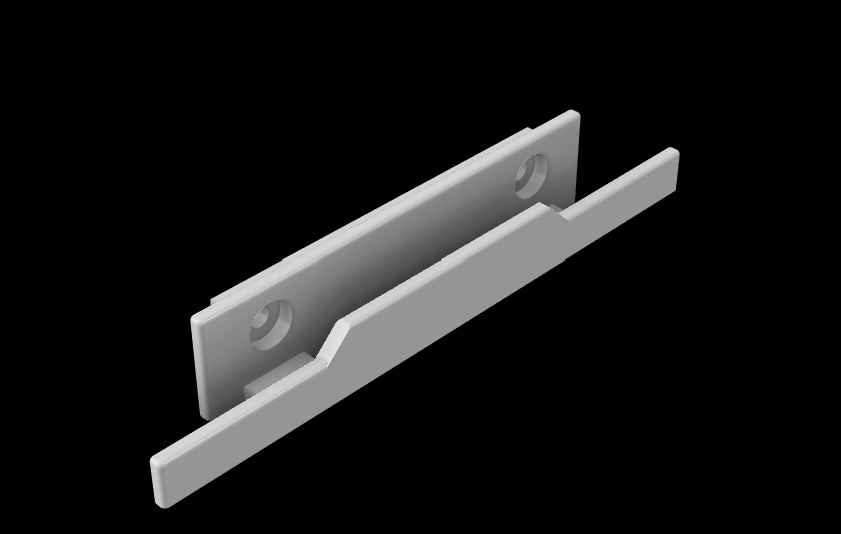
Introducing the Vinyl record wall mount, a vinyl record wall mount designed with a focus on functionality and aesthetics. Inspired by existing designs, it features hidden mounting to create a sleek, minimalistic look that brings your records slightly forward from the wall—a perfect blend of form and function. This versatile mount accommodates both single and double (triple) gatefold albums, ensuring a secure and non-warping hold. It is a durable and aesthetically pleasing solution to showcase and enjoy your vinyl collection.
----------------------------------------------------------------------------------------------------------------
Installation instructions (from llcoolkm)
Tested with 3.5 mm and 4 mm wood screws. The hole for the screw head is 9 mm in diameter and is 3 mm deep. The screw hole is 3 mm in diameter. Make sure the head goes in all the way so not to scratch or hinder the record.
The bigger piece with the lip is the top piece since this is where you push the record up to secure it and release it.
I used a cross laser to align the screw holes and to get everything level. The distance between the bottom and the top screw holes should be approximately 31 cm for a 12" record.
I would recommend to mount in this order:
- Mount the bottom part with a single screw
- Level the bottom part with a laser or spirit level and fasten the other screw
- Stand a record on the bottom part and lean it against the wall
- Hold the top part with your hand and align it so the top of the jacket is just on level with the broader part where the lip begins
- Remove the record and mark one of the screw holes in the wall
- Align the screw hole with the bottom part screw hole
- Mount the top part with one screw, level it with a laser or spirit level and fasten the other screw
- Enjoint
----------------------------------------------------------------------------------------------------------------
Alternative Installation (3M Tape):
Prepare the Surface:
- Clean and ensure that the wall surface is free of dust and debris.
Identify the Mounting Locations:
- Identify the locations where you initially planned to mount the screws for both the bottom and top parts.
Mounting the Bottom Part:
- Peel off a suitable length of 3M tape and apply it to the bottom part.
- Press the bottom part firmly onto the wall, ensuring it is level using a laser or spirit level.
Mounting the Top Part:
- Peel off a suitable length of 3M tape and apply it to the top part.
- Hold the top part in position, aligning it with the previously marked screw holes on the wall.
- Ensure the top part is level with the broader part where the lip begins.
- Press the top part firmly onto the wall.
Securing the Tape:
- Allow the 3M tape to set and bond securely to the wall. Follow the recommended setting time provided by the manufacturer.
Final Adjustments:
- Stand a record on the bottom part and lean it against the wall to ensure stability.
- Make any final adjustments to the alignment of the top part.
Enjoy:
- Once the 3M tape has fully set, your record mount should be secure and ready to use.
Note: Ensure that you choose a 3M tape that is appropriate for the weight and size of the record mount. Follow the manufacturer's guidelines for maximum weight capacity and application instructions. ( I used: 3M Double Sided Tape, Heavy Duty Waterproof Foam Tape)
----------------------------------------------------------------------------------------------------------------
My Print settings:
PLA
Printer: Ender 3 Pro
Layer Height: 0.2
Supports: No
Infill: 20%
Note: Print 2 for to secure the vinyl record
Vinyl Record Wall Mount
by Flying Bison · original on Printables ↗
Art & Design / Wall-mounted
♥ 66⬇ 822🖨 4 prints
Print profiles
vinyl_holder.objDEFAULT
⏱ time and weight estimated after preparation · 1 material(s)
Made to order: we prepare this file when you order, which adds a few minutes before printing starts.
Prints on: A1 mini 0.4PLA
Order this print