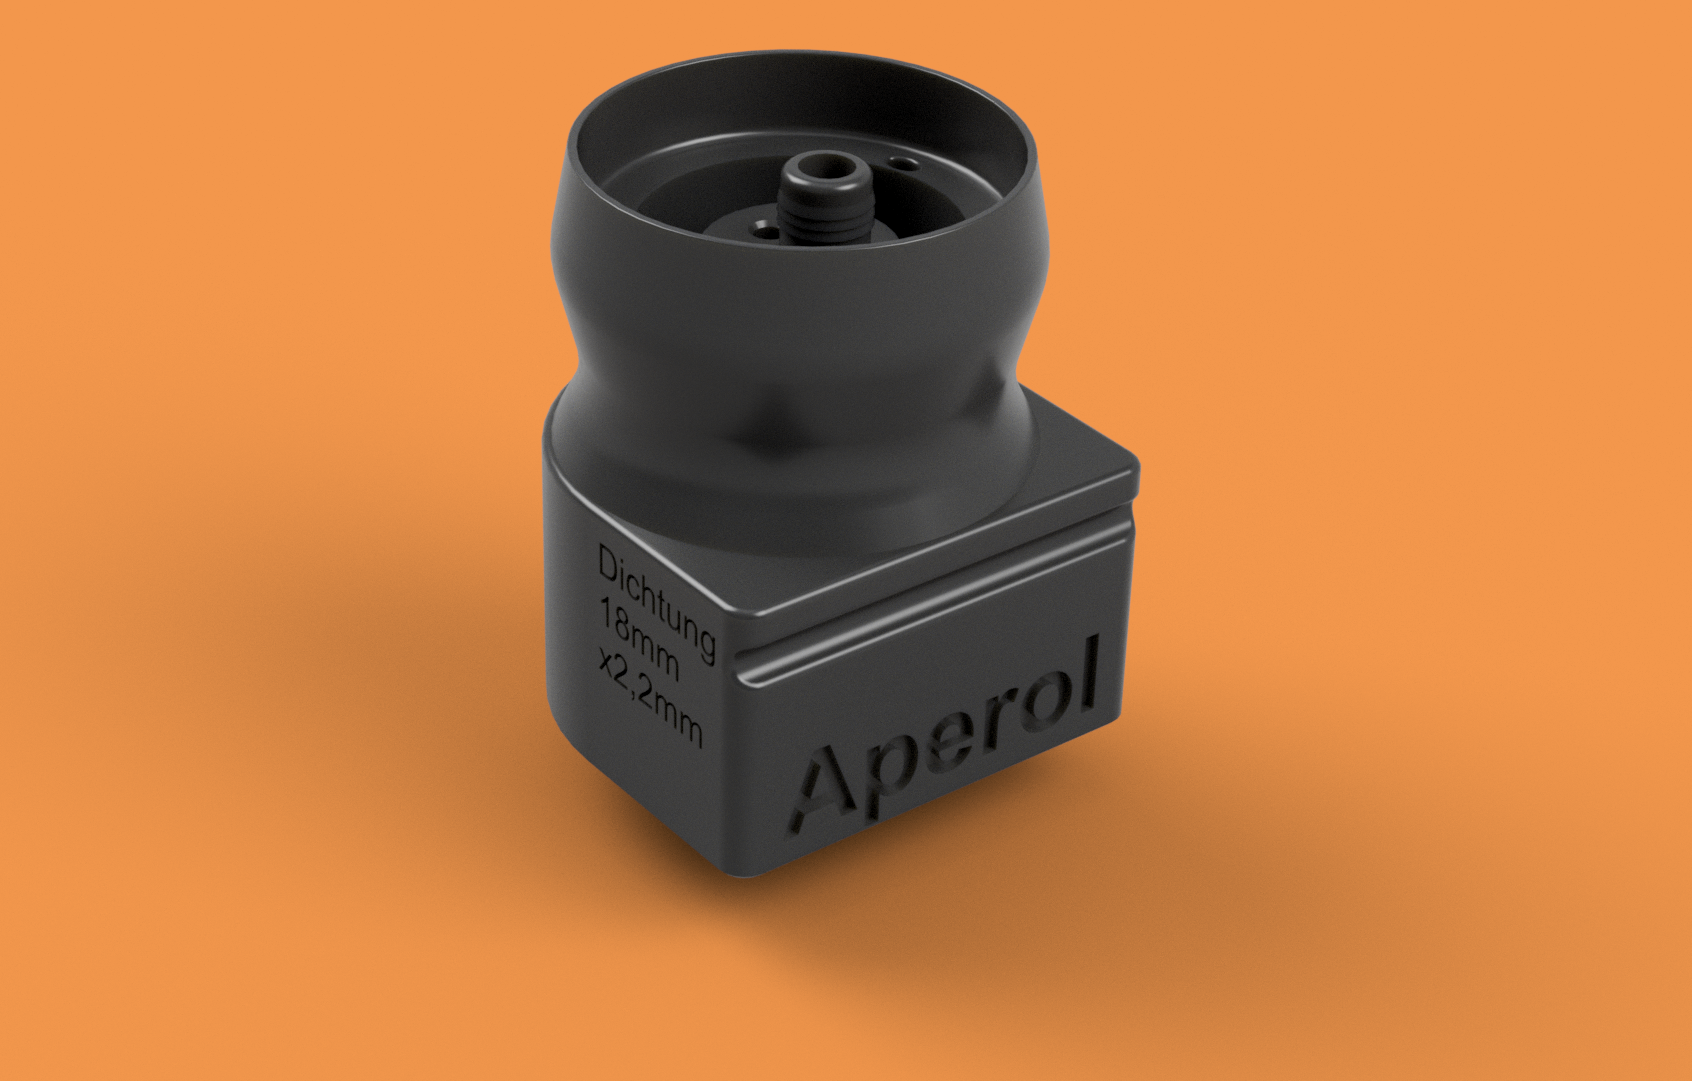
Print settings: (Updated 28.07.25)
- material: PETG
- Use 4x wall perimeters/layers
- Use 4x Top/bottom layers
- … but →
- Modify for ZERO bottom layers - print it open on the bottom!
- Fluid in the inside can flow out.
- Modify for ZERO bottom layers - print it open on the bottom!
- … but →
- Supports for ventile area - green →use print on supports for this area
(optional) “less brindging”Use vertial open infill structure like "Honycomb" with 10%
14.07.2024: STEP Dateien hinzugefügt :)!
Update 29.02.24: Grüße geht raus an alle heutigen Geburtstagskinder =)!
Danke an @Hanno_1419514 für den Denkanstoß zu der guten Verbesserung die Ventilblöcke einfach unten offen und komplett ohne Infill zu drucken!
→ (Prusa Slicer) Die Funktion um nur die Layer direkt am Boden nicht zu Drucken heist “Modifier” - Link Prusa Knowledge
_____________________________________________________________________
Update 23.09.2023:
- Habe eine Beschriftung mit Hinweis zu der benötigten Dichtung hinzugefügt.
Update 10.09.2023: Es gab nochmal eine Live Versuch beim Grillen am Freitag und leider hab ich wieder einiges gesehen das noch verbessert werden muss. Lösung zu folgenden Problemen …sind hier enthalten ;):
- Luftschlauch ist jetzt mit Wiederhacken Rippen gegen rausrutschen gesichert. Das ist echt wichtig sonst fließt hier im blödsten Falle alles komplett raus.
- Die Passungen der Dichtungen waren derart eng, dass die Dichtung abgeschwert wurden. Habe also ein wenig mehr Abstand spendiert.
Update 08.09.2023: “Finaler Stand vor baldigen Release von Aperolino MK/II”
- Der Stecker für den Schlauch zur Entlüftung habe ich verlängert (6mm statt 10mm) und leicht dicker (0,2mm) gemacht, damit der Schlauch sicherer hält.
- Entlüftungsbohrung über Mischrinne angeordnet um Tropfen aus Entlüftungsbohrung durch anfängliche Flüssigkeit bei Aufbau des Systems grundsätzlich zu verhindern.
In Ergänzung der genialen Idee des Aperolinos, meine nächste Weiterentwicklung und Optimierung des Ventilblocks für Aperol Flaschen - Innendurchmesser Flaschenhals 20,4mm.
Upgrades:
- (Dichtung) Doppeldichtung eingefügt - Die 2 Dichtungen sind im Versatz von 0.1mm angeordnet um den Toleranzbereich für eine Abdichtung zu erhöhen.
- (Dichtung) Passung der Aufnahmen für die Dichtungen wurde auf 2,2mm Durchmesser verringert
- (Tropfen) Es wurde eine Art “Vase” um das Ventil hinzufügt der als Sammelvolumen dient. Hierrin sind dann 2 Bohrungen durch den kompletten Ventilblock eingebracht um den Überlauf in die Rinne abfließen zu lassen.
- (Entlüftung) Die Passung des Kunststoffschlauchs wurde auf einen von Toom 8x1,5mm optimiert. Die Wanddicke des Anschlusses verringert um die Innendurchmesser zu vergrößern.
- (Mischverhältnis) Die Position des Schlauchanschlusses wurde von der Bohrung des Flüssigkeitsauslaufs auf einen Wert größer als die Wanddicke des Kunsstoffschlauchs verschoben, damit der Auslauf nicht verdeckt ist.
- (Stabilität) Wie auf dem Schnitt zu sehen wurden die Querschnitte des Verschraubung detaillierter angepasst damit eine Wackelfreie Aufnahme sicher ist!
Folgende Komponenten wurden von mir verwendet:
- Kunsstoffschlauch 8; 1,5mm https://toom.de/p/schlauch-transparent-8-mm/4206939 (1m reicht für alle 3 Ventile)
- Verwendete Dichtungen mit Durchmesser 18mm oder 20mm Dicke 2,4mm aus dem Amazon Link von Original Aperolino.
- Getestet wurde die Passung für die Aperolfalschen 0,7l und 1,0l.
Viel Spass allen beim Nachdrucken und für alle Hinweise.
Danke für alle Hinweise.
________EN___________
In addition to the ingenious idea of Aperolinos, my next optimization of the valve block for Aperol bottles - inner diameter of bottle neck 20.4mm.
Upgrades:
- (Sealing) Double seal inserted - The two seals are offset by 0.1mm to increase the tolerance range for sealing.
- (Sealing) Fit of receptacles for seals reduced to 2.2mm diameter.
- (Drip) A "vase" shape has been added around the valve, serving as a collection volume. Two holes are drilled through the entire valve block to allow overflow to flow into the channel.
- (Ventilation) The fit of the plastic tube has been optimized to Toom's 8x1.5mm. The thickness of the connection has been reduced to increase the inner diameter. Ripps added to fix the tube.
- (Mixing Ratio) The position of the hose connection has been moved from the liquid outlet bore to a value greater than the thickness of the plastic tube, so the outlet is not obstructed.
- (Stability) As seen in the cut, the profiles of the screw connections have been adjusted in more detail to ensure a stable fit!
The following components were used by me:
- Plastic tube 8; 1.5mm: Link (1m is sufficient for all 3 valves)
- Used seals with diameter 18mm or 20mm, thickness 2.4mm, from the Amazon link of the original Aperolino. Fit was tested for Aperol bottles 0.7l and 1.0l.
Enjoy printing everyone and thank you for all the advice.
Aperolino MK2 // Ventilblock "Aperol" mit Leckage-Ablauf & Doppeldichtung
by pr3mium.cola · original on Printables ↗
Toys & Games / Other Toys & Games
♥ 97⬇ 3.3k🖨 13 prints
Print profiles
Ventilblock_Aperol_Remix v8.stl
⏱ time and weight estimated after preparation · 1 material(s)
Made to order: we prepare this file when you order, which adds a few minutes before printing starts.
Prints on: A1 mini 0.4PLA
Order this print
Ventilblock_Aperol_Remix v18.stl
⏱ time and weight estimated after preparation · 1 material(s)
Made to order: we prepare this file when you order, which adds a few minutes before printing starts.
Prints on: A1 mini 0.4PLA
Order this print
Ventilblock_Aperol_Remix v24.stl
⏱ time and weight estimated after preparation · 1 material(s)
Made to order: we prepare this file when you order, which adds a few minutes before printing starts.
Prints on: A1 mini 0.4PLA
Order this print
Ventilblock_Aperol_Remix v27.stl
⏱ time and weight estimated after preparation · 1 material(s)
Made to order: we prepare this file when you order, which adds a few minutes before printing starts.
Prints on: A1 mini 0.4PLA
Order this print
Ventilblock_Aperol_Remix v29.stl
⏱ time and weight estimated after preparation · 1 material(s)
Made to order: we prepare this file when you order, which adds a few minutes before printing starts.
Prints on: A1 mini 0.4PLA
Order this print
Ventilblock_Aperol_Remix v29.3mf
⏱ time and weight estimated after preparation · 1 material(s)
Made to order: we prepare this file when you order, which adds a few minutes before printing starts.
Prints on: A1 mini 0.4PLA
Order this print
Ventilblock_Aperol v38.3mfDEFAULT
⏱ time and weight estimated after preparation · 1 material(s)
Made to order: we prepare this file when you order, which adds a few minutes before printing starts.
Prints on: A1 mini 0.4PLA
Order this print
Ventilblock_Aperol v38.stl
⏱ time and weight estimated after preparation · 1 material(s)
Made to order: we prepare this file when you order, which adds a few minutes before printing starts.
Prints on: A1 mini 0.4PLA
Order this print
Ventilblock_Aperol v38.3mf
⏱ time and weight estimated after preparation · 1 material(s)
Made to order: we prepare this file when you order, which adds a few minutes before printing starts.
Prints on: A1 mini 0.4PLA
Order this print