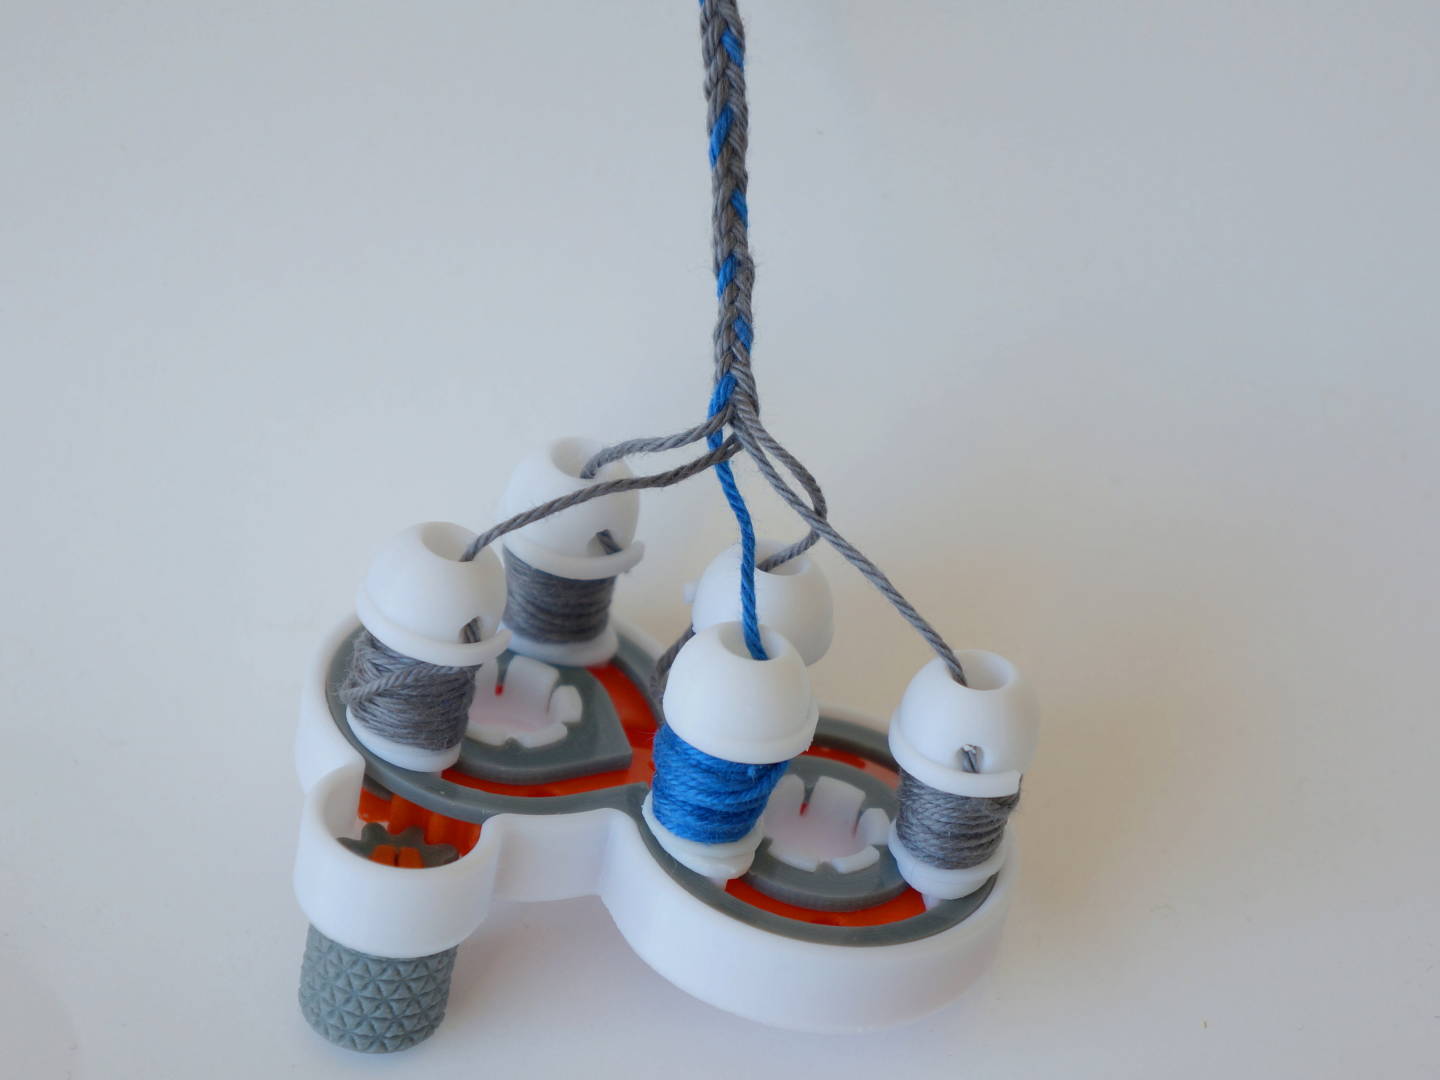
Video
Video with thread
Squarebraider Video
| This is an advanced print with complex mechanics - if you are not experienced with printing and engineering, please start with the 2 gear (flat braider) version! |
- Bobbin pins are 4mm so you can replace them with a M4 bolt if you want.
Assembly in 5min
- Use a little grease on all moving (sliding, clip in, rotating) surfaces.
- Print the main Gear 2×
- You need to print the bobbin pins 3× (incl. lens guide, spool and cap
- Press one gear onto the arbor.
- Align the second gear so the bobbin notches match together and press in.
- Clip the center diverters onto both arbors facing to each other.
- Add the small input gear
- either add the motor Mount into the center and add the half hole input gear.
- or the gear with square hole for manual drive with the grip or ¼" hex shaft
- press in the flat pin
- insert in the hole to intersect with the big gear
- hold and press the grip or the hex shaft from below onto Insert the bobbin pins via the gear port into the first gear.
- or the gear with square hole for manual drive with the grip or ¼" hex shaft
- either add the motor Mount into the center and add the half hole input gear.
- Distribute the bobbins, while each of the 5 positions or notches can only take one spool, so if notch №1 is filled on gear A it must be empty on gear B as spools switch gears not positions (as they do for the square braider with more gears) :
- Two on one gear - one on the other for 3 spools.
- Alternating 3 on one - 2 on the other for 5 spools.
- Put the diverter ring (figure 8 shape) onto the gears.
- Slide the lens shaped guides in the groove onto the pins while none is in the crossing.
- Load the spools with ~60cm (2ft) (1m 3ft v2.5) crochet thread, satin floss or similar each.
- Slide the loaded spools onto the pins.
- Thread the end through the side of the caps so exit is the center and clip onto the pins.
- Check smooth running
- hold the thread ends together make a knot and hang on a door or window handle and pull out 10cm and braid away. The braiding point should be 10cm above the spool caps to minimize the different angles and lateral forces.
Braiding machine
by Jack · original on Printables ↗
Hobby & Makers / Tools
♥ 771⬇ 2.5k🖨 9 prints
Print profiles
DEMO-23-038-BraidingMachine.3mf
⏱ time and weight estimated after preparation · 1 material(s)
Made to order: we prepare this file when you order, which adds a few minutes before printing starts.
Prints on: A1 mini 0.4PLA
Order this print
DEMO-23-038-BraidingMachineCase.3mf
⏱ time and weight estimated after preparation · 1 material(s)
Made to order: we prepare this file when you order, which adds a few minutes before printing starts.
Prints on: A1 mini 0.4PLA
Order this print
DEMO-23-038-BraidingMachineHexConnector.3mf
⏱ time and weight estimated after preparation · 1 material(s)
Made to order: we prepare this file when you order, which adds a few minutes before printing starts.
Prints on: A1 mini 0.4PLA
Order this print
23-038-BraidingMachine5Spool.3mfDEFAULT
⏱ time and weight estimated after preparation · 1 material(s)
Made to order: we prepare this file when you order, which adds a few minutes before printing starts.
Prints on: A1 mini 0.4PLA
Order this print
23-038-BraidingMachineSpool-v2.6.3mf
⏱ time and weight estimated after preparation · 1 material(s)
Made to order: we prepare this file when you order, which adds a few minutes before printing starts.
Prints on: A1 mini 0.4PLA
Order this print
23-038-BraidingMachineHexConnector.3mf
⏱ time and weight estimated after preparation · 1 material(s)
Made to order: we prepare this file when you order, which adds a few minutes before printing starts.
Prints on: A1 mini 0.4PLA
Order this print
23-038-BraidingMachineQuad.3mf
⏱ time and weight estimated after preparation · 1 material(s)
Made to order: we prepare this file when you order, which adds a few minutes before printing starts.
Prints on: A1 mini 0.4PLA
Order this print
23-038-BraidingMachineSpool-v2.8.3mf
⏱ time and weight estimated after preparation · 1 material(s)
Made to order: we prepare this file when you order, which adds a few minutes before printing starts.
Prints on: A1 mini 0.4PLA
Order this print
23-038-BraidingMachineHexConnector5mm.3mf
⏱ time and weight estimated after preparation · 1 material(s)
Made to order: we prepare this file when you order, which adds a few minutes before printing starts.
Prints on: A1 mini 0.4PLA
Order this print
23-038-BraidingMachinePIN-v2.9.3mf
⏱ time and weight estimated after preparation · 1 material(s)
Made to order: we prepare this file when you order, which adds a few minutes before printing starts.
Prints on: A1 mini 0.4PLA
Order this print
23-038-BraidingMachinePIN-v2.9.3mf
⏱ time and weight estimated after preparation · 1 material(s)
Made to order: we prepare this file when you order, which adds a few minutes before printing starts.
Prints on: A1 mini 0.4PLA
Order this print
23-038-BraidingMachine8GearExperimental.3mf
⏱ time and weight estimated after preparation · 1 material(s)
Made to order: we prepare this file when you order, which adds a few minutes before printing starts.
Prints on: A1 mini 0.4PLA
Order this print
23-038-BraidingMachineV3PinShort.3mf
⏱ time and weight estimated after preparation · 1 material(s)
Made to order: we prepare this file when you order, which adds a few minutes before printing starts.
Prints on: A1 mini 0.4PLA
Order this print
23-038-BraidingMachineV3LongSpool.3mf
⏱ time and weight estimated after preparation · 1 material(s)
Made to order: we prepare this file when you order, which adds a few minutes before printing starts.
Prints on: A1 mini 0.4PLA
Order this print
23-038-BraidingMachineV3QuadGearlowClearance.3mf
⏱ time and weight estimated after preparation · 1 material(s)
Made to order: we prepare this file when you order, which adds a few minutes before printing starts.
Prints on: A1 mini 0.4PLA
Order this print