Updates!
- Reorganized parts listing for clarity
About
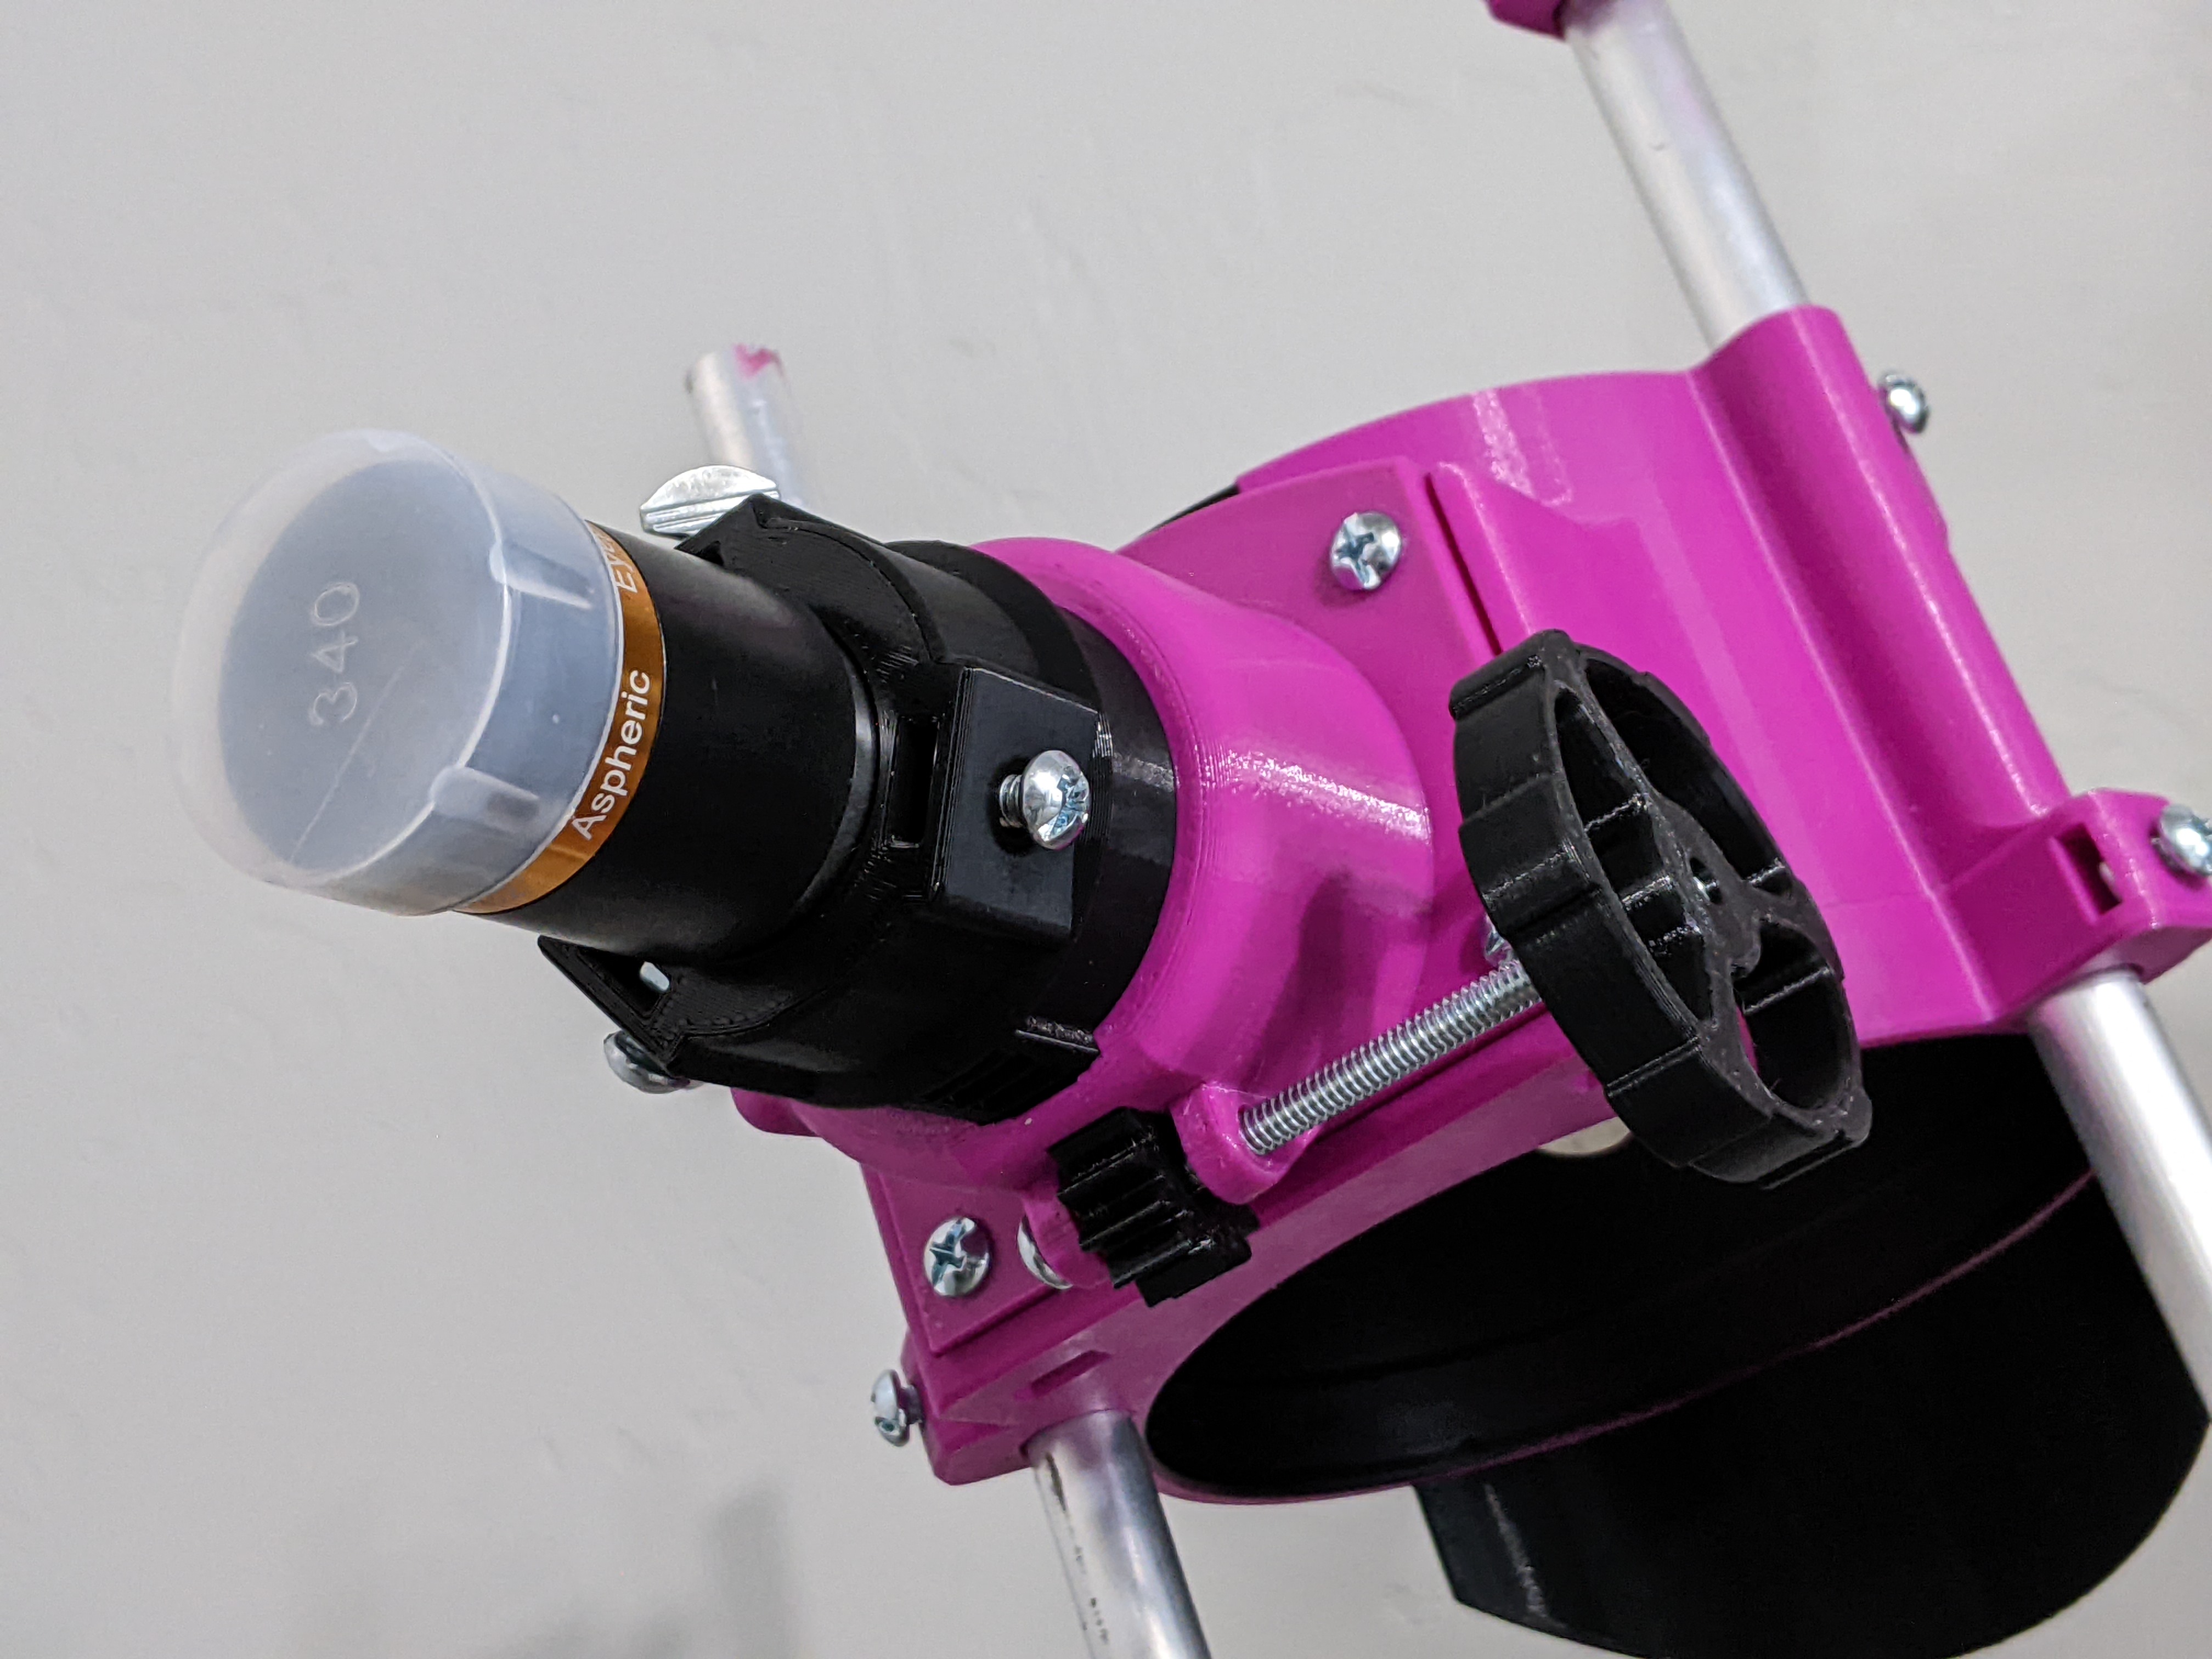
After spending some time trying to use a telescope camera with the wonderful Hadley telescope by Maff, I decided I needed a focuser that didn't rotate. Rather than wait, I decided I'd draft one up myself and share it, too. I mimicked the design language of Maff's Helical Focuser, ensured it's compatible without modifications to the Hadley telescope, and designed it around similar hardware. If you've already built the telescope, you can build this, too.
Despite being quite different from the Helical Focuser, I've listed it as a remix because of the direct inspiration and obvious similarities.
Notes
Fits a 1.25" eyepiece. It only takes ¾ of a full turn of the knob to move the focuser fully in/out.
Because of the print orientation and the fact I'm letting the parts interface with each other, the inner focuser will catch on the outer due to the layer lines. Straight off the printer, motion will be rough, but with some sanding it can be rather smooth. There are two different sets of parts to tackle this: Loose Fit and Tight Fit.
You can now choose an adjustment wheel size that works best for you. See Adjustment Knob Sizes.
If you load enough weight onto it, you can make the inner cylinder bind, inhibiting movement unless you support it with something else. This happens with my mirrorless camera (~500g) and other users have also reported this. Both versions are affected, but the tight fit may handle more force before binding.
Printing
To build this, you only need to print one of each part. They should already be in the correct print orientation and do not need supports. You can use 15% infill (with the exception of the pinion, which should be 100%) and a layer height of 0.20mm or finer. I used a 0.4mm nozzle.
Loose Fit: Print files in Base and Loose Fit folders. This is the loosest and easiest to build version. It uses lock nuts to attach the knob and pinion to the axle and features a forgiving gap between the inner and outer pieces. It can handle lighter attachments, like eyepieces, and only requires a little sanding. Pause the knob and pinion at the same time on the same print before the hexagonal hole is closed and insert a lock nut into both. It's sized to fit a nut no taller than ~6.2mm.
Tight Fit: Print files in Base and Tight Fit folders. This is the tightest and slightly more complex version, although still quite accessible. It uses setscrews to attach the knob and pinion to the axle. This version requires a fair bit of sanding, but once sized correctly is the smoothest and most reliable, handling a little more force. However, this version results in much more resistance and essentially requires using a setscrew to attach everything together. There are no special printing instructions, but it'll probably be an interference fit before sanding.
For either version, you can also change the orientation of the focuser by mirroring the outer part when slicing. I'd recommend the current orientation for better clearance around the knob once installed.
Hardware
| Loose Fit | Tight Fit |
| 1x #10-24 x 3" machine screw | 1x 3/16" x 3" metal rod |
| 2x #10-24 lock nuts | 2x M4 x 5mm setscrews |
| 2x #10-24 x ½" machine screws | |
| 2x #10-24 x ½" thumbscrew machine screw | |
| 4x #10-24 nuts |
Nearly all fasteners are the same as what's used in building the telescope, save the 3" machine screw. If you've already built the telescope, then you'll probably have most of these already.
Building
Do some post processing on the inner and outer focuser parts, making sure they can freely move. Focus your sanding on the interface between the outer and inner parts. You should also make sure your 3" screw/axle can spin freely in the holes in the bottom of the outer focuser. After this, set the inner focuser aside until the last steps.
Decide where you want the knob to be. I'd recommend keeping it opposite the thumbscrew used for locking the focuser.
Loose Fit: With the 3" screw removed, hold the pinion in position and begin to thread the screw through from opposite where you want the knob to be. This is the most tedious part, as you need to turn it until the head of the screw just meets the outer focuser (as shown in the assembled picture).
Tight Fit: Cut your 3/16" metal rod to size and file two notches (~1mm deep) where the pinion and knob will attach. With the axle removed, hold the pinion in position and slide the axle through, positioning it so the knob is placed where you'd like. Make sure the hole for the setscrew is accessible, and then insert it to lock the pinion and axle in place.
Attach the knob to the free end in the appropriate fashion and test it. The entire pinion assembly should move as one unit.
Add the screws and nuts to the inner focuser to hold your eyepiece in place (same as the helical focuser). Add the thumbscrew and nut to the outer focuser meant to lock the inner in place.
Slide the two parts together, then see how it moves and adjust anything or sand some more (be wary of removing too much material) if needed. If you find your setscrews sit proud and inhibits movement, you should be able to align the rack and pinion to avoid this by having the setscrew face the opening nearest the secondary mirror when you insert the inner.
That's it! Feedback is welcome!
Adjustment Knob Sizes
I've added more sizes for the adjustment wheel, in case you've got extra add-ons or restraints on the size. They range from 50mm (the default) to 30mm. I would always recommend picking the largest size it can support as it should make fine adjustments easier. Download these from the archive in Other files.
With the 30mm size, you could even use an axle shorter than 3", as it clears the focuser's attachment plate.
STEP Files
I have uploaded STEP files for remixing! While all the base and alternative parts are there, I did not include every size of adjustment knob.
Simple Rack and Pinion Focuser for Hadley Telescope
by Six · original on Printables ↗
Learning / Physics & Astronomy
♥ 94⬇ 612🖨 12 prints
Print profiles
RP_Focuser_Nylock_Pinion.3mf
⏱ time and weight estimated after preparation · 1 material(s)
Made to order: we prepare this file when you order, which adds a few minutes before printing starts.
Prints on: A1 mini 0.4PLA
Order this print
RP_Focuser_Nylock_Knob.3mf
⏱ time and weight estimated after preparation · 1 material(s)
Made to order: we prepare this file when you order, which adds a few minutes before printing starts.
Prints on: A1 mini 0.4PLA
Order this print
RP_Focuser_Outer.3mfDEFAULT
⏱ time and weight estimated after preparation · 1 material(s)
Made to order: we prepare this file when you order, which adds a few minutes before printing starts.
Prints on: A1 mini 0.4PLA
Order this print
Test_RP_Focuser_Inner.3mf
⏱ time and weight estimated after preparation · 1 material(s)
Made to order: we prepare this file when you order, which adds a few minutes before printing starts.
Prints on: A1 mini 0.4PLA
Order this print
Test_RP_Focuser_Outer.3mf
⏱ time and weight estimated after preparation · 1 material(s)
Made to order: we prepare this file when you order, which adds a few minutes before printing starts.
Prints on: A1 mini 0.4PLA
Order this print
RP_Focuser_Loose_Inner.3mf
⏱ time and weight estimated after preparation · 1 material(s)
Made to order: we prepare this file when you order, which adds a few minutes before printing starts.
Prints on: A1 mini 0.4PLA
Order this print
RP_Focuser_Set_Screw_Pinion.3mf
⏱ time and weight estimated after preparation · 1 material(s)
Made to order: we prepare this file when you order, which adds a few minutes before printing starts.
Prints on: A1 mini 0.4PLA
Order this print
RP_Focuser_Set_Screw_Knob.3mf
⏱ time and weight estimated after preparation · 1 material(s)
Made to order: we prepare this file when you order, which adds a few minutes before printing starts.
Prints on: A1 mini 0.4PLA
Order this print
RP_Focuser_Tight_Inner.3mf
⏱ time and weight estimated after preparation · 1 material(s)
Made to order: we prepare this file when you order, which adds a few minutes before printing starts.
Prints on: A1 mini 0.4PLA
Order this print