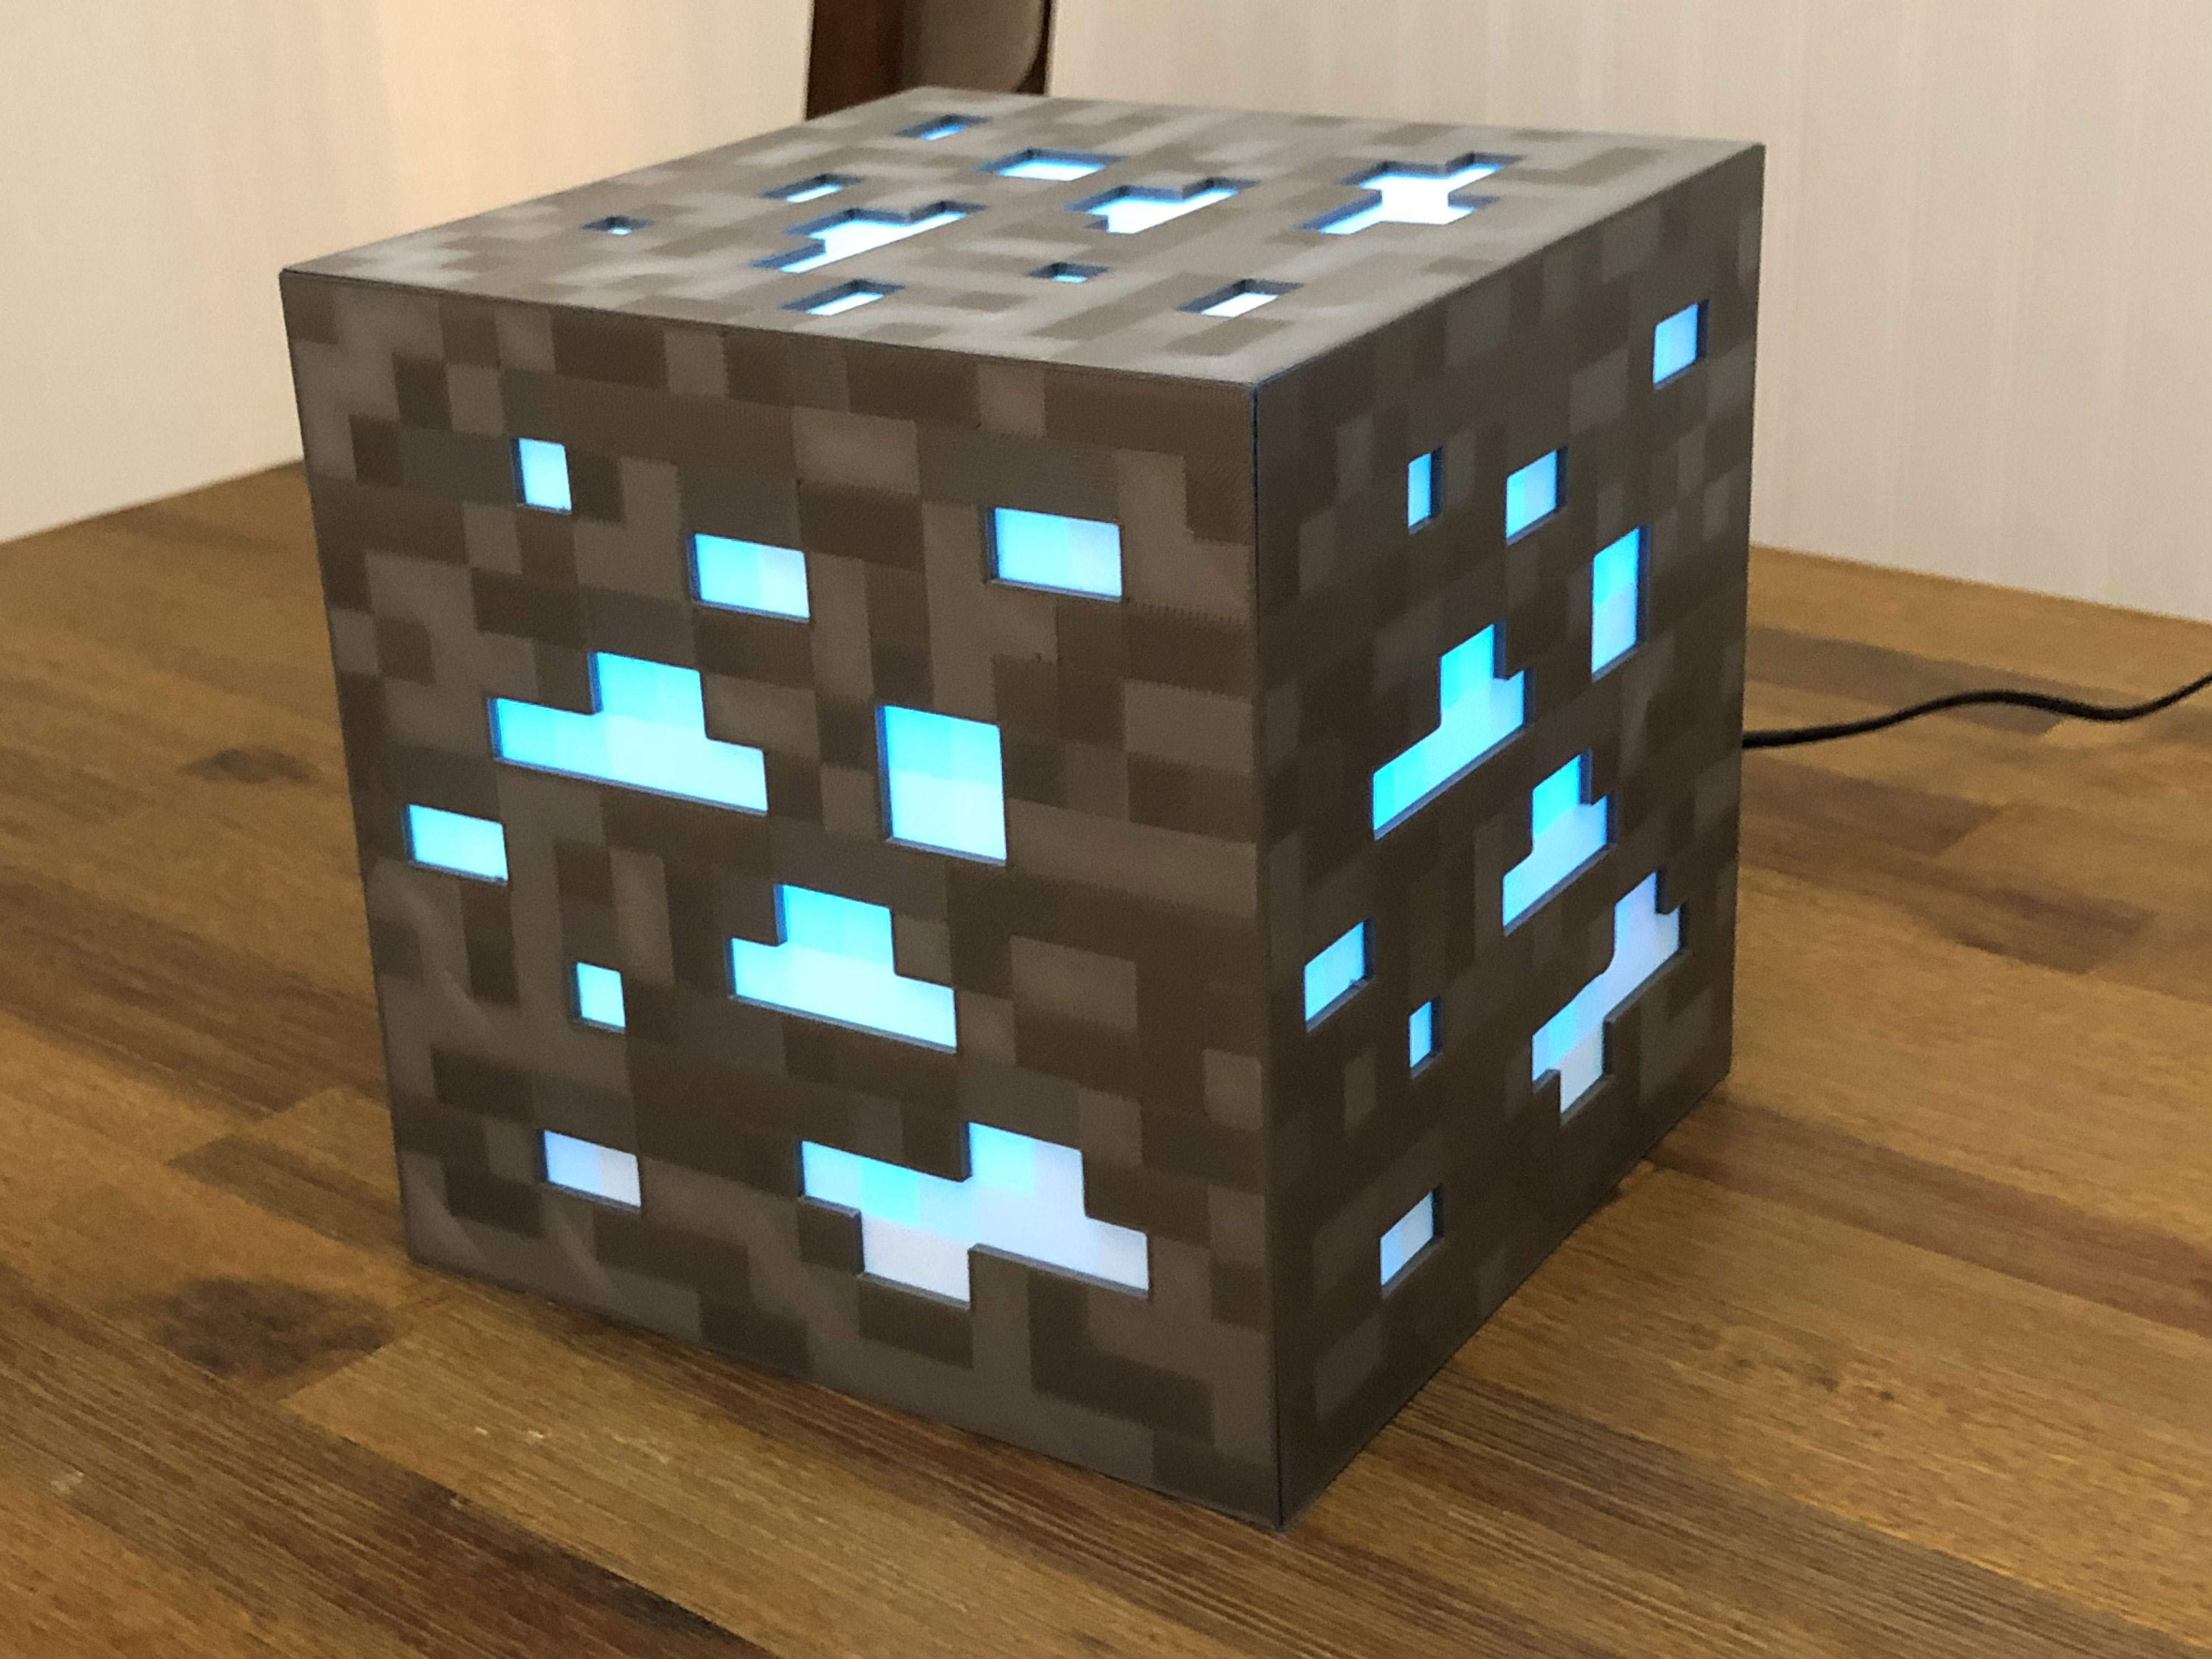
I've seen other Minecraft diamond ore lamps in various places by they all seem to lack the definitive pixelation that Minecraft embraces.
By leveraging techniques used from 3D printed lithographs and some of the features of the latest PrusaSlicer, I was able to give mine all the glorious blockiness it needs.
Best of all, it is super easy to print! This lamp assembles from 6 sides all printed flat on the printer's bed, which then discreetly snap together to form this cube.
The lamp can be controlled via Siri via Homebridge.
Via the Home app on my iOS devices, I can easily control the color, brightness and on/off state at will with the familiar interface that I use with other devices.
Or, I can use the Siri commands:
"Hey Siri, turn the Diamond lamp on."
"Hey Siri, set the brightness of the Diamond lamp to 100%"
"Hey Siri, set the color of the Diamond lamp to [insert any color you like here!]" or
"Hey Siri, set the color of the Diamond lamp to Aqua" to get back to the desired Diamond Ore look.
Here's a video: https://youtu.be/6jC8ryEkgvQ
This is powered by a Raspberry Pi Zero and a Unicorn pHAT which offers an excellent about of lighting for this project and with a high level of flexibility.
I've even added a couple of bonus "colors" which are more like effect modes:
"Hey Siri, set the color of the Diamond lamp to Candlelight" will simulate a flickering candle inside the lamp.
"Hey Siri, set the color of the Diamond lamp to Ocean Boat Blue" will create a slowly undulating blue wave effect, and
"Hey Siri, set the color of the Diamond lamp to Razzmatazz" will create a cycling rainbow effect.
Non-affiliate links for the Pi and LED array:
https://www.adafruit.com/product/3400
https://shop.pimoroni.com/products/unicorn-phat
I've published the software I wrote to control the lamp and instructions for installing it here: https://github.com/mkoistinen/unicorn-homebridge-integration
This print measures 150mm on each edge.
Print instructions
If you print from the provided .3mf files, it should just work. =)
In general, you'll need to print the following:
4x - 150mm Face (in gray) 4 x 5h14m
1x - 150mm Back Face (in gray) - 1 x 5h14m
1x - 150mm Base (in gray) - 1 x 5h28m
5x - 150mm Aperture (in white filament) - 5 x 2h6m
Estimated print time: ~42h, however, each of the prints is easy. There are no supports and everything is flat against the print bed.
The Base will provide four mounting pins for the RPi and the Back Face has a small hole near the bottom for the power cord.
Once printing is complete, the 5 apertures should just slide into some tiny brackets on the "inside" of each face. Once these are all in, each face snaps together with the next. Attach your RPi to the pins in the base (you may need to clean up the ends a little). Next, snap the base onto the remaining faces and you're done! It's a snug, semi-permanent fit when printed on my reasonably well-tuned Original Prusa i3 MK3S.
Note that the set of STL files also includes some "modifier" objects. These are referenced by the PrusaSlicer files (.3mf) to modify the print direction so that the flat faces have apparent "pixels" due to differing light effects.
I printed 3 of these, the first (shown above) in the silver filament that came with the printer from Prusa and the other 2 with Prusament Galaxy Silver in both cases, the results are gorgeous and the "pixel" effect is prominent in both.
The photos don't do it justice.
"8-Bit" Minecraft Diamond Ore Lamp - Siri Enabled!
by mkoistinen · original on Printables ↗
Household / Home Decor
♥ 932⬇ 2.1k🖨 36 prints
Print profiles
150mm-light-face-modifier.stl
⏱ time and weight estimated after preparation · 1 material(s)
Made to order: we prepare this file when you order, which adds a few minutes before printing starts.
Prints on: A1 mini 0.4PLA
Order this print
150mm-aperture.3mfDEFAULT
⏱ time and weight estimated after preparation · 1 material(s)
Made to order: we prepare this file when you order, which adds a few minutes before printing starts.
Prints on: A1 mini 0.4PLA
Order this print
150mm-face.3mf
⏱ time and weight estimated after preparation · 1 material(s)
Made to order: we prepare this file when you order, which adds a few minutes before printing starts.
Prints on: A1 mini 0.4PLA
Order this print
150mm-back-face.3mf
⏱ time and weight estimated after preparation · 1 material(s)
Made to order: we prepare this file when you order, which adds a few minutes before printing starts.
Prints on: A1 mini 0.4PLA
Order this print
150mm-base.3mf
⏱ time and weight estimated after preparation · 1 material(s)
Made to order: we prepare this file when you order, which adds a few minutes before printing starts.
Prints on: A1 mini 0.4PLA
Order this print
150mm-dark-face-modifier.stl
⏱ time and weight estimated after preparation · 1 material(s)
Made to order: we prepare this file when you order, which adds a few minutes before printing starts.
Prints on: A1 mini 0.4PLA
Order this print
150mm-medium-face-modifier.stl
⏱ time and weight estimated after preparation · 1 material(s)
Made to order: we prepare this file when you order, which adds a few minutes before printing starts.
Prints on: A1 mini 0.4PLA
Order this print
150mm-aperture.stl
⏱ time and weight estimated after preparation · 1 material(s)
Made to order: we prepare this file when you order, which adds a few minutes before printing starts.
Prints on: A1 mini 0.4PLA
Order this print
150mm-back-face.stl
⏱ time and weight estimated after preparation · 1 material(s)
Made to order: we prepare this file when you order, which adds a few minutes before printing starts.
Prints on: A1 mini 0.4PLA
Order this print
150mm-face.stl
⏱ time and weight estimated after preparation · 1 material(s)
Made to order: we prepare this file when you order, which adds a few minutes before printing starts.
Prints on: A1 mini 0.4PLA
Order this print
150mm-base.stl
⏱ time and weight estimated after preparation · 1 material(s)
Made to order: we prepare this file when you order, which adds a few minutes before printing starts.
Prints on: A1 mini 0.4PLA
Order this print